Theme Configurations
Last updated: November 13, 2026
Use Configure → Theme to manage your institution’s logos, colors, and onboarding gradient. Preview the member experience before saving, test it in staging, and publish approved changes to production.
Open Theme Settings
In the dashboard, select Configure, then Theme under General. The page contains Institution Branding, Colors, Onboarding Gradient, and a mobile preview.
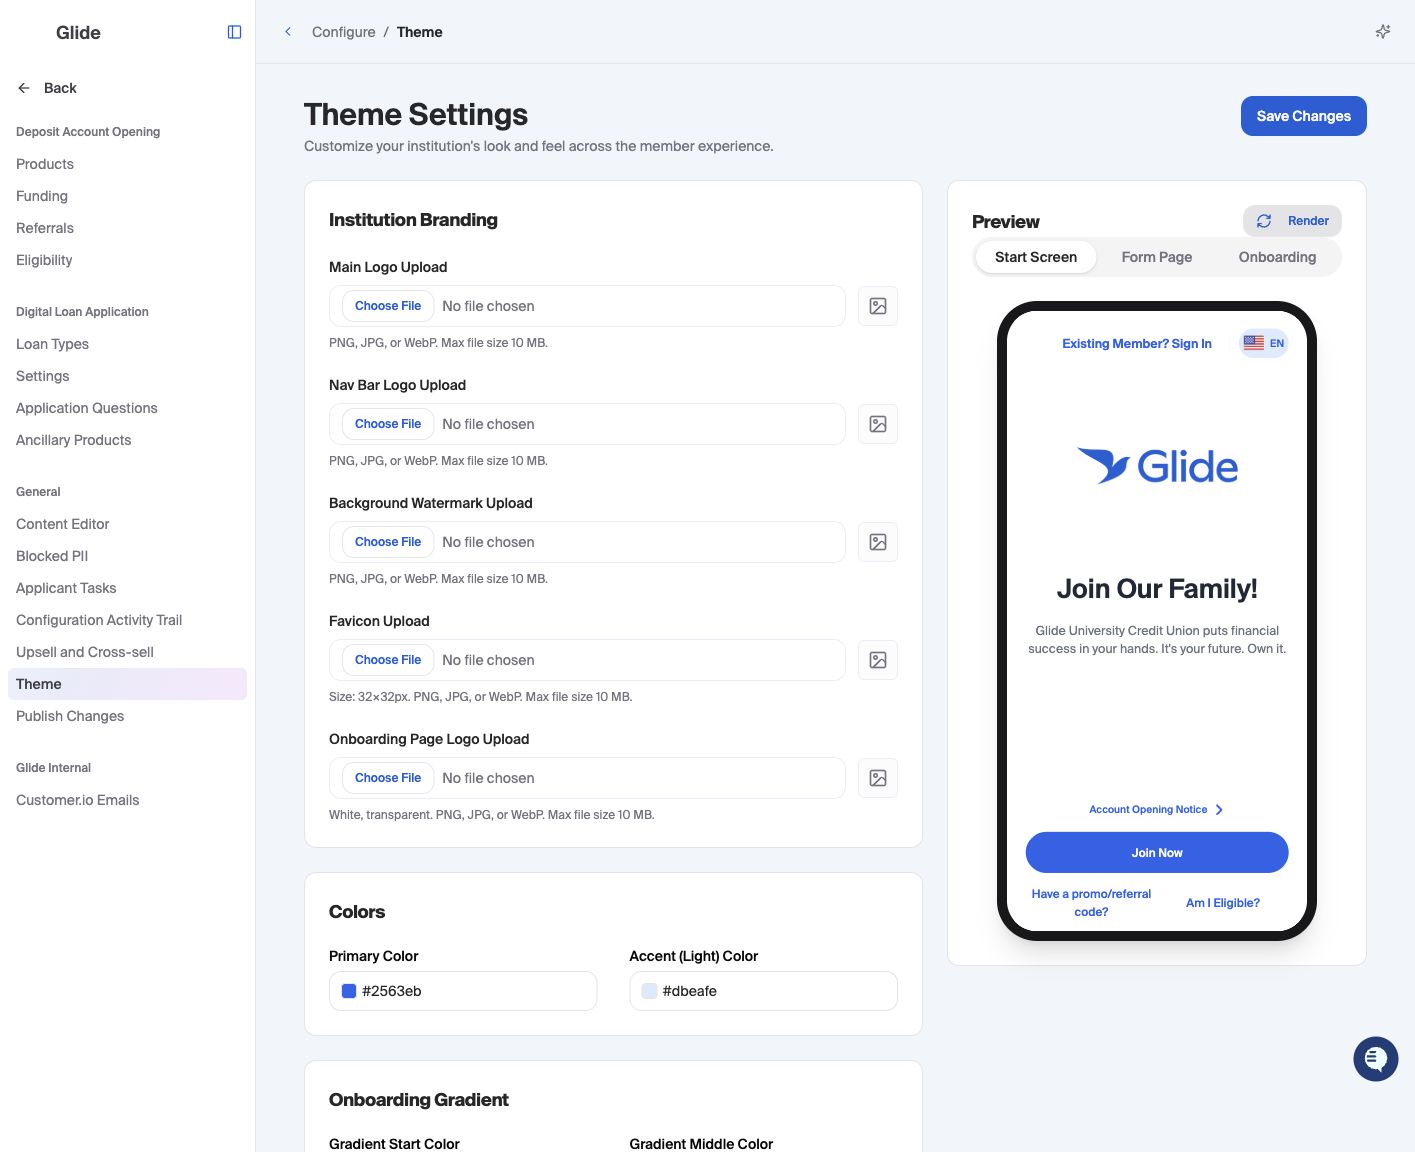
Upload branding images
Select Choose File beside the image you want to replace.
Setting | Purpose |
|---|---|
Main Logo Upload | Main logo on the start screen. |
Nav Bar Logo Upload | Logo in the navigation area of the digital flow. |
Background Watermark Upload | Background branding image. |
Favicon Upload | Small icon shown in the browser tab. Use a 32 × 32 px image. |
Onboarding Page Logo Upload | Logo on the onboarding page. Use a white logo with a transparent background. |
Supported formats are PNG, JPG, and WebP, with a maximum file size of 10 MB per image. Keep a copy of the existing asset before replacing it so you can restore it if needed.
After uploading, review the preview and select Save Changes. Uploading a file alone does not complete the save.
Set colors and the onboarding gradient
Enter your brand’s hex color values, including the leading # (for example, #2563eb).
Primary Color: the main interface color, including prominent buttons and links.
Accent (Light) Color: the lighter supporting color.
Gradient Start Color, Gradient Middle Color, and Gradient End Color: the three colors used in the onboarding gradient.
Choose colors that keep text and controls readable against their backgrounds.
Preview the member experience
Use the tabs in the Preview panel:
Start Screen: review the landing-page logo, buttons, and links.
Form Page: review branding on an application form.
Onboarding: review the onboarding logo and gradient.
Select Render to refresh the preview after making edits. Previewing does not save or publish your changes.
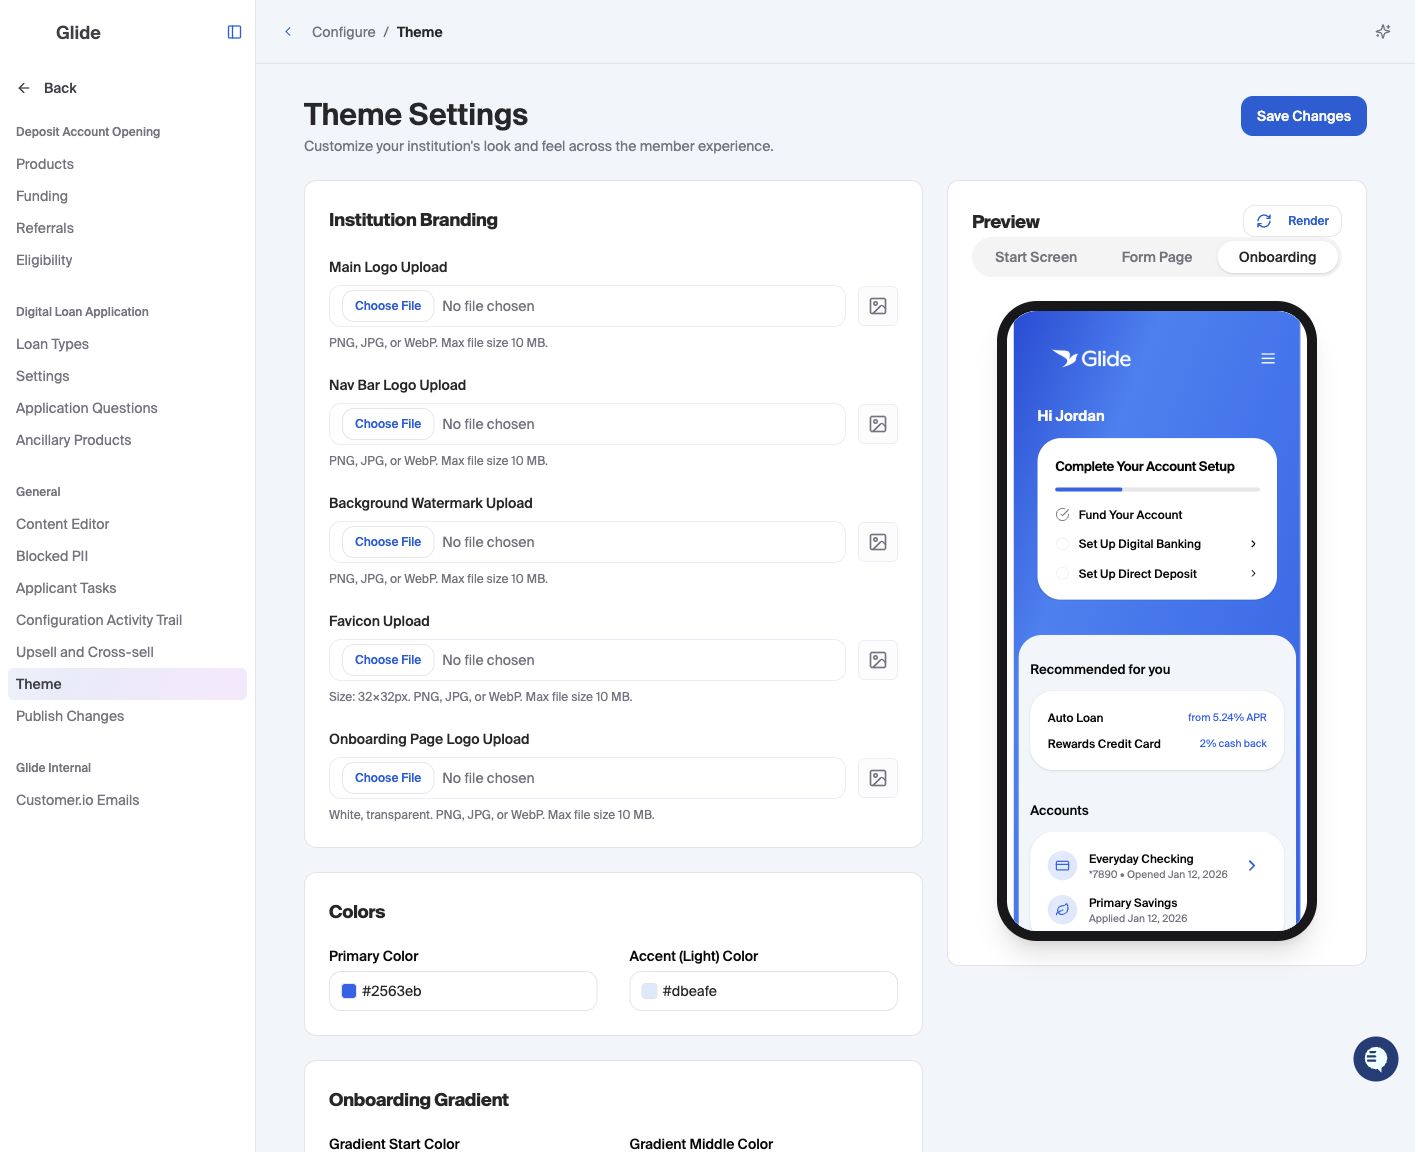
Glide Uni: the Onboarding preview shows the logo and gradient.
Save and test in staging
Select Save Changes and wait for the success message.
Reload Theme Settings to confirm the values were saved.
Open your institution’s staging digital flow in a separate tab.
Allow several minutes for the saved configuration to appear, then refresh the digital flow.
Check the landing page and relevant application or onboarding screens.
Updates are not always immediate. Allow approximately five minutes before rechecking; a refresh shortly afterward may still be needed. An unchanged page immediately after saving does not necessarily mean the save failed. Avoid repeatedly saving or changing the color while waiting, as this makes it harder to tell which update is displayed.
The preview and the separate digital flow can update at different times.
Publish approved changes
Saving and publishing are separate actions. Saving lets you review configuration changes before they reach production.
When the theme is ready, open Configure → Publish Changes in the production dashboard. Review the theme changes under Unpublished Changes, then use Push to production or Schedule to production as appropriate.
Publishing controls are disabled in the staging dashboard. This does not prevent saved theme changes from appearing in the staging digital flow after the refresh delay.
For more about scheduling and reviewing published changes, see Product CMS: Product & Offer Management.
Review the Configuration Activity Trail
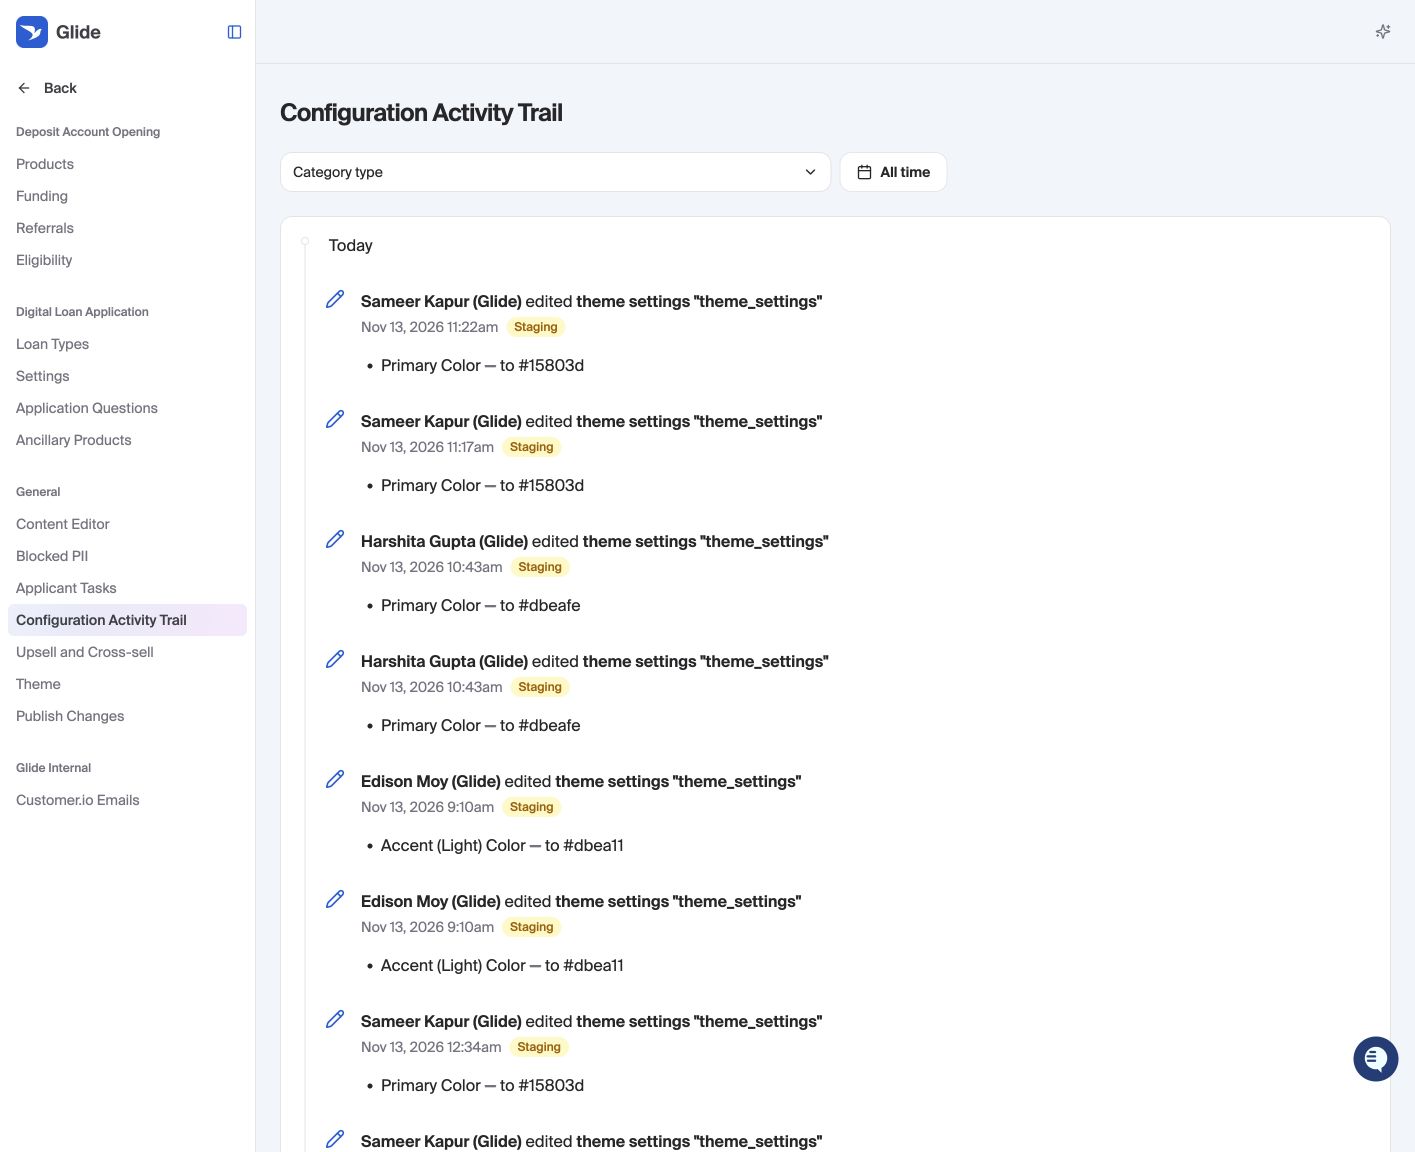
Open Configure → Configuration Activity Trail to review theme edits. Theme entries identify the staff member, date and time, environment, and changed fields.
Look for entries such as edited theme settings "theme_settings". If Theme is not available in the category filter, leave the category unfiltered and use the date filter to find recent edits.
Troubleshooting
The digital flow still shows the old theme.
Confirm the saved values by reloading Theme Settings. Check that you opened the correct institution and environment, allow several minutes, and refresh again. Production changes also require publishing.
The preview does not match my edits.
Select the relevant preview tab and click Render.
An image does not upload.
Check its format and size. Use PNG, JPG, or WebP under 10 MB. For the favicon, use 32 × 32 px; for the onboarding logo, use a white logo with transparency.
I need to undo a test change.
Enter the previous color values or re-upload the original image, then save. Allow the same refresh delay when checking the restored staging theme. If the change reached production, review and publish the correction through Publish Changes.