Invite Applicants Feature Overview
Last updated: November 3, 2026
Invite Applicant lets staff prepare an account application and email the applicant a link to finish it online. You can also send a reminder to someone who already has an In Progress application, keeping their saved information and progress.
Note: Invite Applicant requires Customer.io. If your FI has not migrated to CIO, contact your DPM to get enabled.
Invite someone to start an application
1. Prepare the application
From Applications → Deposit Accounts, select Add Member. Choose the membership type and products. Confirm that at least one savings account or certificate is selected.
Enter the information you already know, such as product selections, promo/journey/referral codes, employment and eligibility details. You do not need to complete the full application before inviting someone. The invitation panel summarizes the information that will carry forward.
Select Invite Applicant at the top of the form.
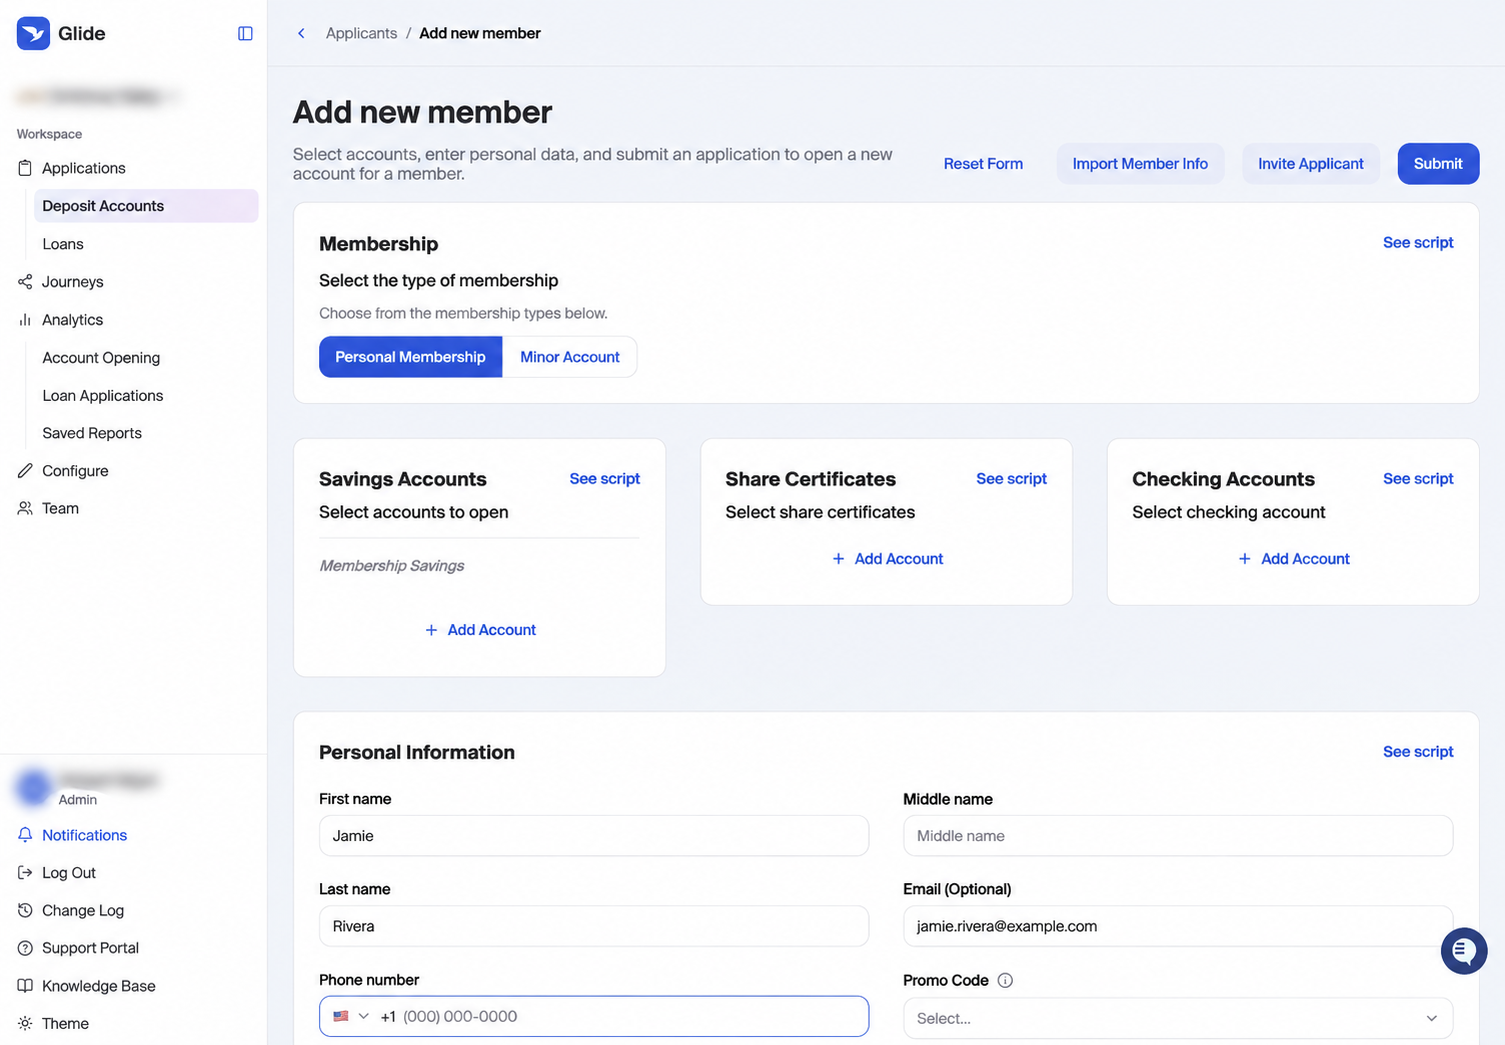
Select the membership and products, then open Invite Applicant.
2. Review the recipient and add a note
Confirm First Name, Last Name, and Email. Add an optional Note (up to 1,000 characters) to explain why you are sending the invitation. This note is included in the applicant's email, so use it for applicant-facing instructions.
Assign Application to me is on by default for a new invitation. Leave it on to assign the application to yourself, or turn it off.
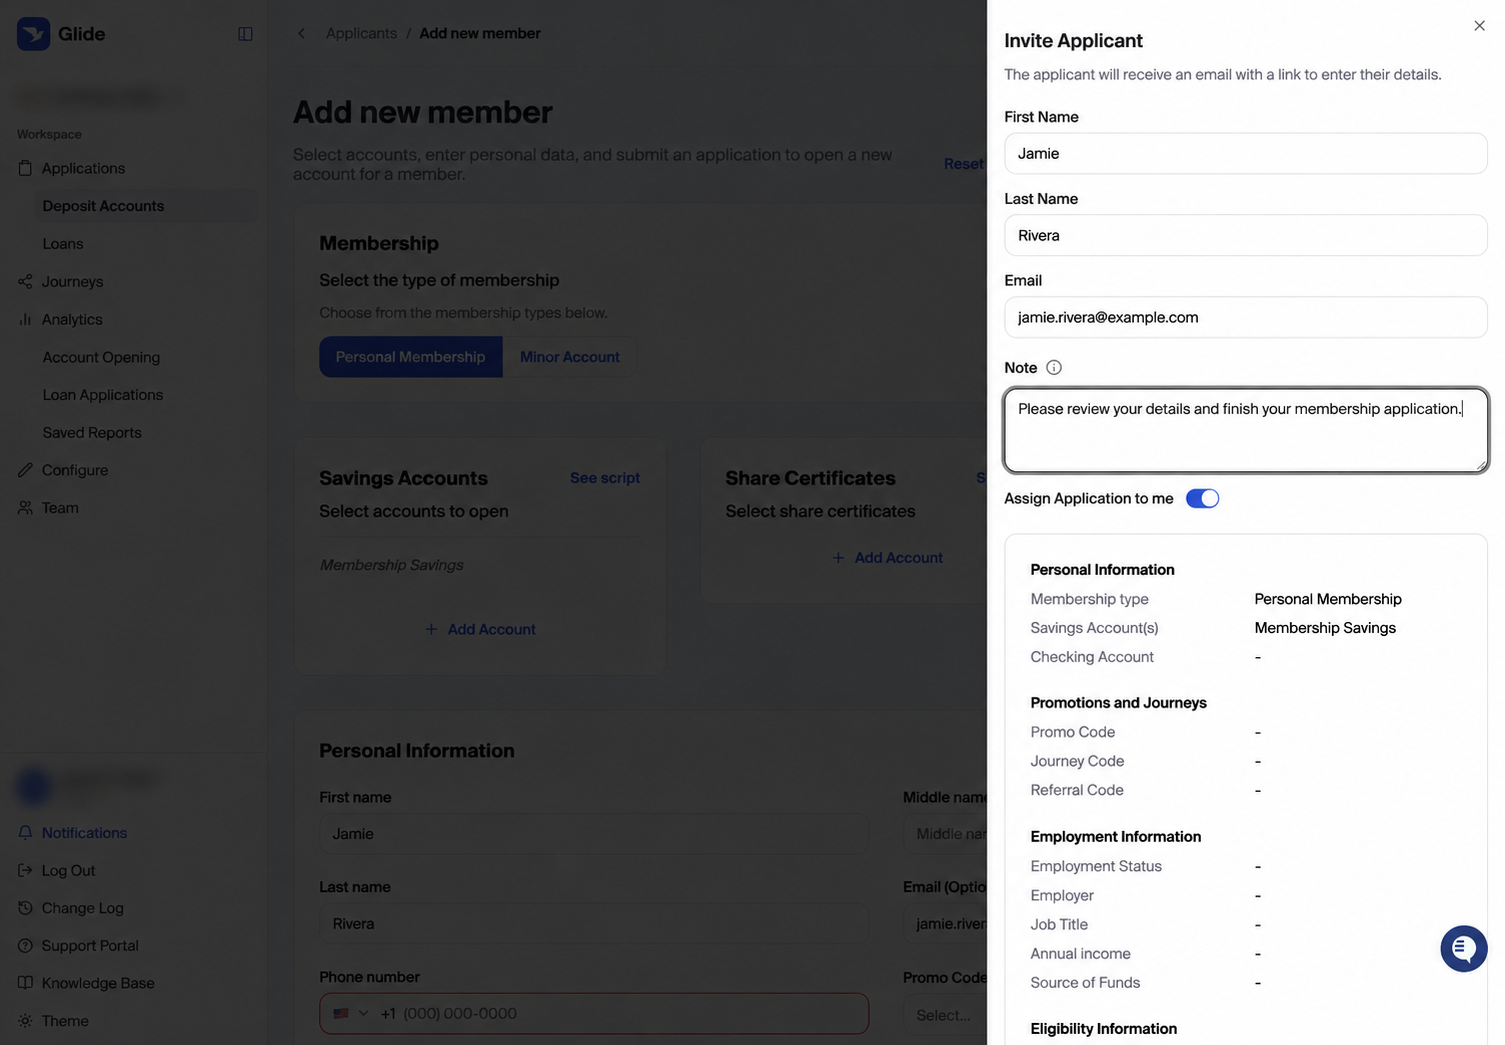
Review the recipient and optional note before sending.
3. Review and send
Review the summary of membership, products, codes, and other prefilled details. If something needs changing, close the panel, update the form, and reopen it. Select Send Invite when ready.
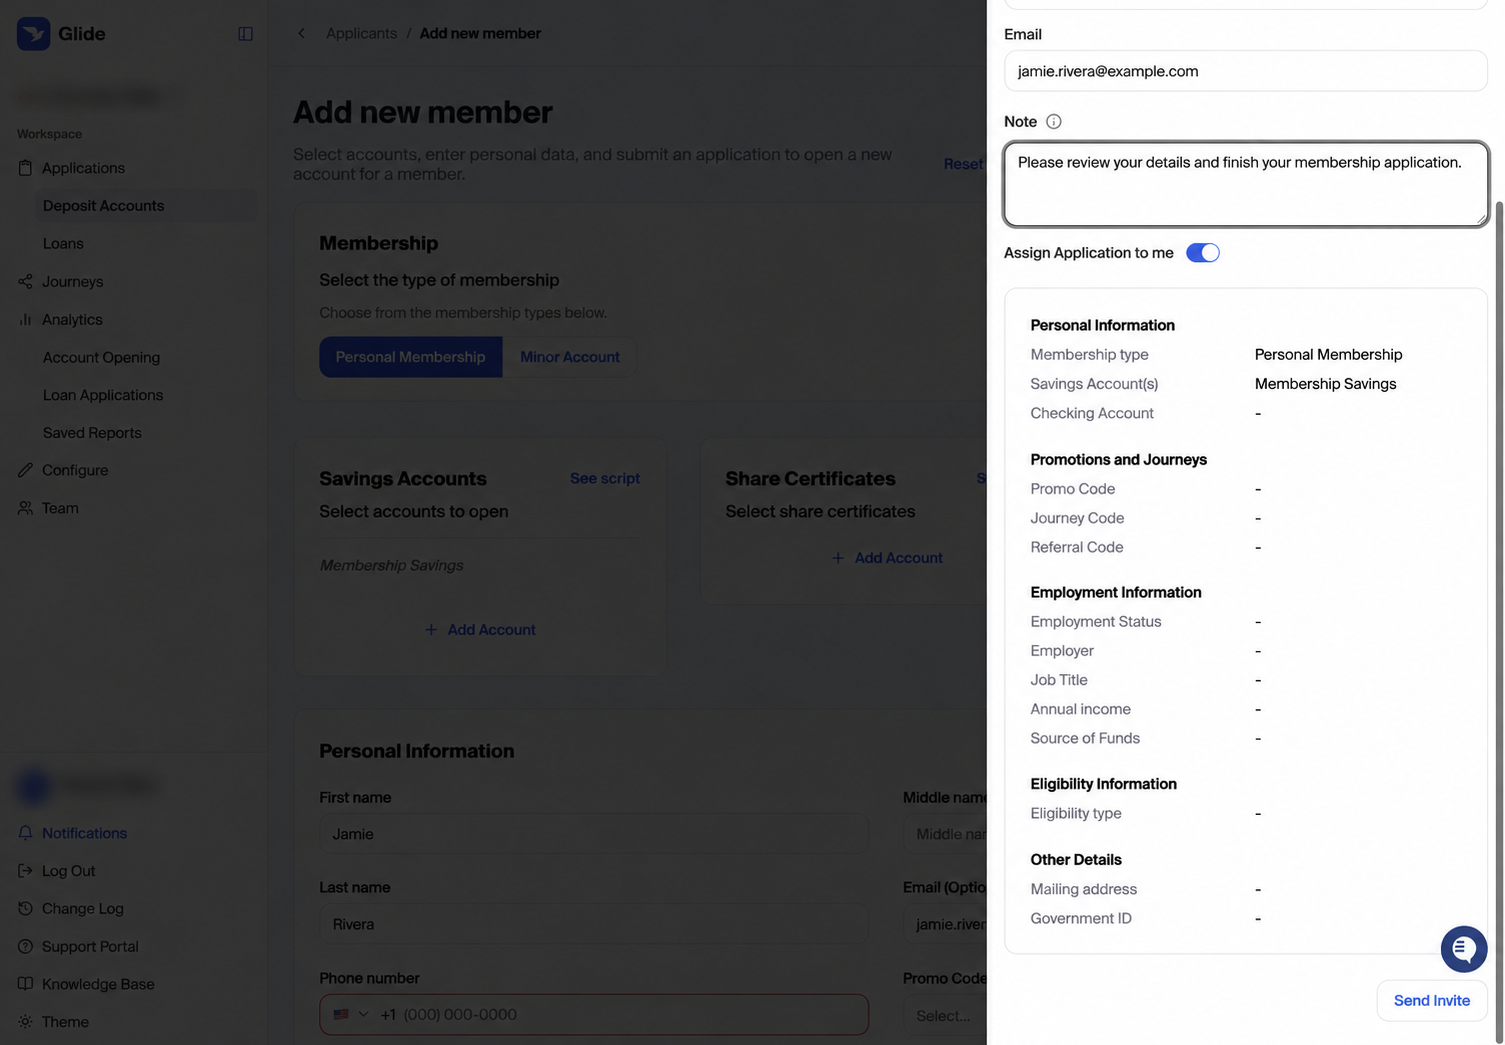
The summary shows what is included in the invitation.
Glide creates an In Progress application and records the invitation in its Activity trail. The applicant follows the email link, completes the required identity verification and remaining application steps, and submits the application. Inviting someone does not submit or approve their application.
When a staff-invited application is submitted, the original inviter and current assignee receive in-app and email notifications. If they are the same person, that person is notified once.
Who should receive the invitation?
Membership | Recipient and preparation |
|---|---|
Personal | Invite the primary applicant. Leave additional roles and documents for the applicant to complete. |
Minor | Invite the adult joint owner who will complete the minor's application. You can prefill the child's details and include one joint-owner role; remove other roles before sending. |
Trust | Enter the trust's type, title, and effective date. Add exactly one recipient manually as Trustee or Trustor as Trustee. The recipient verifies their identity and finishes the trust application. |
Business | Enter the business's legal name and structure, then enter the authorized signer's name and email in the invitation panel. Do not add owners, signers, or documents before sending; the applicant adds these in the digital flow. |
Uploaded documents are not included in new invitations. The invited adult joint owner's or trustee's SSN, date of birth, home address, and government ID are not carried into their verification step. They complete identity verification themselves. Use the panel summary to check the supported prefilled details.
Invite someone to resume an existing application
Find and open the applicant's In Progress application. Select More → In Progress to view in-progress applications.
Open the three-dot menu in the upper-right corner and choose Invite Applicant.
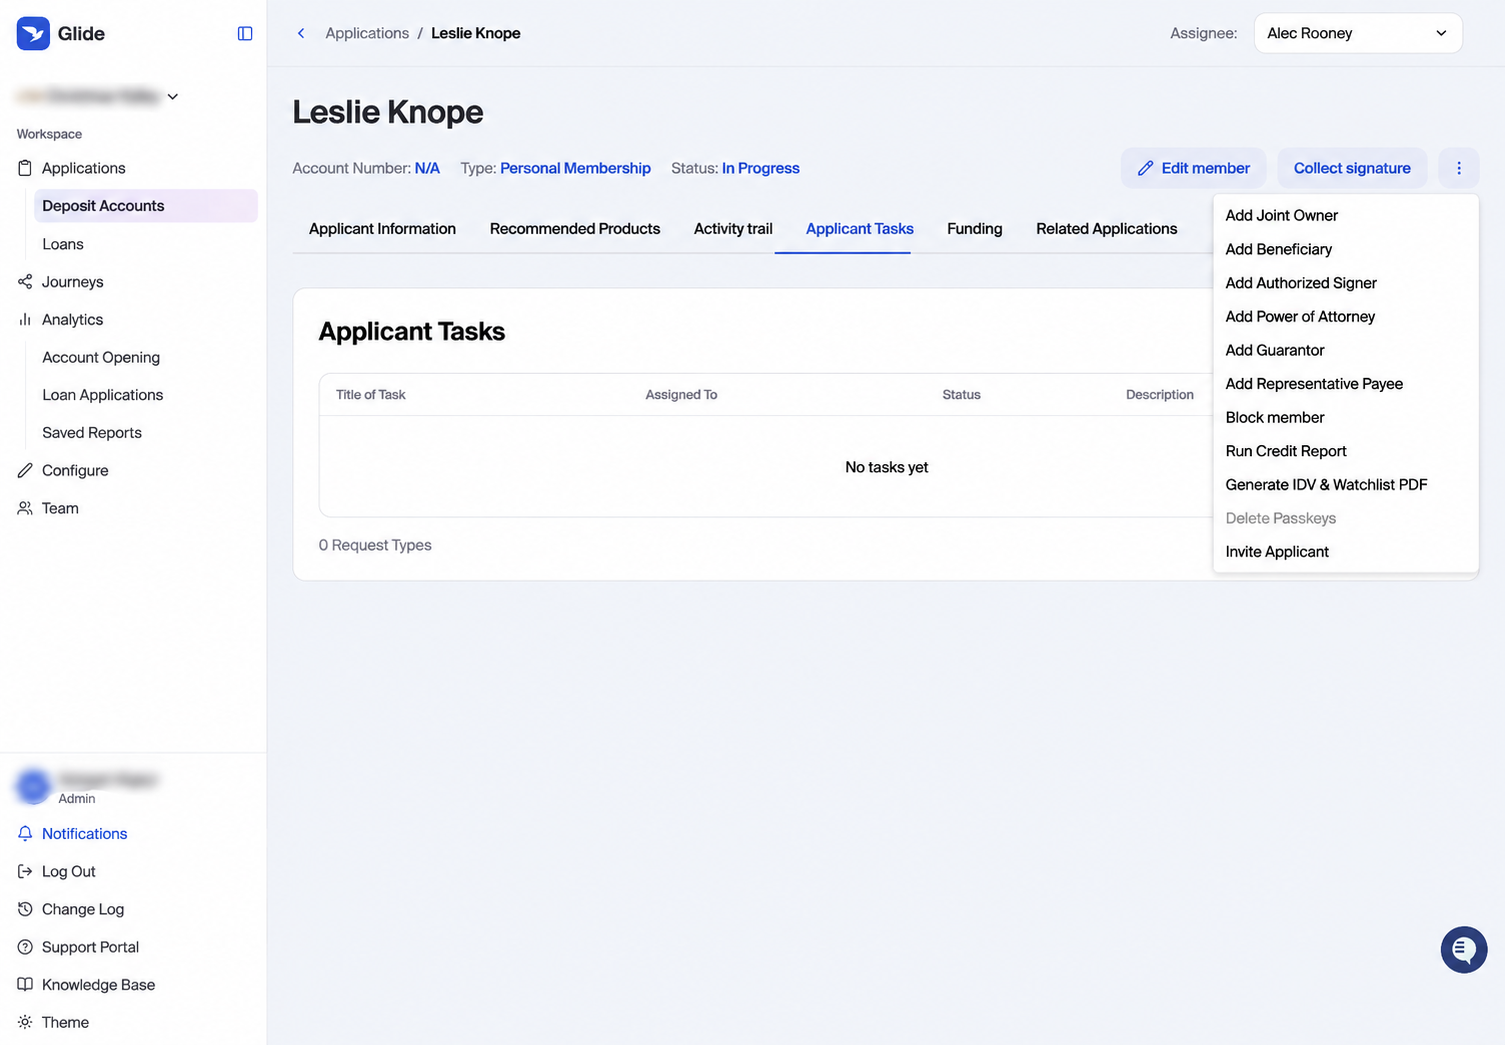
Use the existing application's menu to send a reminder.
Review the recipient, add an optional note, and choose whether to assign the application to yourself. Assignment is off by default for a reminder.
Select Send Invite.
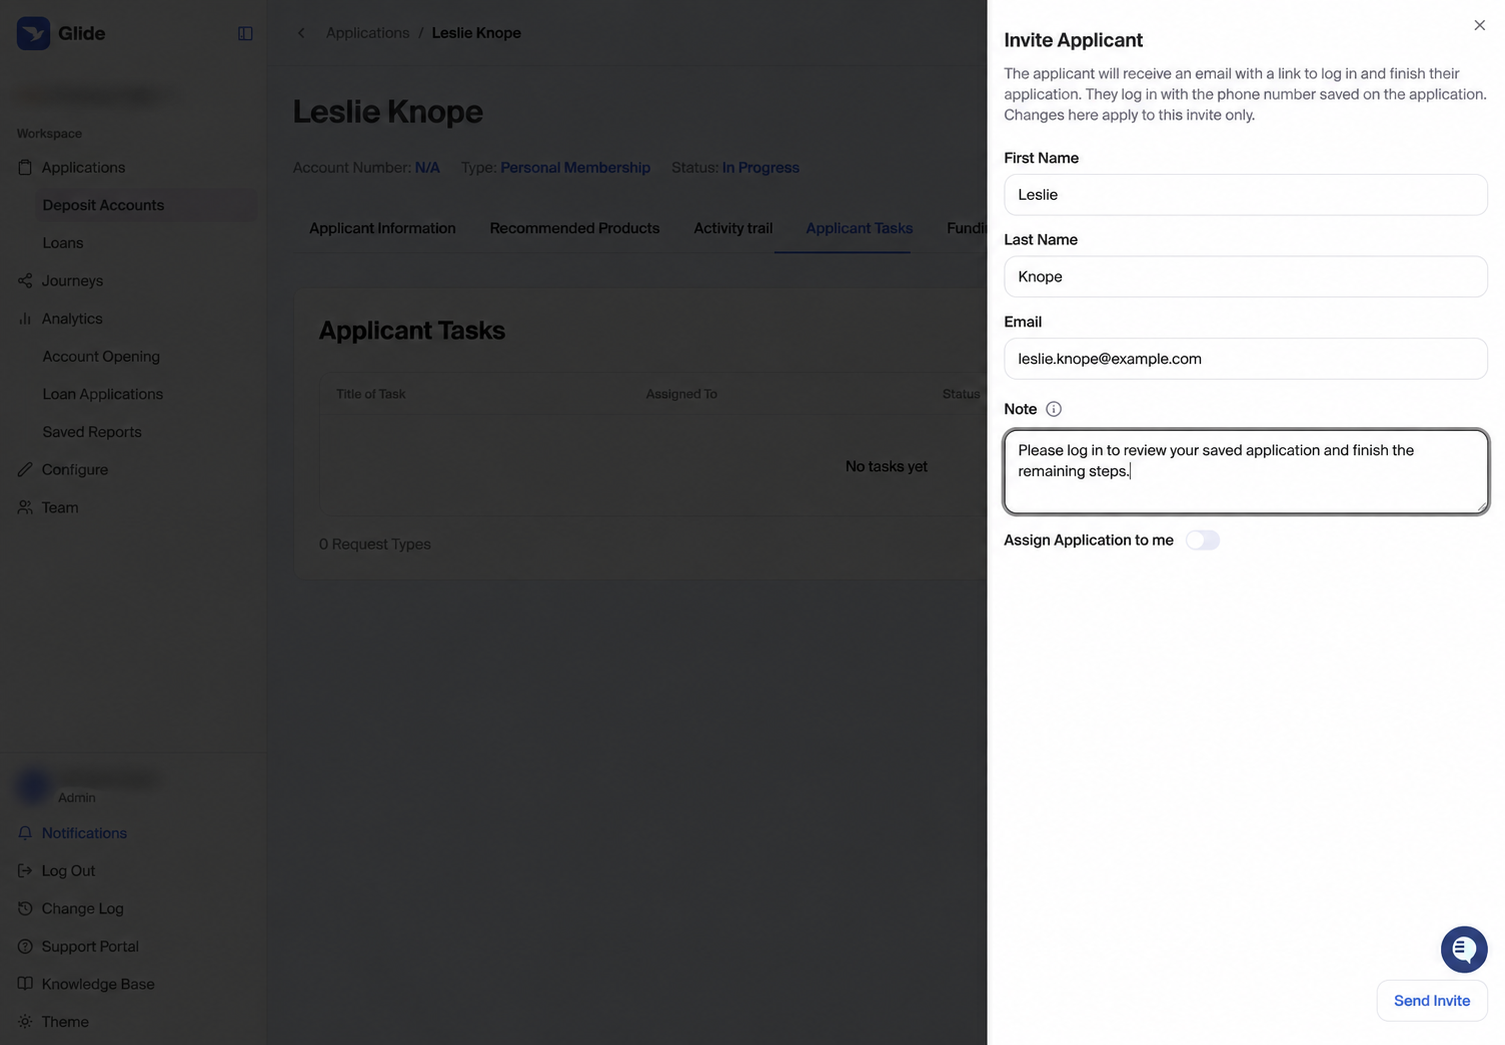
The reminder links to login and keeps the existing application.
The applicant logs in with the phone number saved on the application, selects their in-progress application when prompted, and continues with their saved progress. The reminder does not create a second application.
The panel starts with the saved recipient details. Changes made inside this panel apply to this invitation only; they do not update the applicant's saved profile or login phone. To correct saved contact information, update the application first. For minor accounts the recipient is the responsible adult; trust and business reminders go to the relevant primary applicant/signer.
The send is recorded in the application's Activity trail.
Resend, cancel, and expired links
Resend invite: If a new invitation is still pending, the application's three-dot menu shows this action. It sends a replacement link to the original invitation recipient. The previous link stops working, and the original expiration date stays the same.
Cancel invite: Available for a pending invitation. The confirmation explains that the link will stop working and the application will be closed.
Link expiry: A new, unclaimed invitation expires after 30 days. Clicking it once does not immediately consume it. After the applicant has claimed the invitation, opening it again routes them to login so they can continue.
Already started: Use the resume flow above. A resume email contains a login link rather than a new 30-day invitation token.
Customer.io email templates
These are the default email templates for Applicant Invite and Applicant Resume Invite in Customer.io.
Applicant Invite
Subject: Finish your [[CU_NAME]] application
Hi {{customer.first_name | default: 'there'}},

{{event.inviter_name}} at [[CU_NAME]] started a membership application for you. We've filled in what we could, so you only need to review it and finish a few steps.

{% if event.note != blank %}
A note from {{event.inviter_name}}:
{{event.note | escape}}
{% endif %}

Finish My Application

This link expires in 30 days. If we send you a new link, this one stops working.

If you have any questions, please reply to this email, call us at [[PHONE]], or schedule a virtual appointment.

Thank you,
[[CU_NAME]]

Unsubscribe
Finish My Application button link: {{event.invite_link}}.
Applicant Resume Invite
Subject: Finish your [[CU_NAME]] application
Hi {{customer.first_name | default: 'there'}},

{{event.inviter_name}} at [[CU_NAME]] invited you to come back and finish your membership application. Your progress is saved, so you can pick up where you left off.

{% if event.note != blank %}
A note from {{event.inviter_name}}:
{{event.note | escape}}
{% endif %}

Log In to Finish

Log in with the phone number on your application. If you can't, give us a call.

If you have any questions, please reply to this email, call us at [[PHONE]], or schedule a virtual appointment.

Thank you,
[[CU_NAME]]

Unsubscribe
Log In to Finish button link: {{event.login_link}}.
Campaign setup
Campaign | Event trigger | To |
|---|---|---|
Applicant Invite |
|
|
Applicant Resume Invite |
|
|
Set both campaigns to enter On every event, keep the Unsubscribed segment exclusion, and activate both campaigns before sending invitations. Preview each email with and without a note, and check that its button uses the link shown above.
For other supported emails and events, see Glide + Customer.io: Supported Email Triggers & Variables.