Configuring Your Digital Loan Application: Ancillary Product Configuration
Last updated: September 23, 2026
Overview
This guide outlines the standard five-step process for configuring any ancillary product (GAP, Debt Protection, VPP, MBP, or DPW) within the Glide Digital Loan Application.
Getting Started: The Ancillary Products Overview
When you first enter the configuration area, you will be presented with a high-level overview of your available add-on products. This screen serves as your central hub for managing loan protections.
Accessing the Menu: Navigate to the Digital Loan Application section in the sidebar and select Ancillary Products.
Product List: Here you can see all current products, such as GAP, Debt Protection, VPP, MBP/MBI (Warranty), and DPW (Depreciation Protection).
Status Indicators: The Status column quickly shows which products are currently Enabled and visible to potential borrowers.
Search Functionality: Use the Search products... bar at the top to quickly find a specific product if your list grows.
Once you click into a specific product from the main list, the configuration process follows a standardized five-step structure across all offerings:
1. Product Details & Branding
Define how the product appears to your borrowers in the application interface.
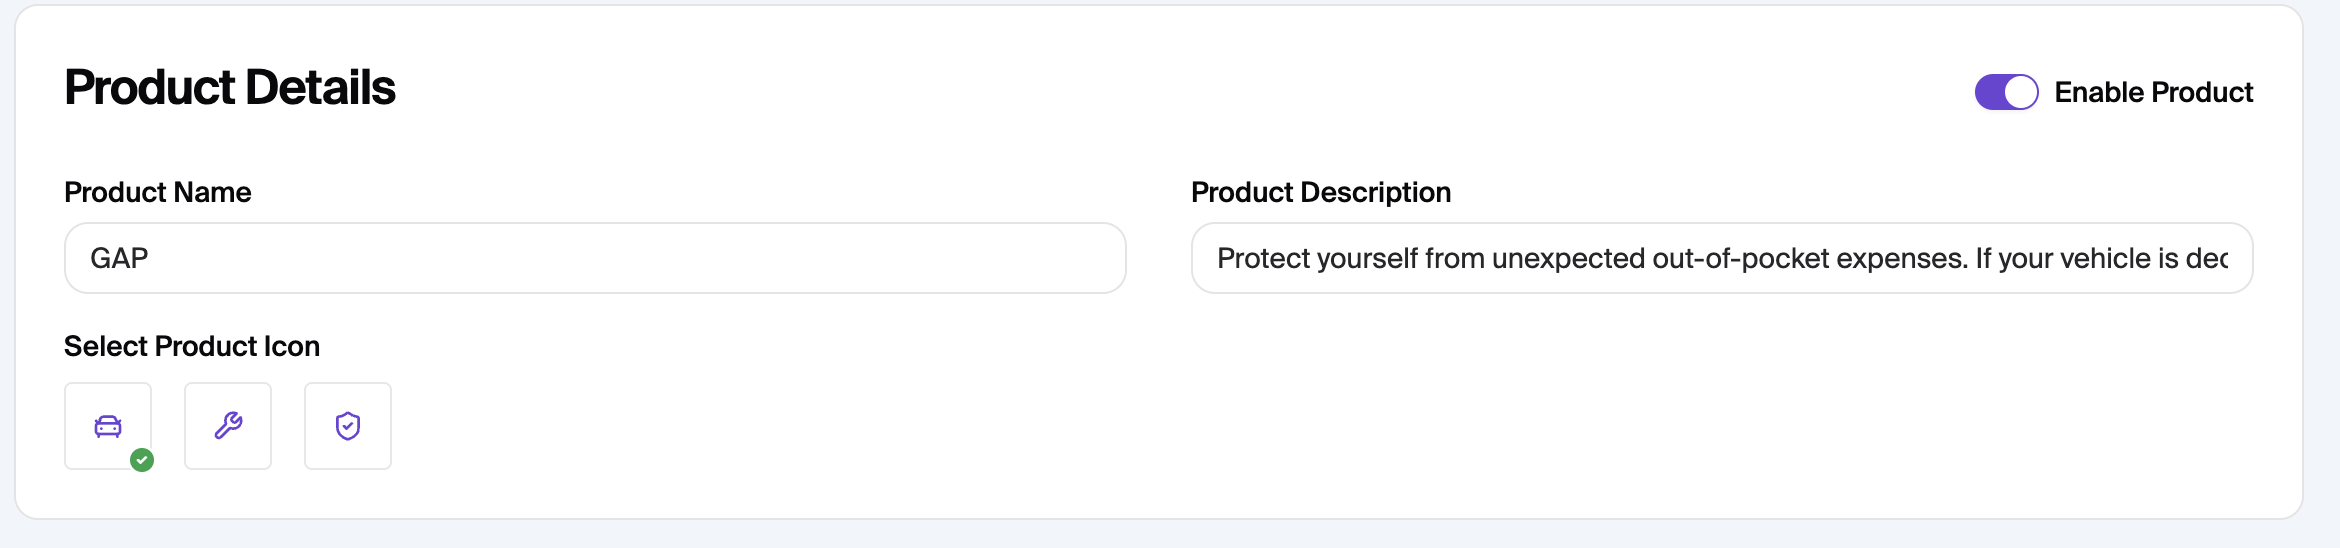
Enable Product: Use the master toggle to turn the specific offering on or off for all eligible applications.
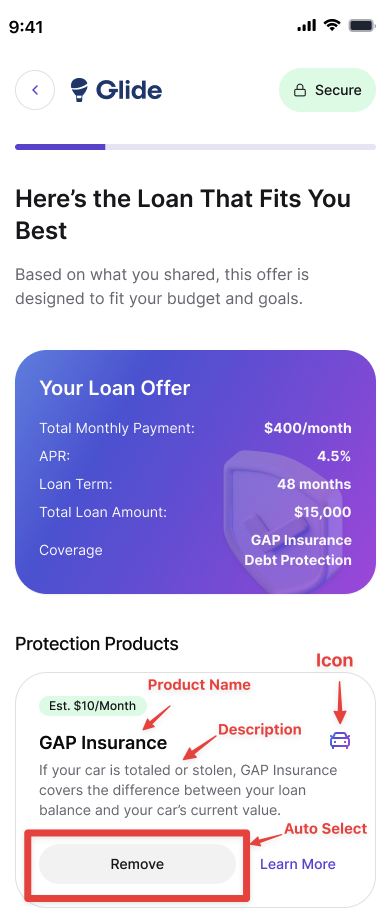
Product Name & Description: Customize the title (e.g., "GAP") and provide a clear explanation of the benefits for the borrower.
Product Icon: Select a visual identifier (like a car or shield icon) to represent the product in the UI.
2. Visibility & Automation
Control when the product is shown and how it is added to the loan.

Loan Type Visibility: Restrict the product to specific loan types, such as Auto Loans or Personal Loans. Further filtering by vehicle categories is available in the Vehicle Exclusions section described below.
Auto-Select: Choose whether the product is automatically pre-selected for the borrower once they meet the eligibility criteria.
3. General Exclusions (Borrower & Loan)
Set the primary "guardrails" for eligibility based on the borrower and the loan terms.
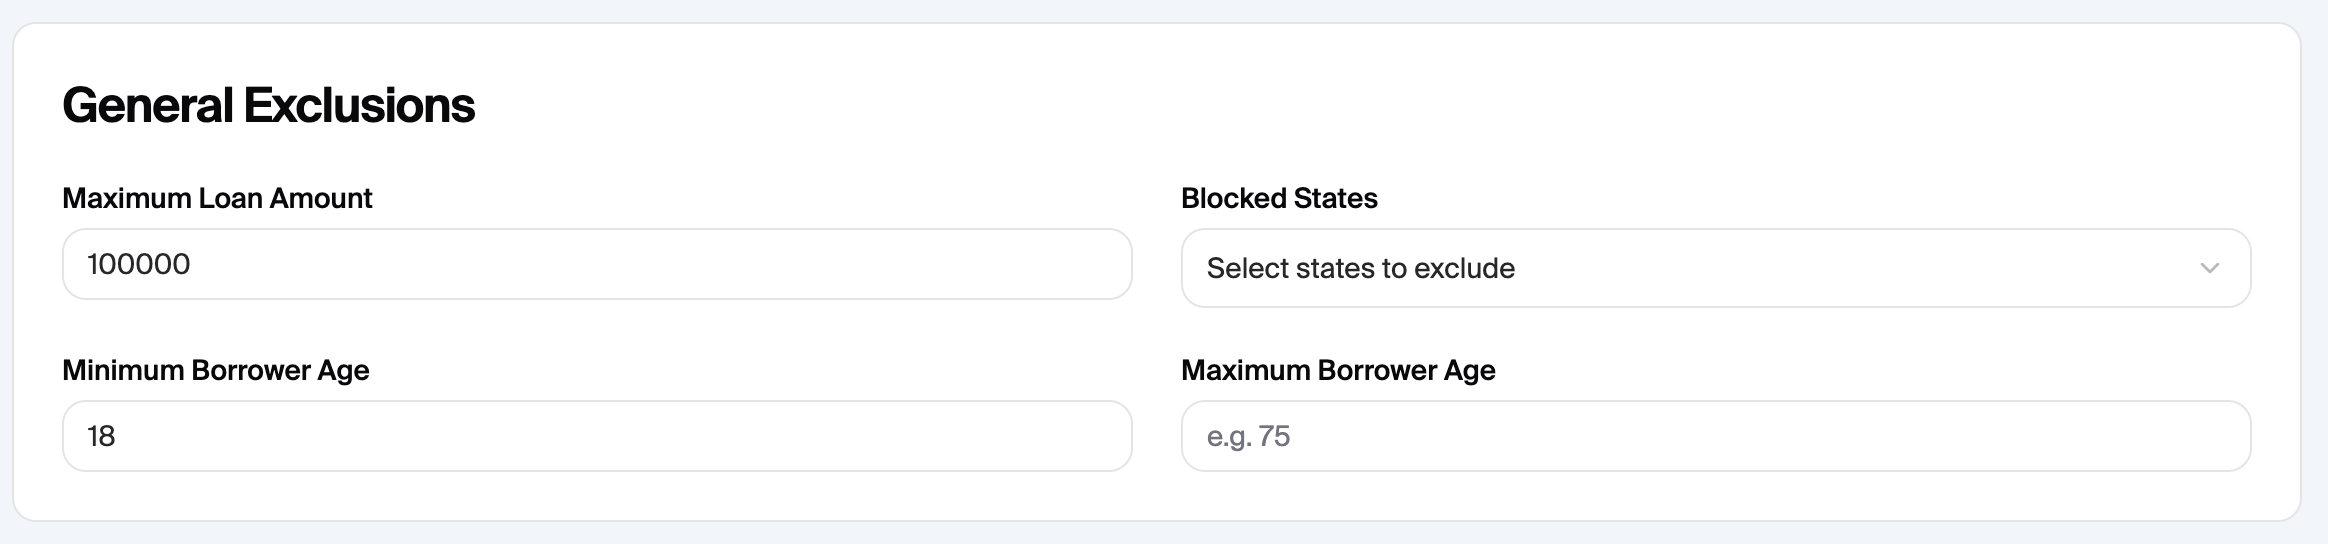
Loan Amount: Set a Maximum Loan Amount (e.g., $25,000) for coverage eligibility.
Geography: Use Blocked States to exclude specific regions due to regulatory or licensing restrictions.
Borrower Age: Define a Minimum and Maximum Borrower Age (e.g., 18 to 75 years).
4. Vehicle & Financing Exclusions
For collateral-based products, ensure coverage is only offered for qualified assets.
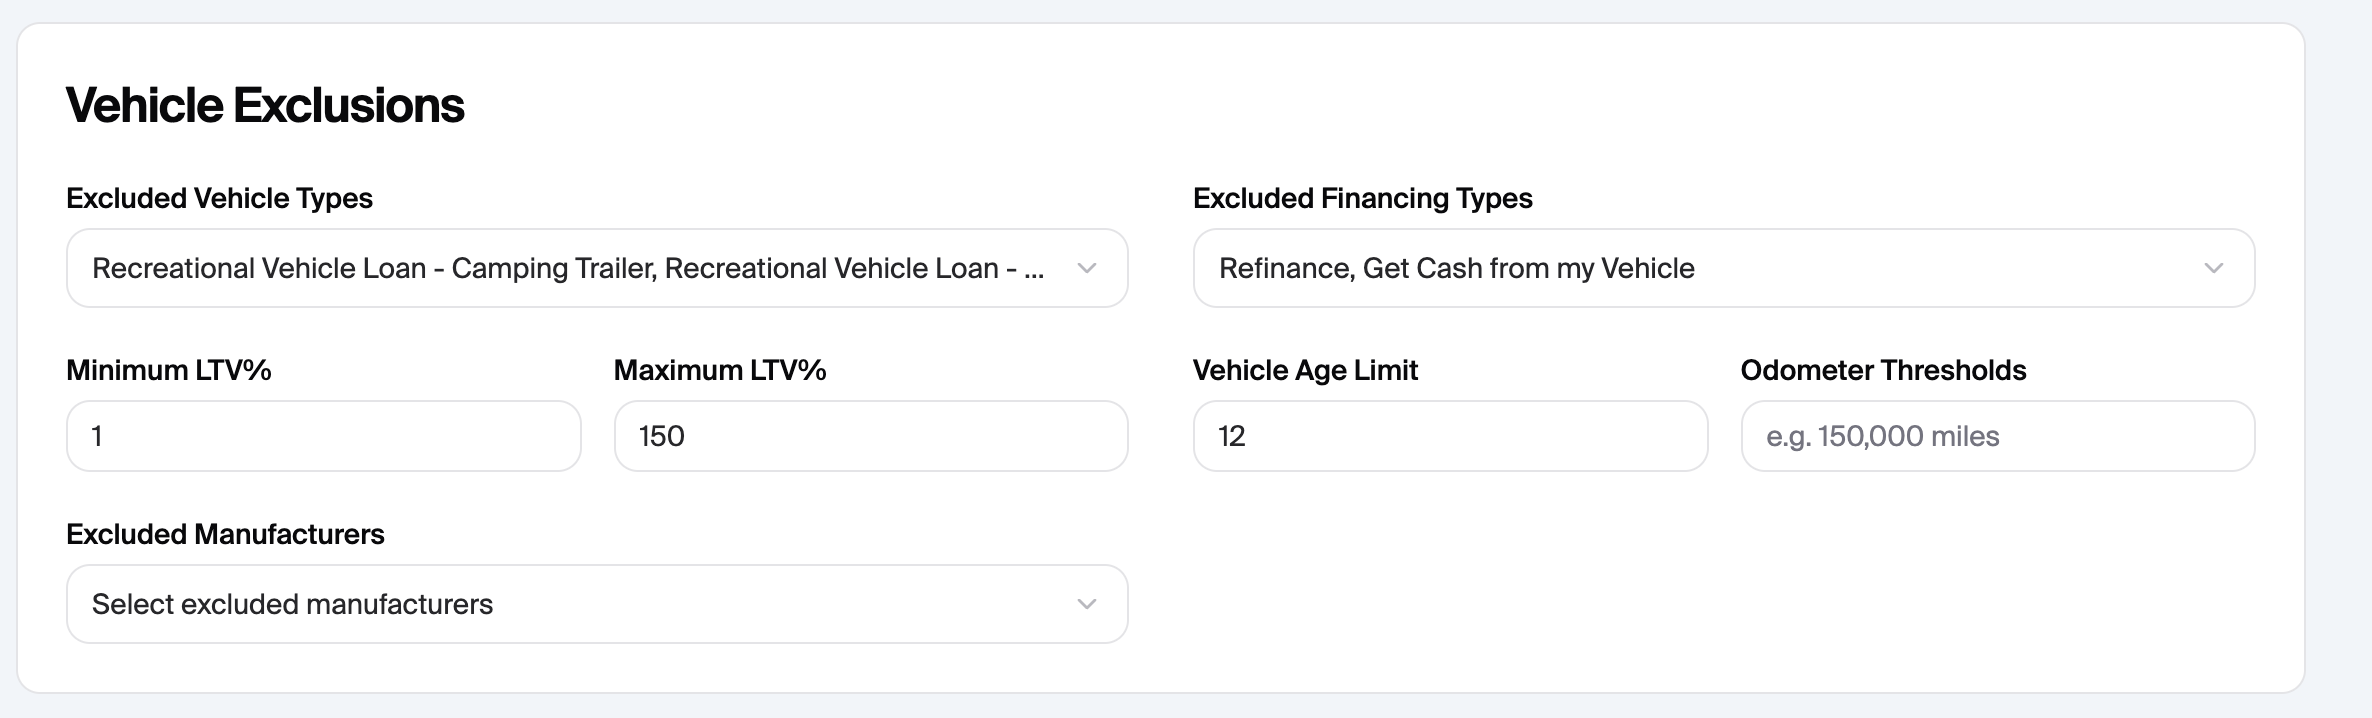
Vehicle Specifications: Set limits for Vehicle Age, Odometer Thresholds, and Excluded Vehicle Types.
Loan-to-Value (LTV): Define the eligible Minimum and Maximum LTV% (e.g., 10% to 120%).
Financing & Manufacturers: Exclude specific financing types or certain vehicle makes from coverage.
5. Pricing/Quote
Configure how pricing is calculated and shown to the user
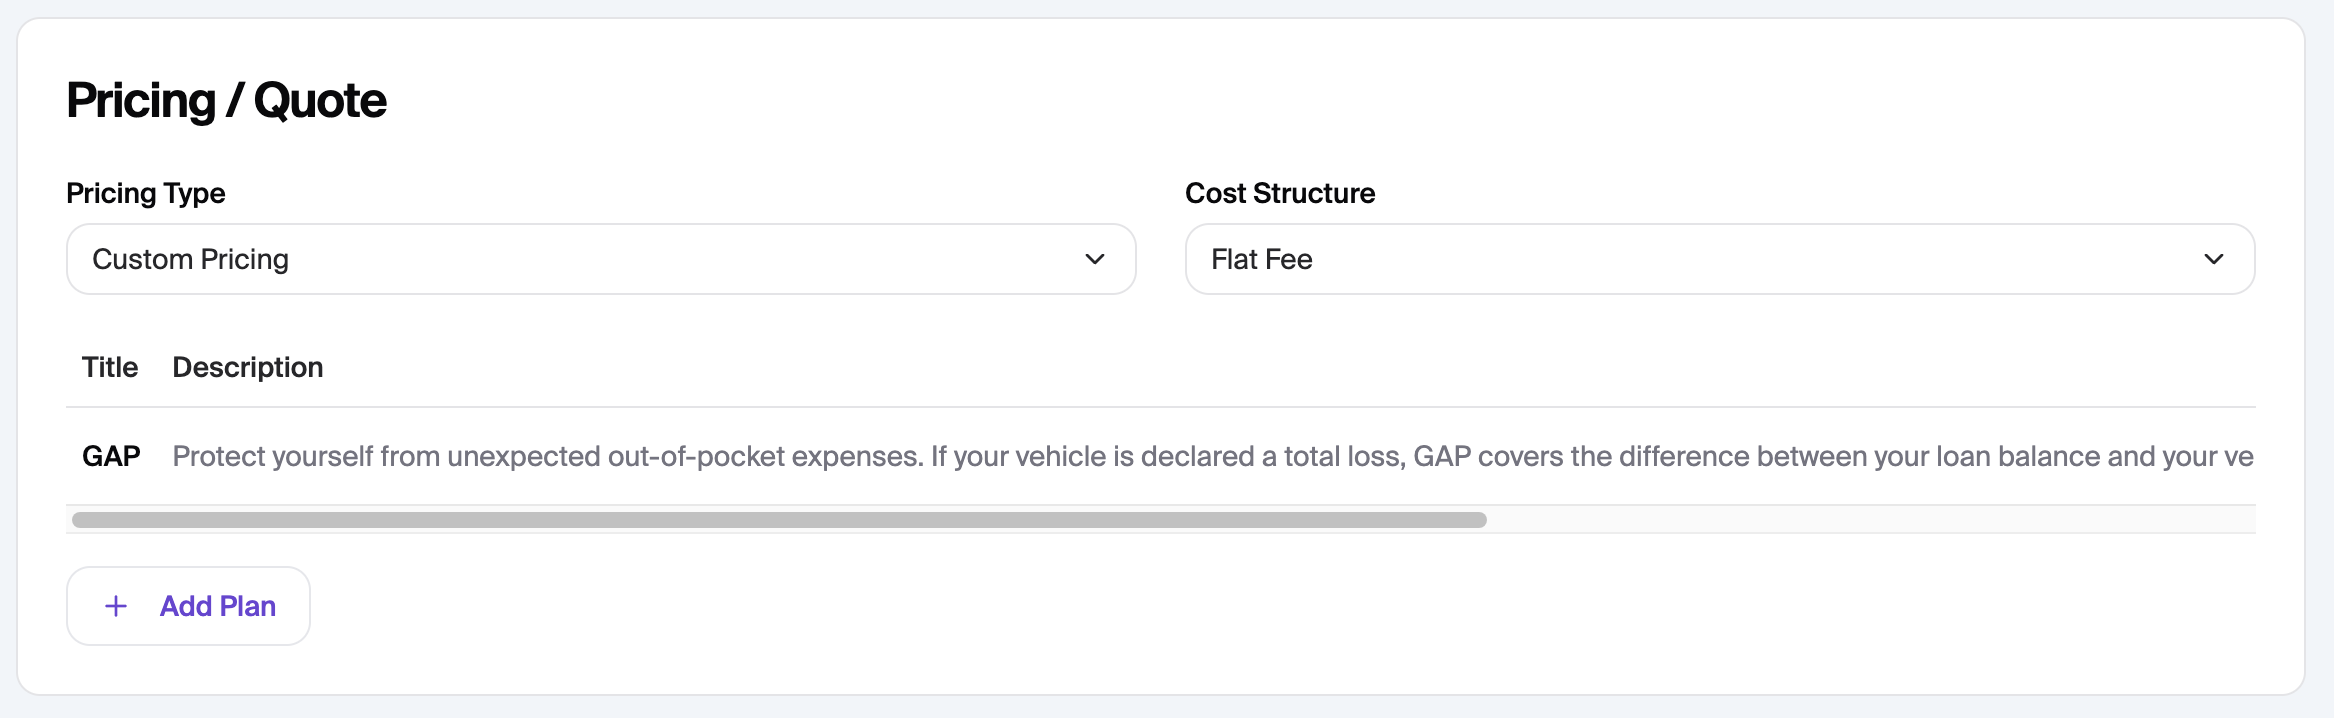
Pricing Type
Custom Pricing - Configure pricing manually
Hide Pricing - Users will not see an estimated price
Third-Party Quote - Pull a live quote from your insurance provider
After selecting this option, you will need to select the provider under the Quote Provider option that will appear.
Custom Pricing Configuration
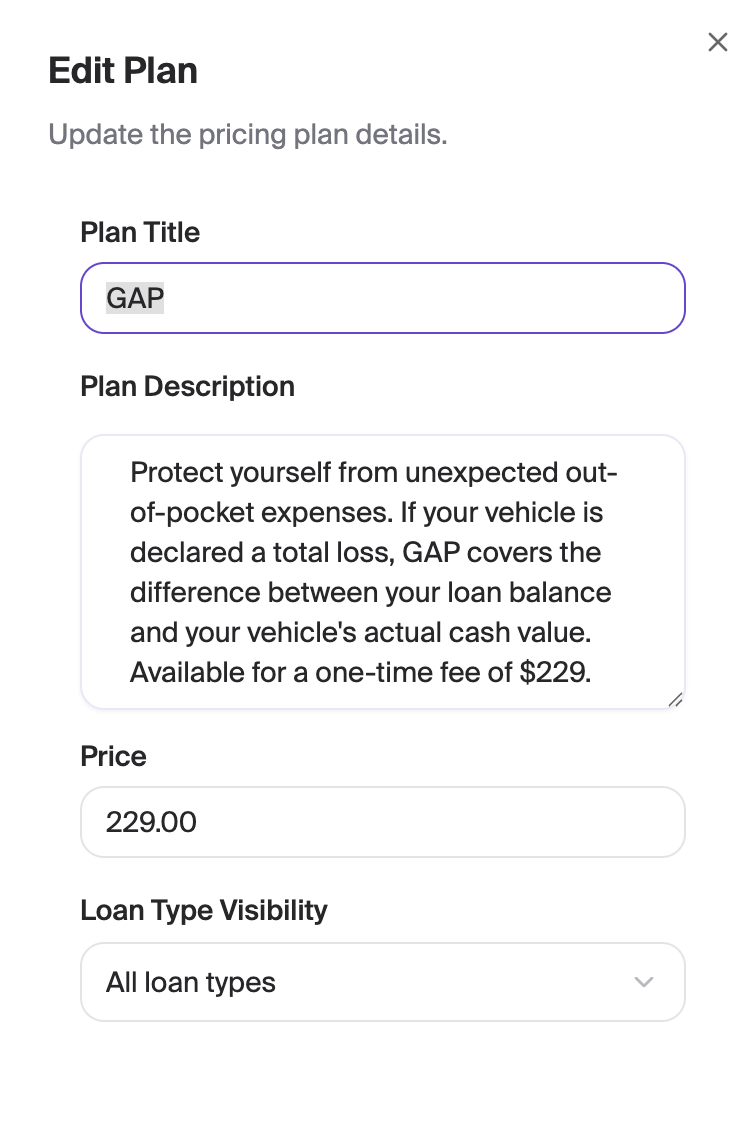
Step 1: Choose your cost structure (flat fee or per $1000)
Step 2: Add one or more plans
Step 3: Plan Configuration
Plan title - This is the title that will show to users
Plan Description - Will be shown to users for that plan
Pricing
Flat Fee - Enter the total cost of the plan
Per $1000 - Enter the primary and co-borrower cost per $1000 (see below for more details on how per $1000 costs are calculated)
Loan Type Visibility - Customize which loan types, categories and/or sub-categories the plan appears for.
The image below shows the 'End user Display.'
Third-Party Quote Behavior (SWBC)
When the Third-Party Quote pricing type is enabled and SWBC is selected as the quote provider, quotes are retrieved automatically — no action is required from the applicant to trigger them.
On the Recommended page, Glide reads available quote pricing and shows a loading state while quotes are being processed. A new SWBC request is not guaranteed on every page load.
On the Customize page, changes to loan amount, term, or APR can request a refreshed quote when a quote provider is configured and the required values are available. Amount and term changes use a short delay to avoid a request for every rapid adjustment.
When completed or partially completed quote prices have expired, Glide can request a fresh quote automatically if a quote provider is configured.
Saving
Save: Click the Save button at the top right to store your configuration changes.
Per $1000 Calculations
For a single borrower, we will calculate the maximum monthly payment as:
Cost/$1K/mo * Loan Amount / 1000
For applications with co-borrowers, we will add the 2 costs like so:
(Cost/$1K/mo + Co-Borrower Cost/$1K/mo)* Loan Amount / 1000