Digital Loan Applications: Override Status
Last updated: August 4, 2026
Background
The Override Status functionality allows staff to update the status that is displayed on a loan application in both the dashboard and user facing experiences. Keep in mind:
The override will only update the status shown on the Glide side. It will not update the application decision in your LOS.
When a status is overridden, any actions that are set up to trigger based on application status will also occur. The most common case of this will be application status update emails.
This feature can be useful if:
Your LOS does not support updates to Glide upon application status changes.
There was some error with the application submission or status update from the LOS and the currently shown status in Glide is no longer accurate.
Your LOS does not show an accurate status for certain applications. This often occurs with Credit Card applications as they are handled a differently from other loans.
How to Override a Loan Application Status
Open the Glide Dashboard and Navigate to Loan Applications
Open the loan application you want to override the status for
Click on the Override Status drop-down at the top right of the page
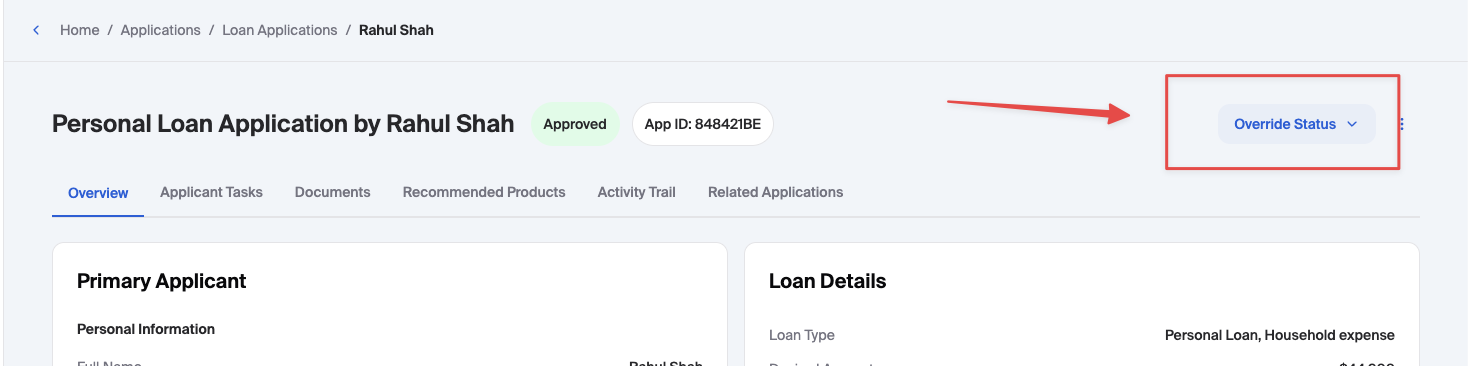
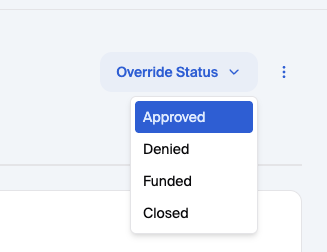
Select the new status for the application and click Override in the confirmation modal.
Updates after Override
If we receive a status update from your LOS on an application with an overridden status, we will only update to that status if it is different from the original pre-override status. Examples:
No update made
Original Status is "Pending"
Status is overridden to "Approved"
LOS sends update that the application is "Pending"
No change made in Glide
Update made
Original Status is "Pending"
Status is overridden to "Approved"
LOS sends update that the application is "Denied"
Glide updates to "Denied" status