Middesk Dashboard Overview
Last updated: October 9, 2026
Use the Middesk dashboard to investigate business verification results, review watchlist matches, request additional checks, and manage your team’s access.
Access to full Business Verification & Risk Services is optional. If you currently do not have access to the Middesk Dashboard and want to enable these features, please contact your DPM to get started.
Open a business and review its results
In Glide, open the business application and select Open in Middesk in the Fraud & KYB table. Sign in with your individual Middesk account if prompted.
If testing in staging, search for the test business as the link within the Glide dashboard will not take you directly to the business.
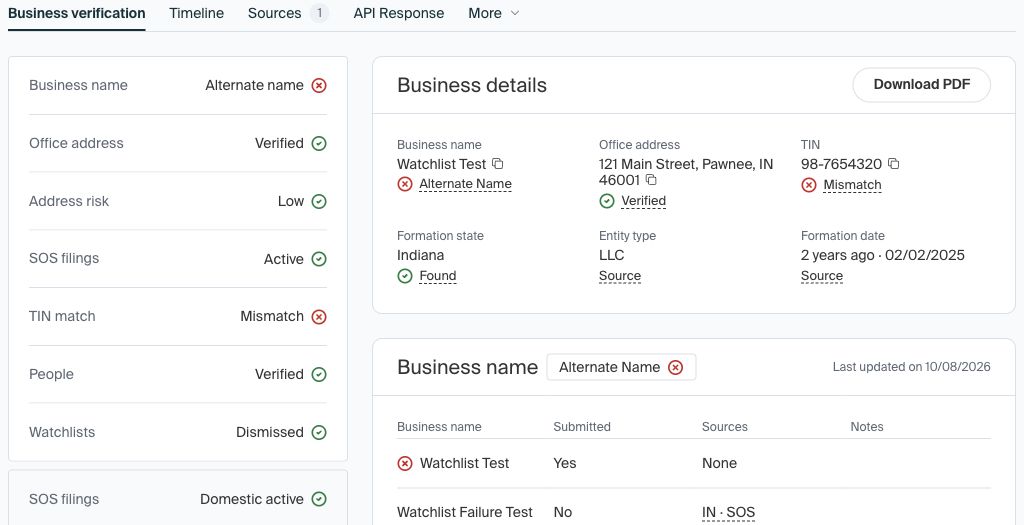
Review business name, address and address risk, TIN, Secretary of State filings, people, and watchlists. Click a result to investigate its details. Sources provides supporting records; Timeline shows activity; Download PDF exports the business report.
Sandbox example: verification results and report download.
Investigate and dismiss a watchlist match
Dismissing watchlists is optional. Your FI is not required to dismiss watchlist match unless required by internal policy.
Open the business’s Watchlists section, then View Watchlists to inspect each match, its agency, list, and matching details.
Follow your institution’s compliance review process. Compare the available identifying details and supporting records. For further, OFAC research, use the official sanctions search tool.
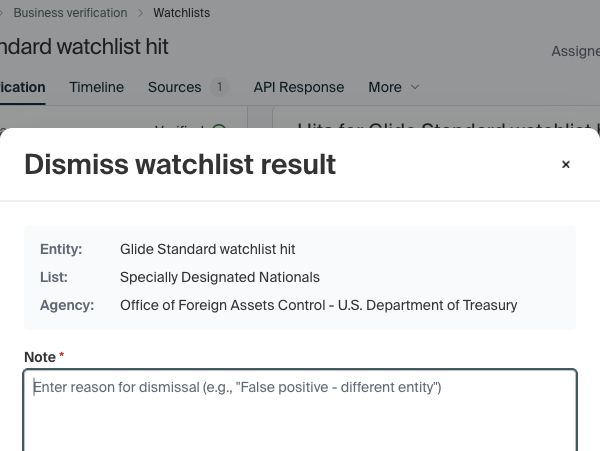
If an authorized reviewer determines the match is a false positive, select Dismiss, enter the required reason in Note, and submit. Document the evidence and decision in the Glide application’s notes as well.
Dismissing a match is not application approval. It can update the screening result shown in Glide, but your team must still complete the application review.
Sandbox example: the dismissal dialog requires a reason.
Choose who can view, review, and order
Your Glide DPM will invite your institution’s Admins to the Middesk dashboard. Admins then manage staff in Settings → Team → Invite members. Each staff member should use their own login.
Relevant roles:
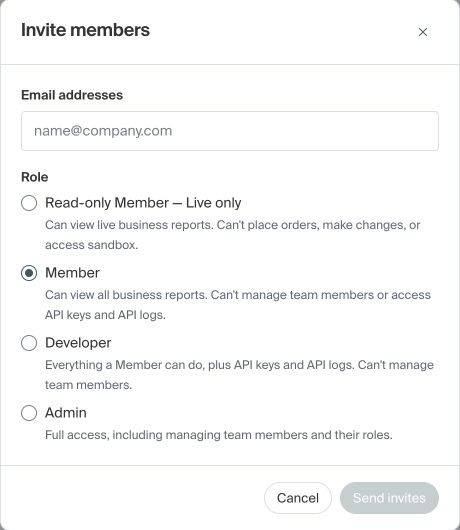
Read-only Member — Live only: views production reports; cannot place orders, make changes, or access sandbox. Recommended for staff who only need to read reports.
Member: for trusted staff who review businesses and order additional services. Cannot manage team members.
Admin: full access, including managing users and their roles. Reserve for designated administrators.
If you cannot see Team or another setting, ask your Admin to check your role. Team settings apply to production access even when the dashboard environment is Sandbox.
The current invitation screen shows all four roles and the read-only sandbox restriction.
Set up single sign-on (SSO)
Middesk supports SSO so your team can sign in using your institution’s identity provider.
Sign in to your institution’s Middesk dashboard as an Admin and open Settings → Team.
Open the Single Sign On / SSO tab or section and select Configure.
Choose your identity provider and follow the guided setup with your IT administrator. Middesk supports providers such as Microsoft, Okta, and Google, as well as custom SAML or OpenID Connect connections.
Follow Middesk’s SSO setup guide to complete the provider-specific configuration. Ensure each staff member has been invited to your Middesk account with the appropriate role.
To sign in, select Sign in with SSO on the Middesk sign-in page, enter your work email address, and authenticate through your institution’s identity provider.
If the SSO tab is missing, contact your Glide DPM to coordinate enablement with Middesk.
Order additional checks
Use extra checks when you need a fresh KYB report after a business change, more detail about a risk flag, Secretary of State documents, or due diligence for another business relationship. You can order checks for a business that has no Glide application.
Select Place order.
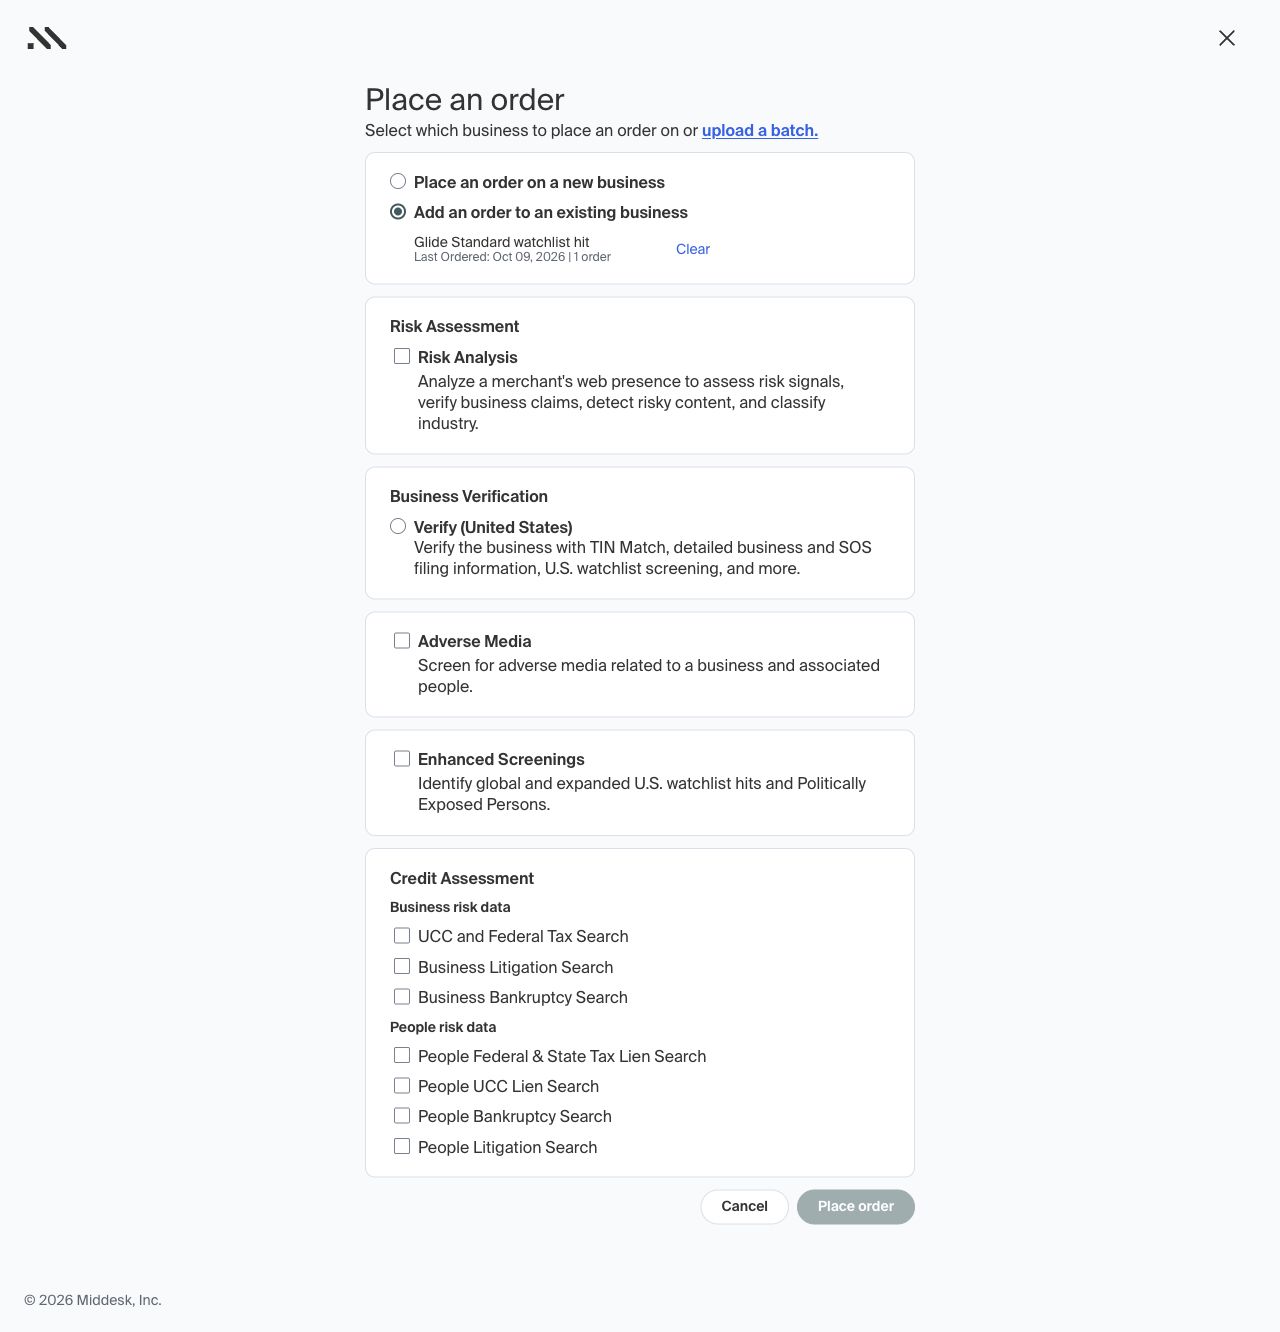
Choose Add an order to an existing business and confirm the business, or Place an order on a new business and provide its details.
Select the checks your institution needs. These can include Verify, Risk Analysis, Adverse Media, Enhanced Screenings, and business or people lien, litigation, and bankruptcy searches.
Review the selected services against your institution’s executed order form or KYB services addendum, then place the order. Review its results when processing finishes.
The Business Verification & Risk Services guide is the full service catalog.
Glide’s Rerun KYB remains available for application-level rechecks. A standalone Middesk order does not itself create a Glide application, edit membership information, or update your core.
Sandbox example: add services to an existing business or start a new business order.
Test cases & Sandbox configurations
Sandbox uses simulated data and does not perform real compliance checks. Keep training and test orders in Sandbox.
Select Sandbox, then open Settings → Sandbox Configuration.
Select Create configuration (called Create new example in Middesk’s documentation).
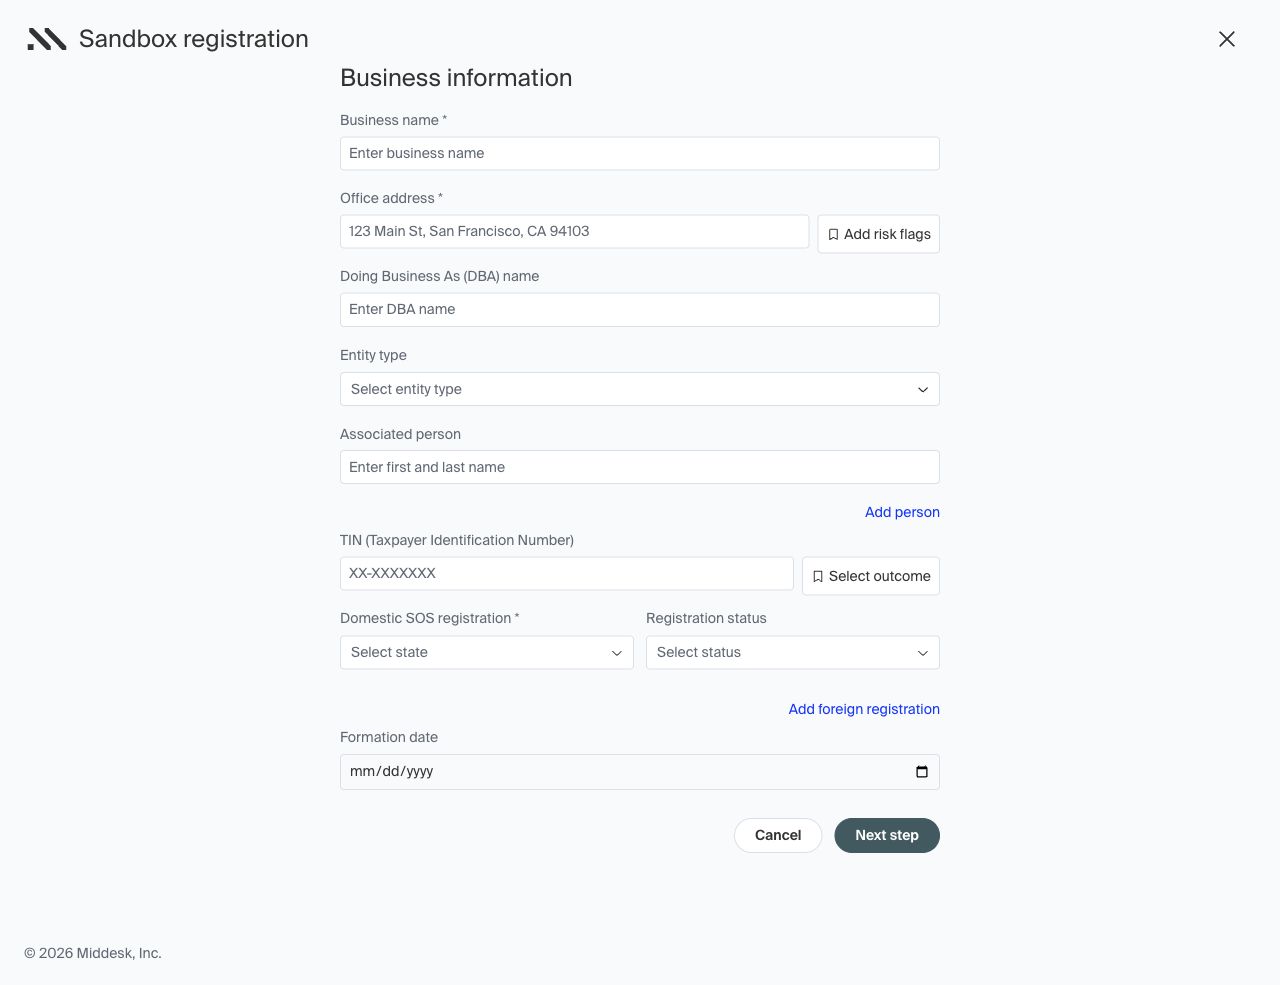
Enter fictional business details and configure the available outcomes, such as address risk flags, TIN results, and registration status. Continue through the setup and save your reusable example.
Use Place order in sandbox to select the example and review the simulated results. Practice both a happy path and a watchlist-review scenario.
Sandbox configuration: business details and selectable verification outcomes.
Screening settings and other dashboard tools
Settings → Screenings → Watchlists shows the lists screened, people included, date-of-birth tolerance, and minimum name-match score. Matching can include similar names; the score is not the probability that a person or business is sanctioned.
Keep your institution’s agreed configuration. Have your compliance owner review any requested change with your Glide team.
Assignments: use Assigned to on a business to route review. Admins can manage the default reviewer in Team settings.
Batch orders: access Settings → Batch orders or upload a batch from Place order. Coordinate the file format, services, and fees with your DPM and validate in sandbox before a live batch.
Business exports: use the export option in Settings when your role and account allow it.
Monitoring and policies: Middesk offers optional monitoring and decision policies. Confirm enablement, pricing, and how your FI will use the results before relying on these features. A Middesk decision or policy does not establish that Glide will approve an application.
Common questions
Do we need a separate login? Each staff member needs their own Middesk account. Once your institution configures SSO, select Sign in with SSO and use your work email and identity provider. Otherwise, use your individual Middesk login when prompted. See Set up single sign-on (SSO) above.
Why is Open in Middesk missing?
Your FI needs dashboard access and the Glide integration enabled. Older applications created before the switch to the FI’s dedicated account may not have an accessible record there. Contact your Glide team if the button is missing on a new application after enablement.
Related guides
Business Verification & Risk Services — available services, access, and billing.
Fraud & KYB Checks — background on the checks in Glide. For dedicated-account dashboard configuration, use this overview and your FI’s current settings.