Creating an application on the dashboard
Last updated: July 24, 2026
How to Create an Application from the Dashboard
This guide will take you step by step on creating a application from the staff dashboard.
Before creating an application, ensure that your branch is selected on the top left. This will attribute the application correctly for analytics purposes.
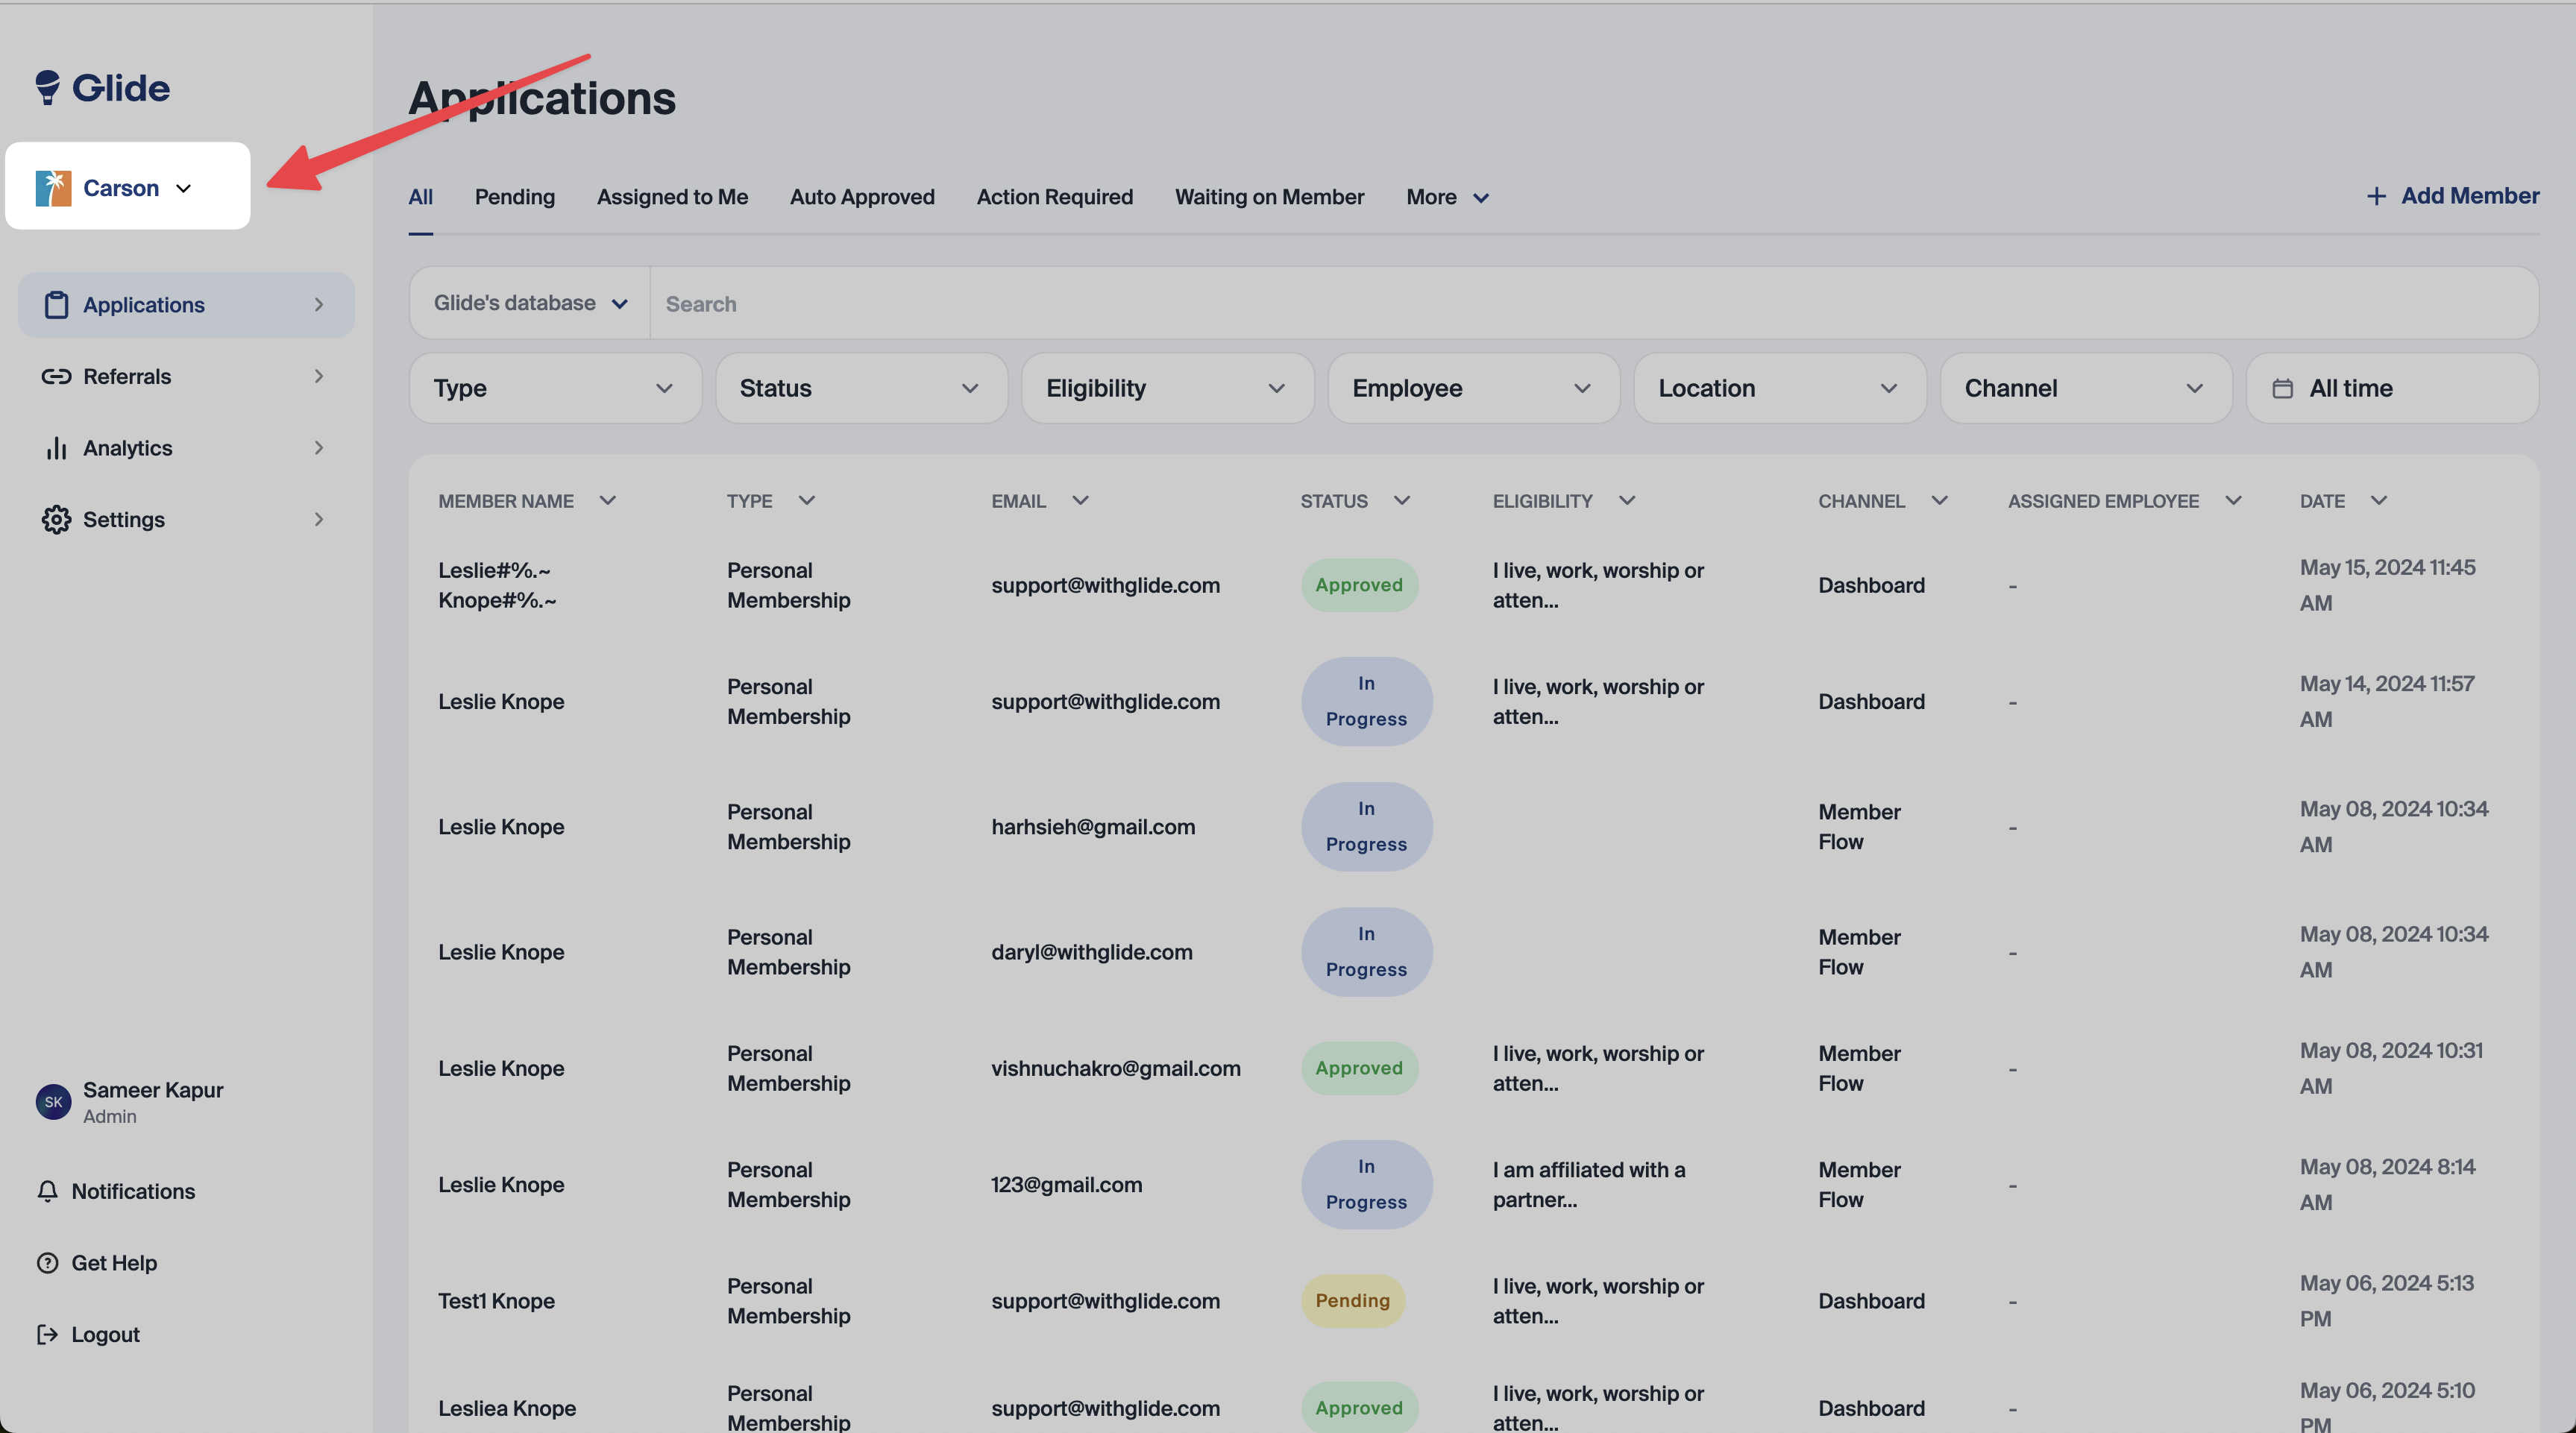
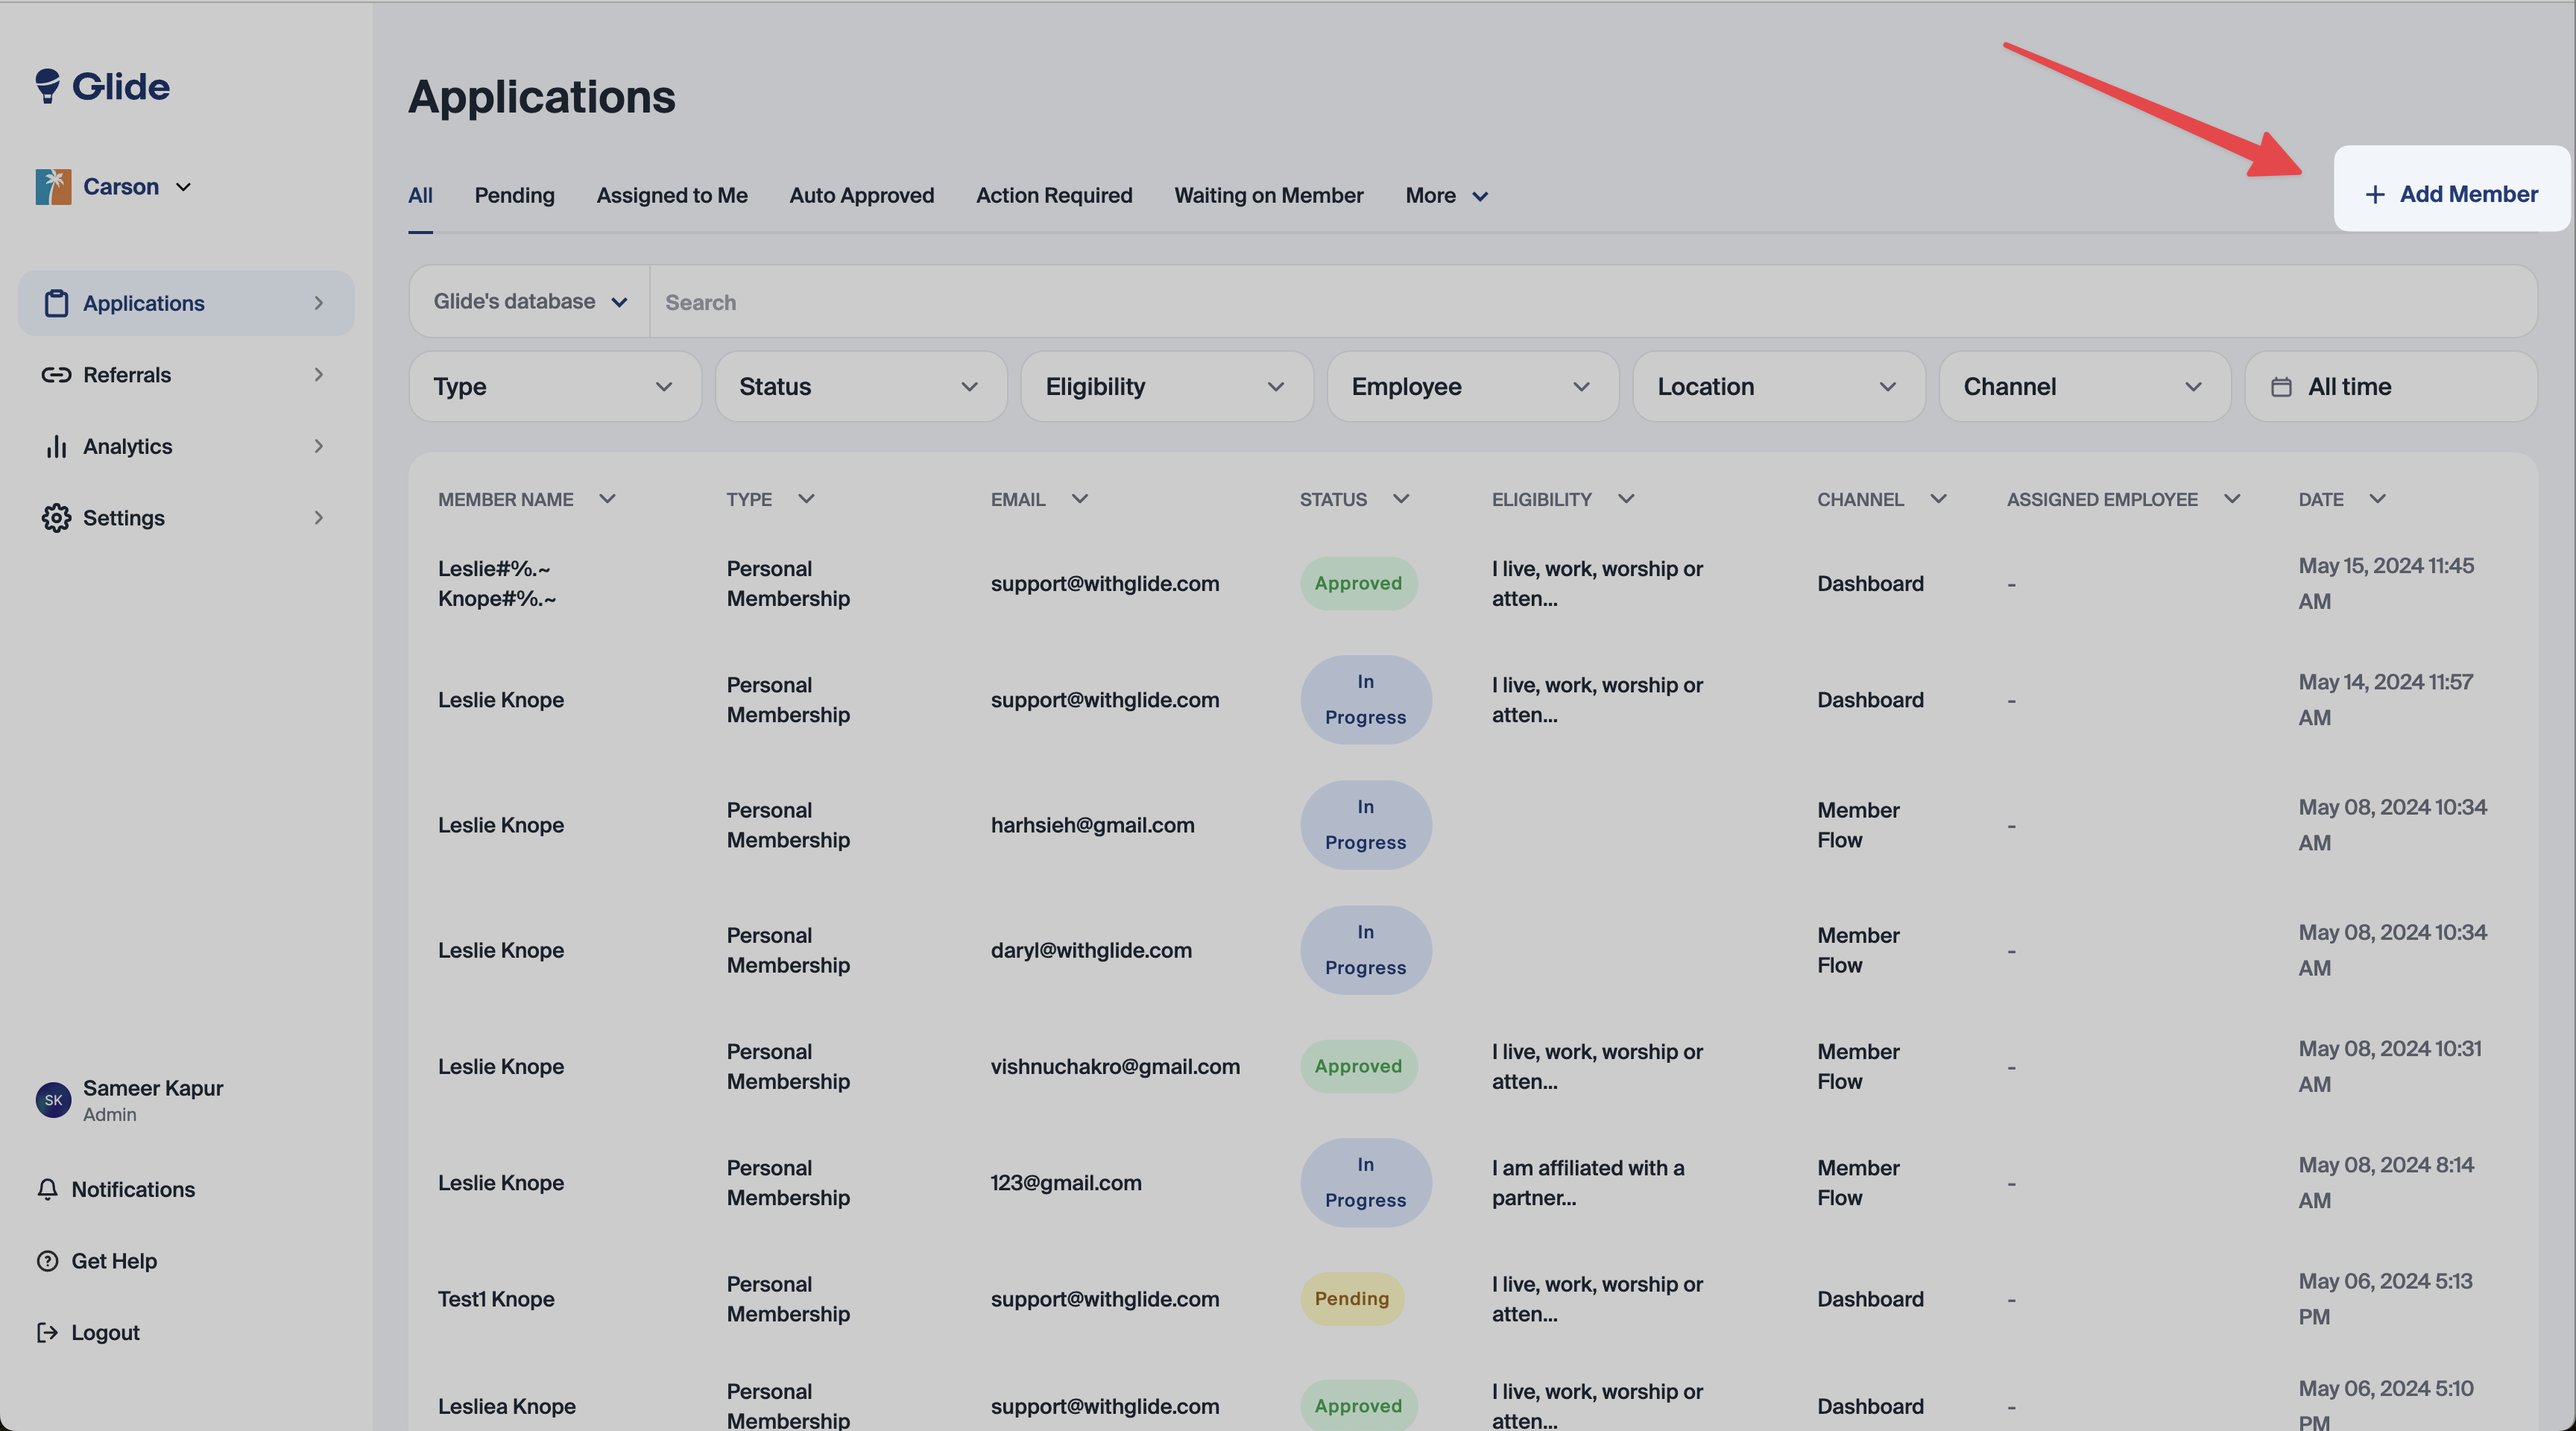
Start by clicking the “+Add Member” button on the top right of the applications page.
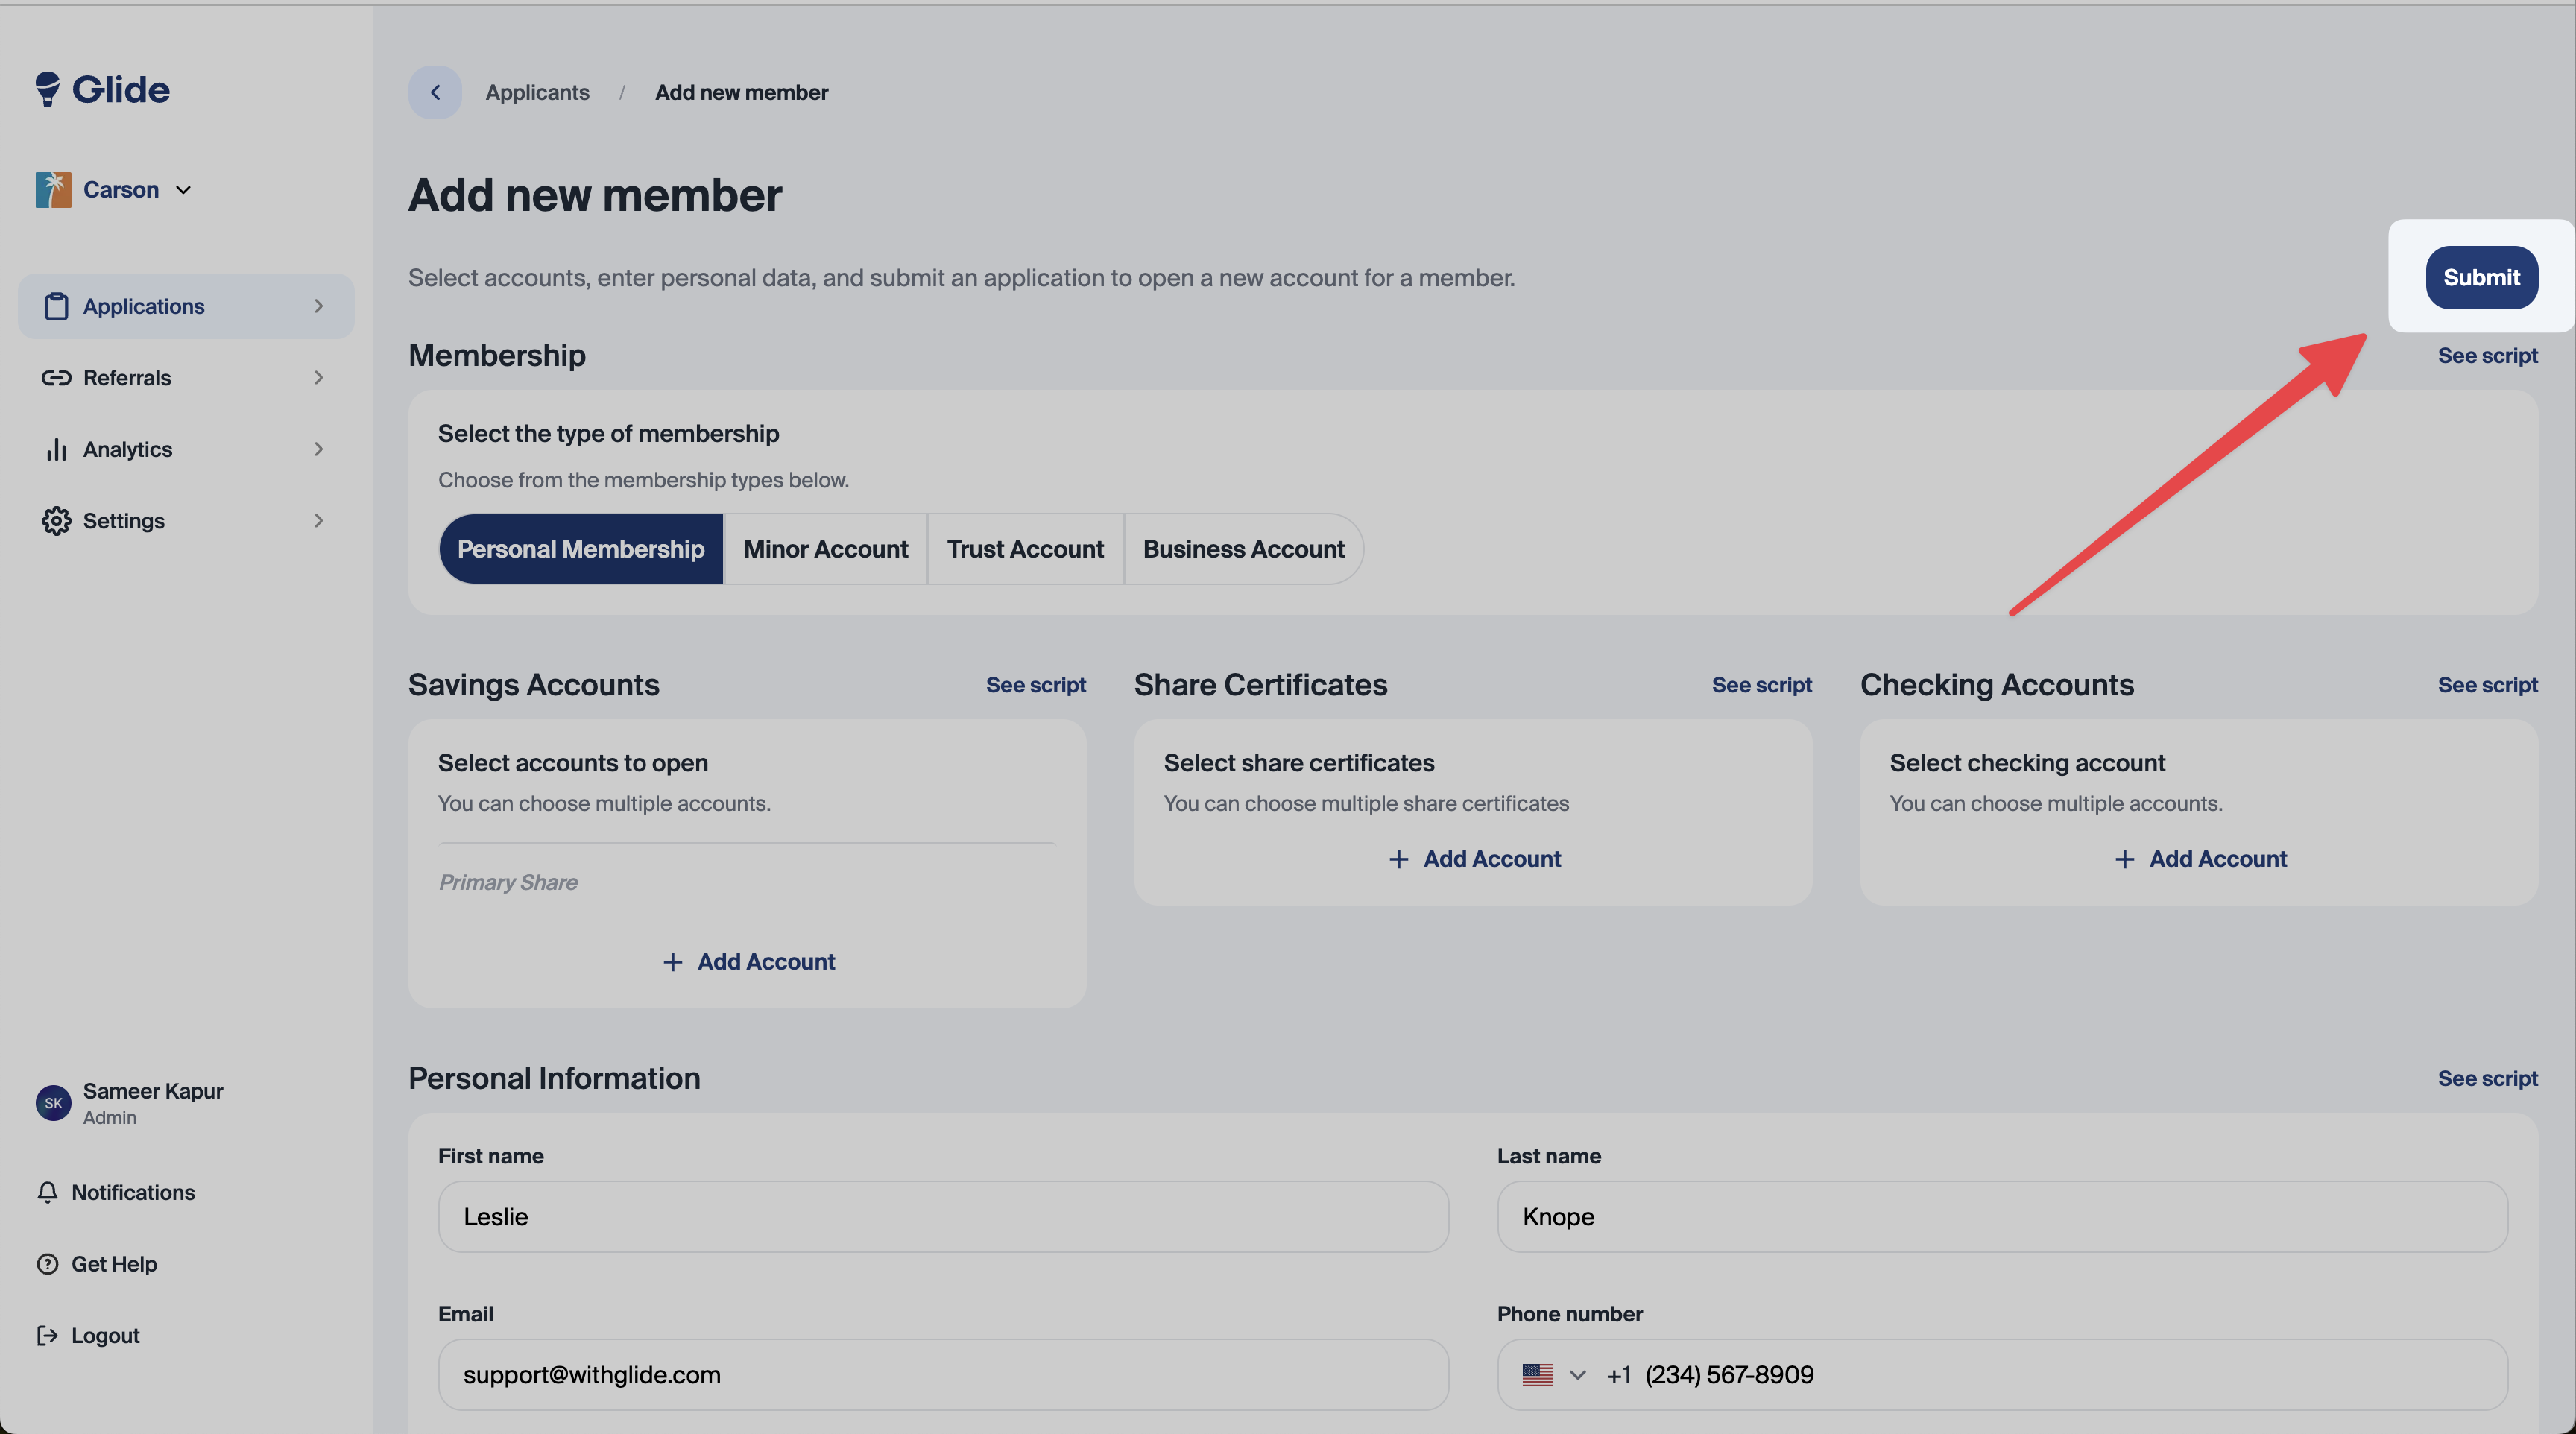
Start by choosing “Personal membership” (1)
Then, select the Savings Accounts (2), Share Certificates (3), or Checking Accounts (4) you’d like to open.
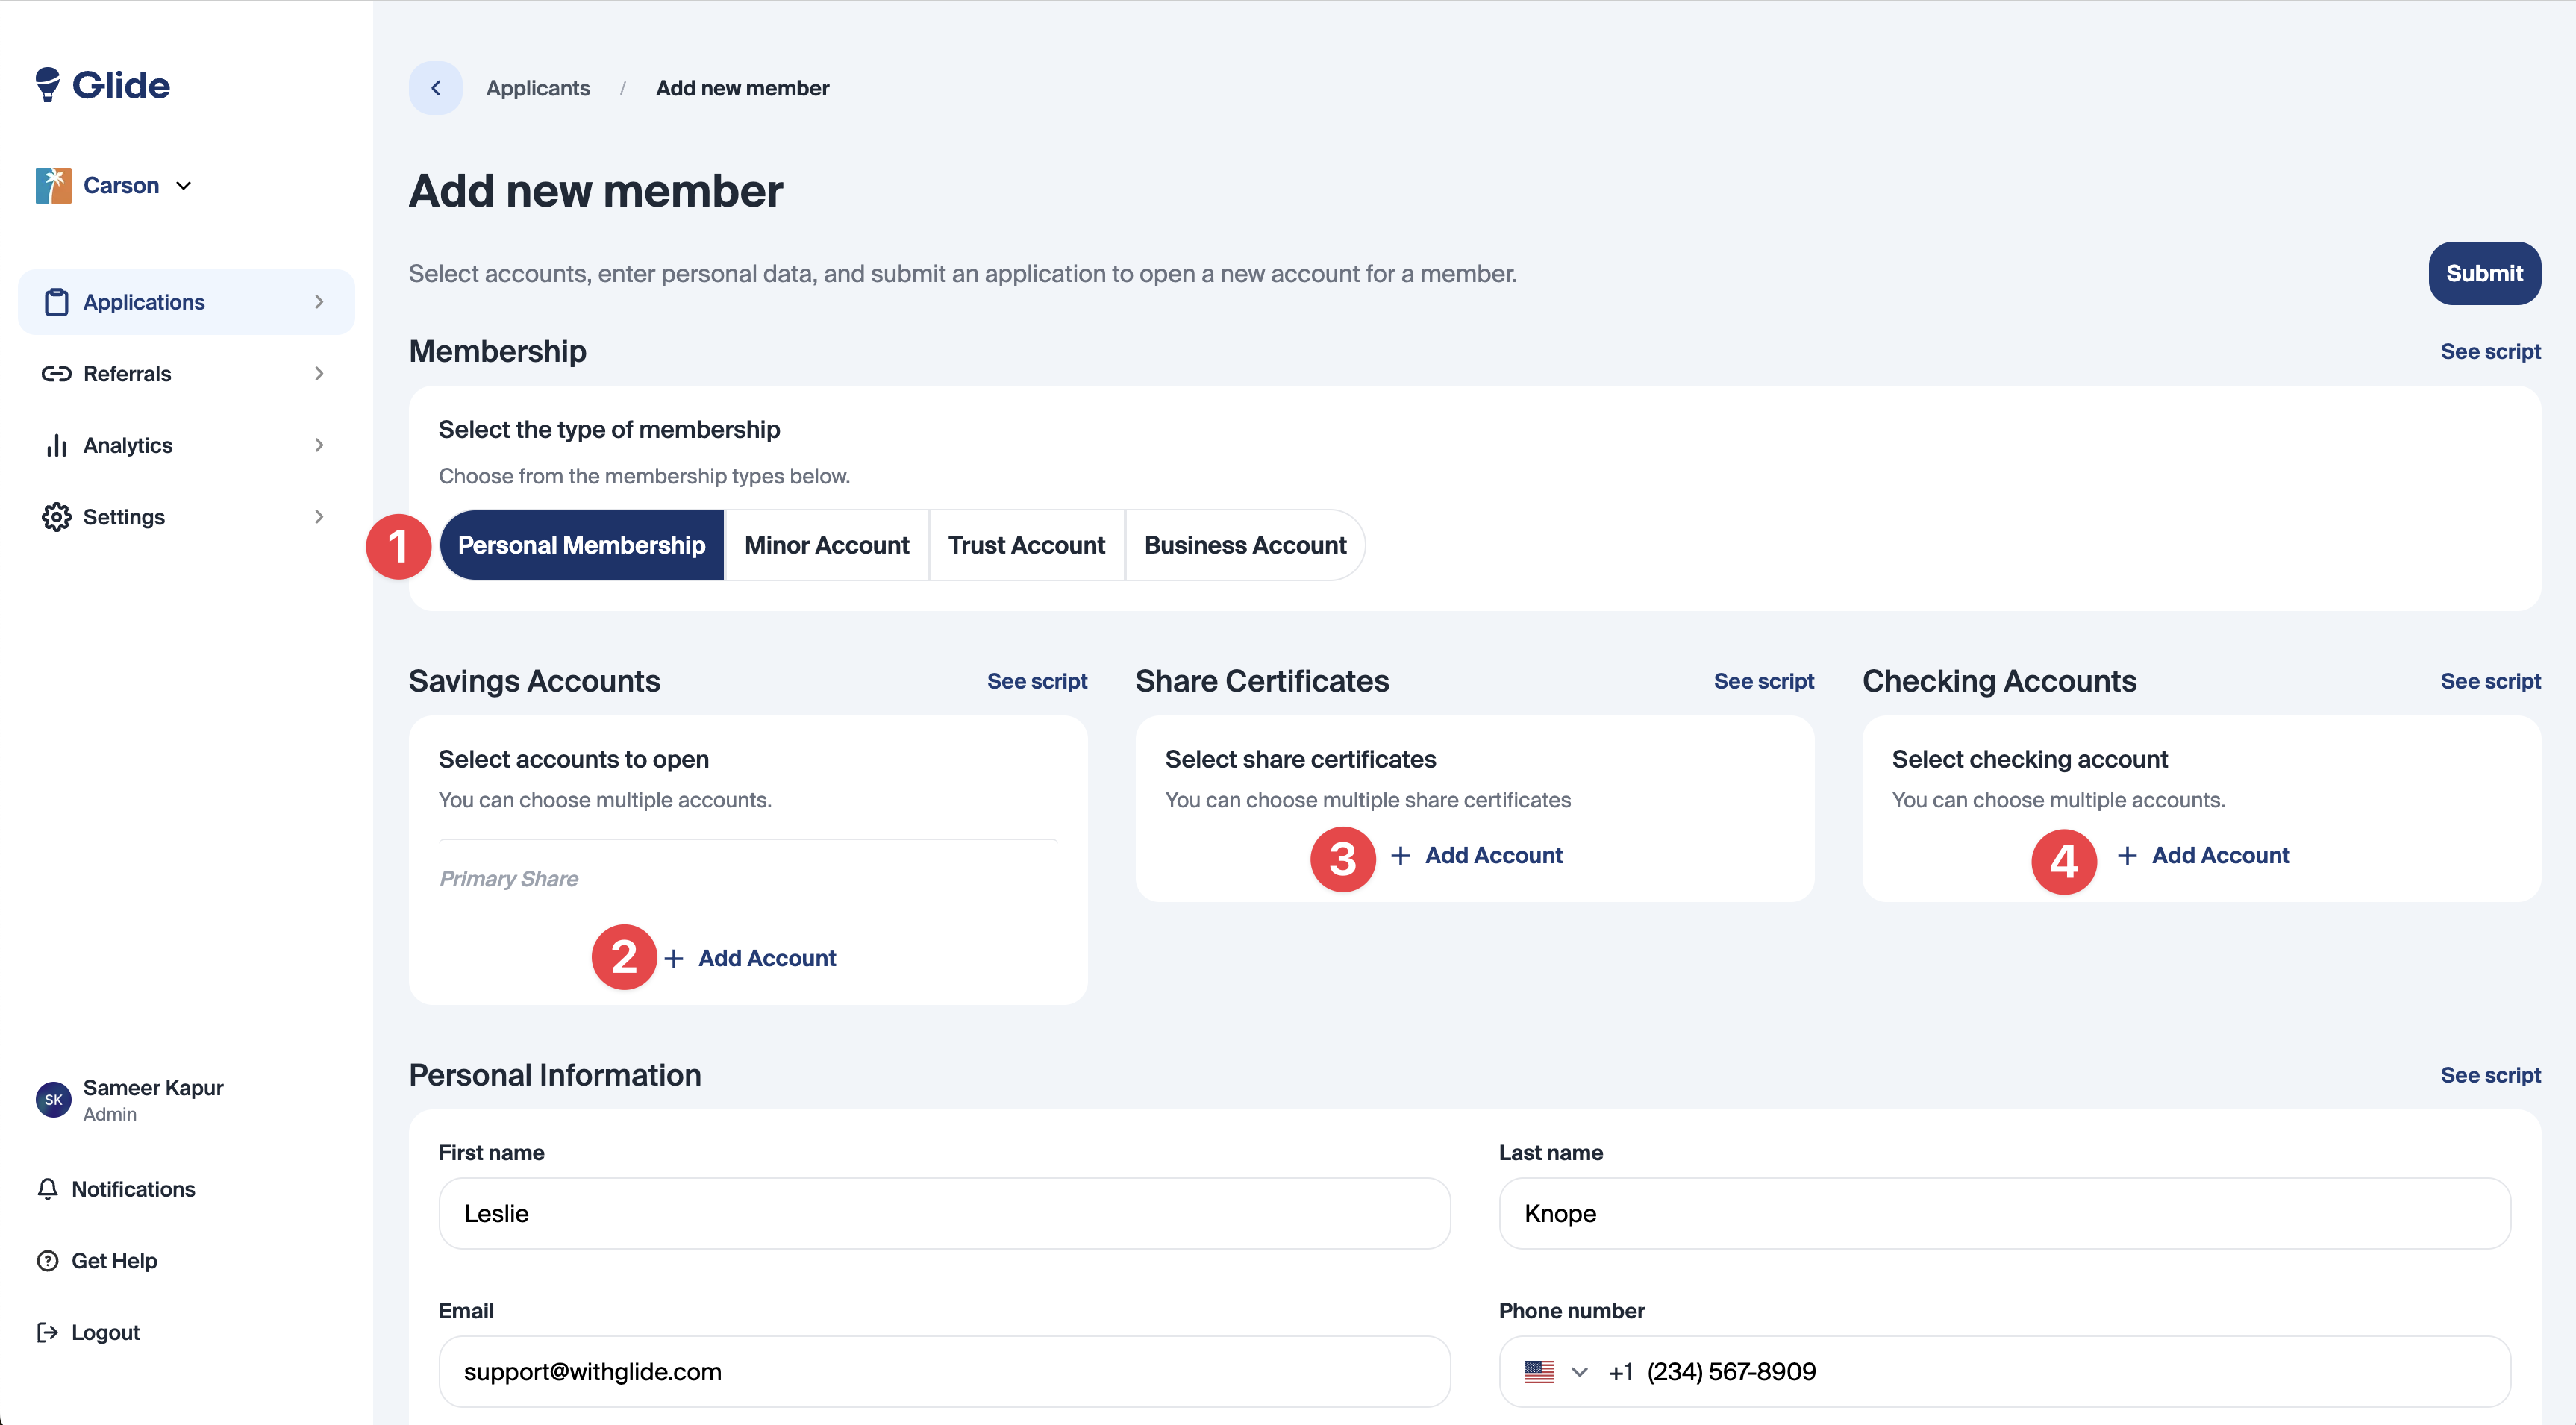
In the Personal Information (5) section, enter the members First name, Last name, Email, and Phone number.
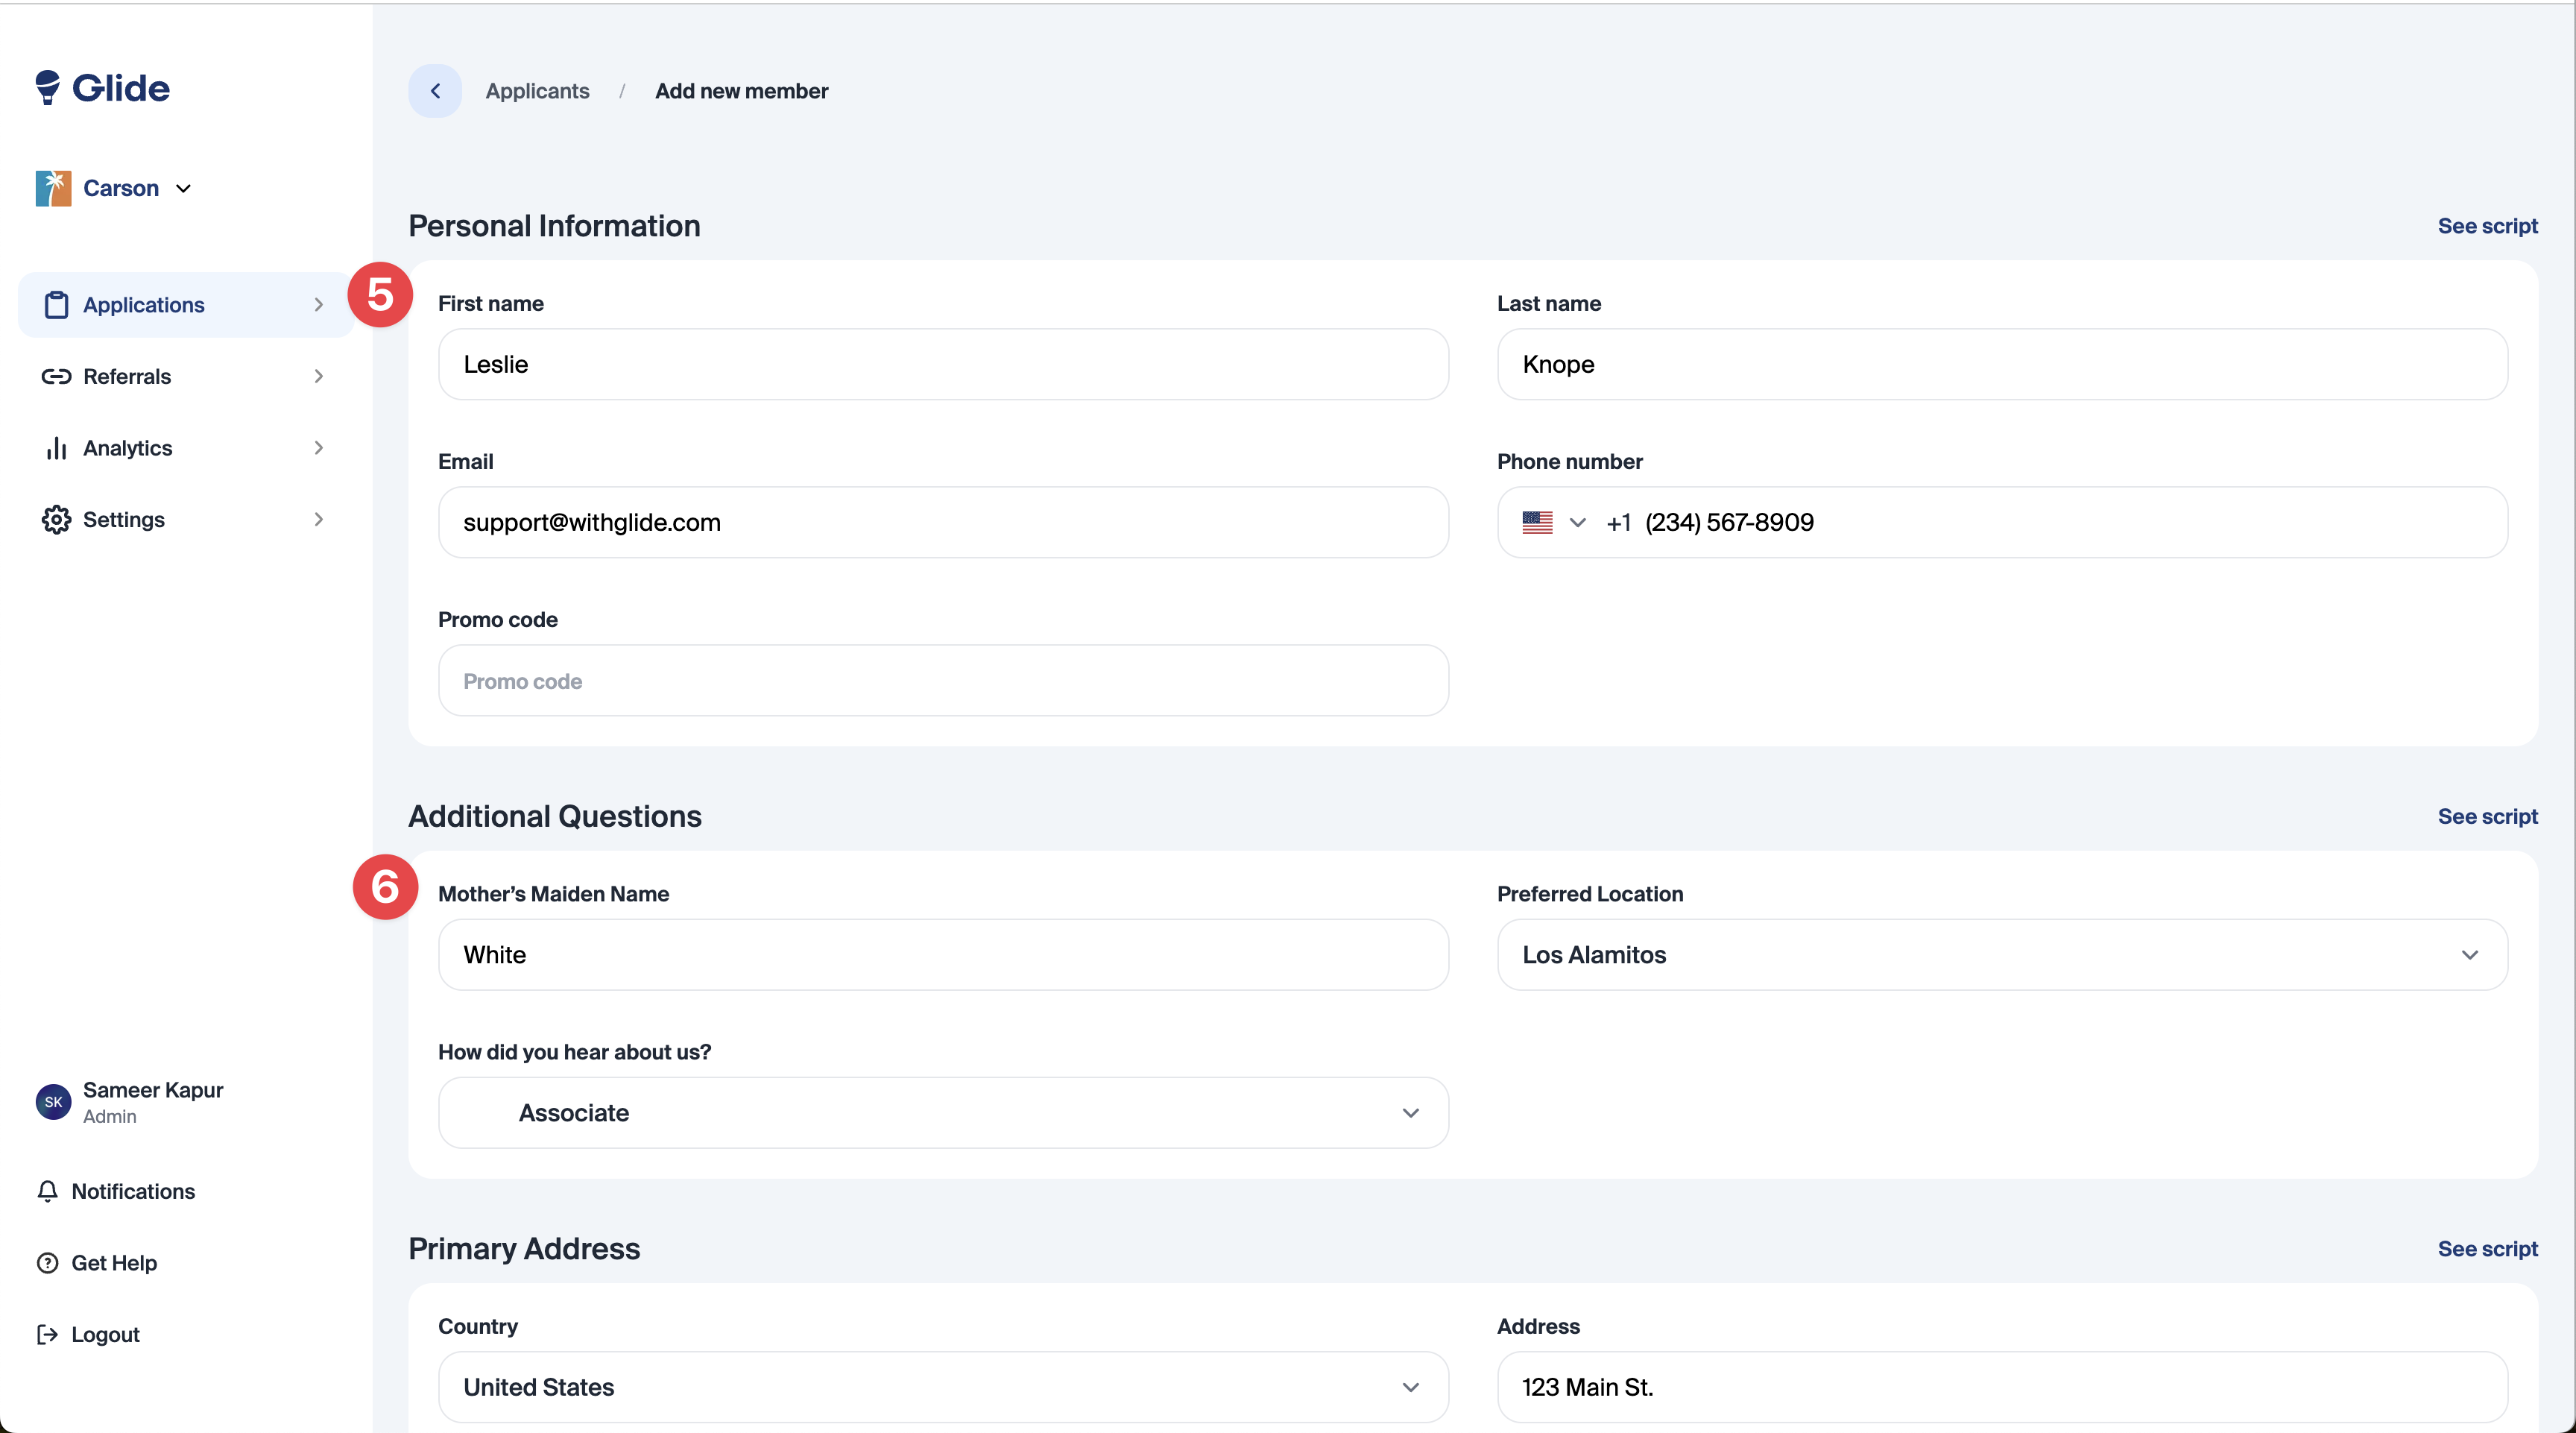
Complete the additional questions (6) if required by your credit union.
Enter the applicants Primary Address (7). If they have a separate mailing address, unselect the toggle for “Mailing address is same as primary address” and enter mailing address.
Next, in the Legal Information (8) section, enter the Date of Birth and the SSN/ITIN.
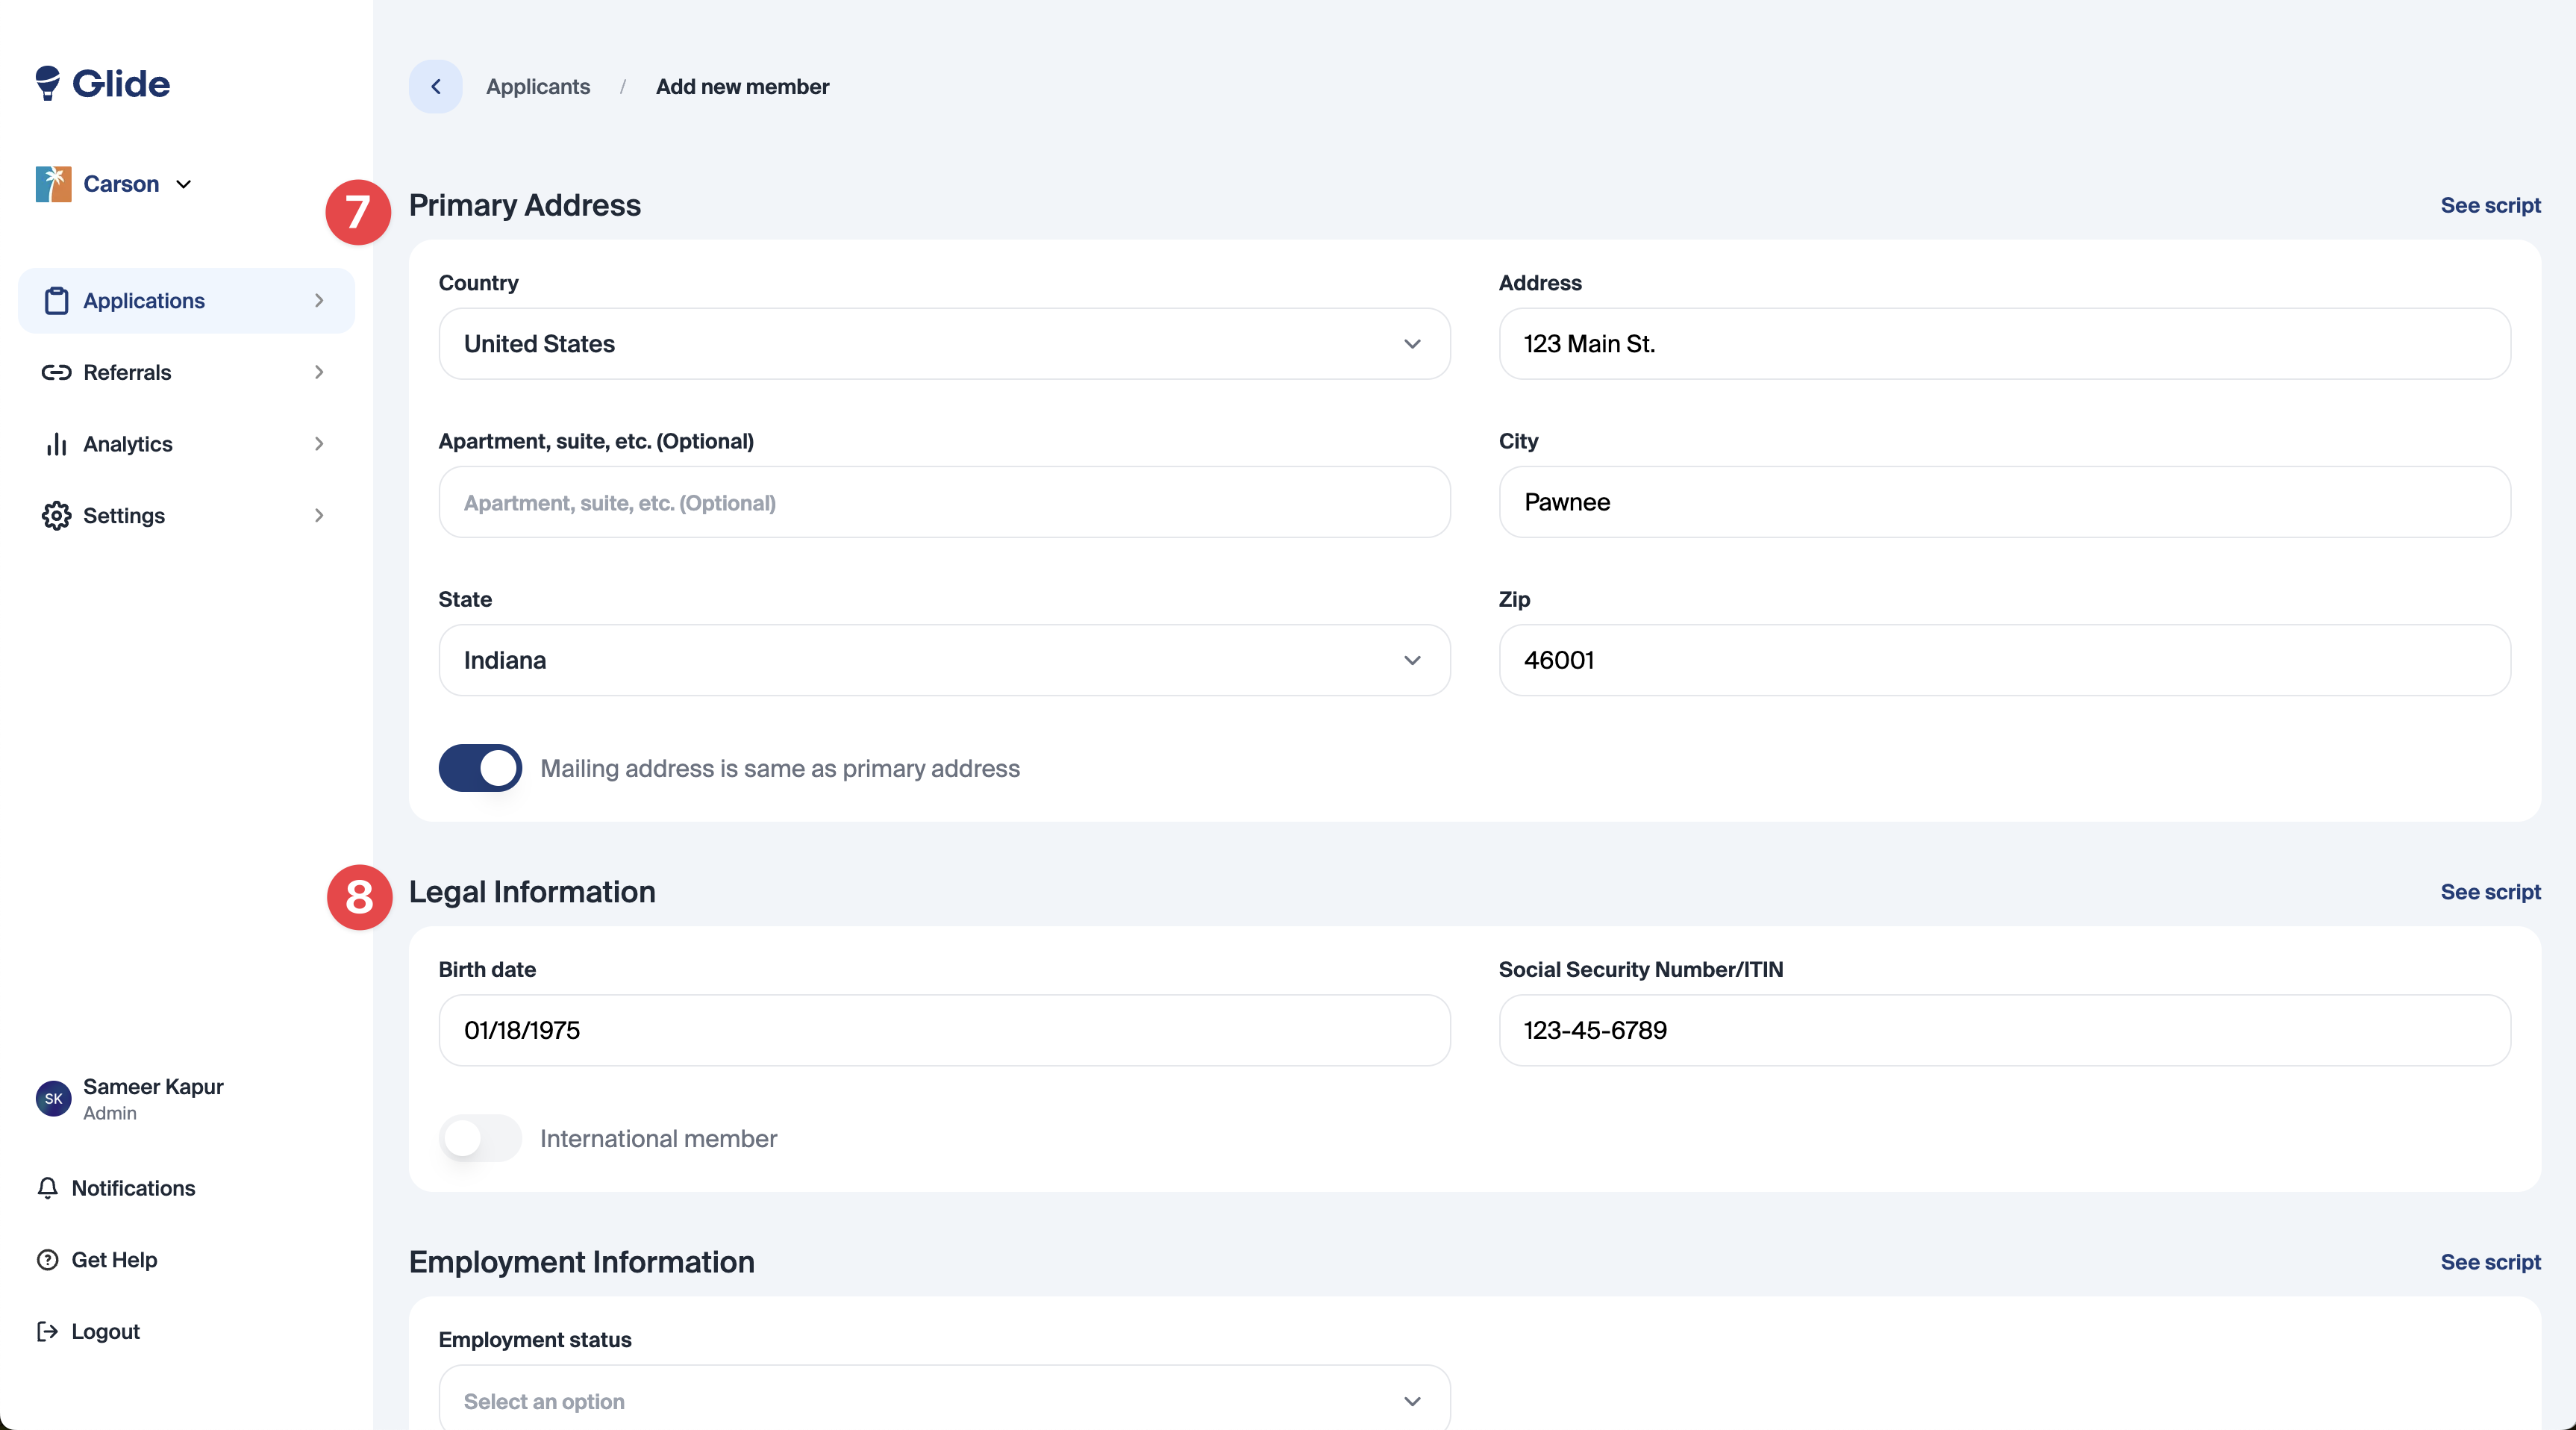
Enter in the Employment Information (9) and Eligibility Information (10). These fields are required for submission.
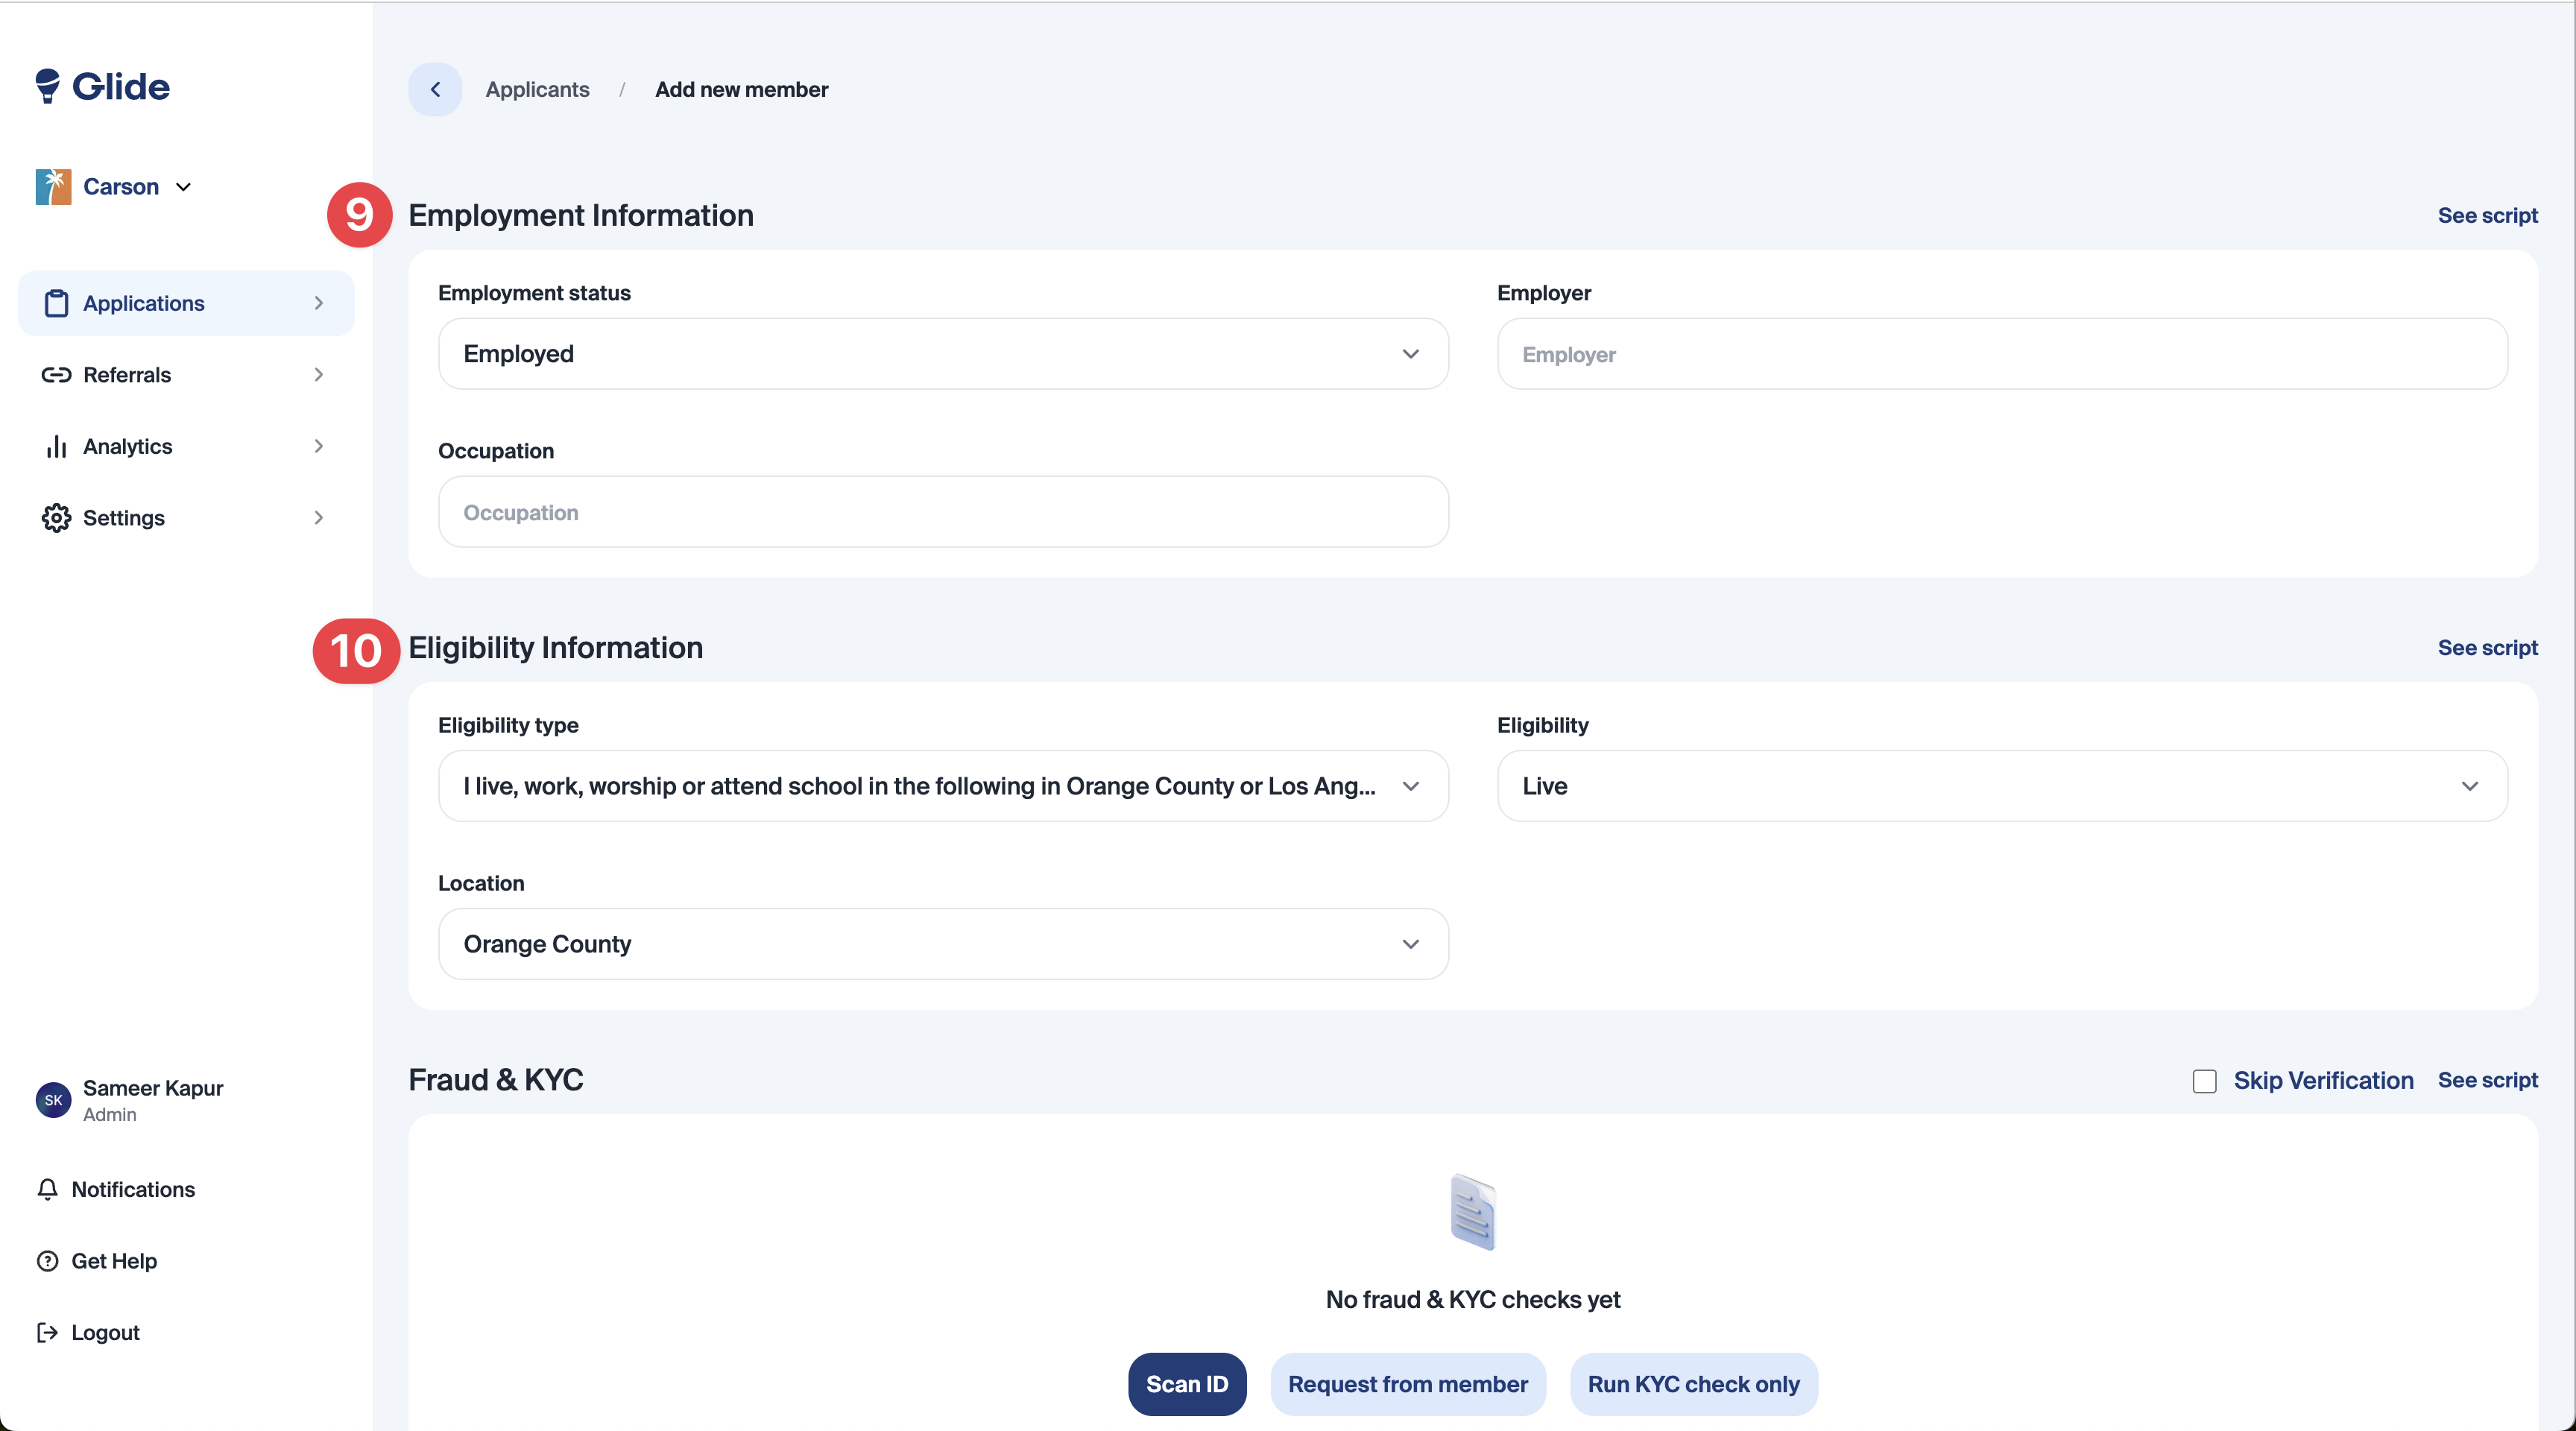
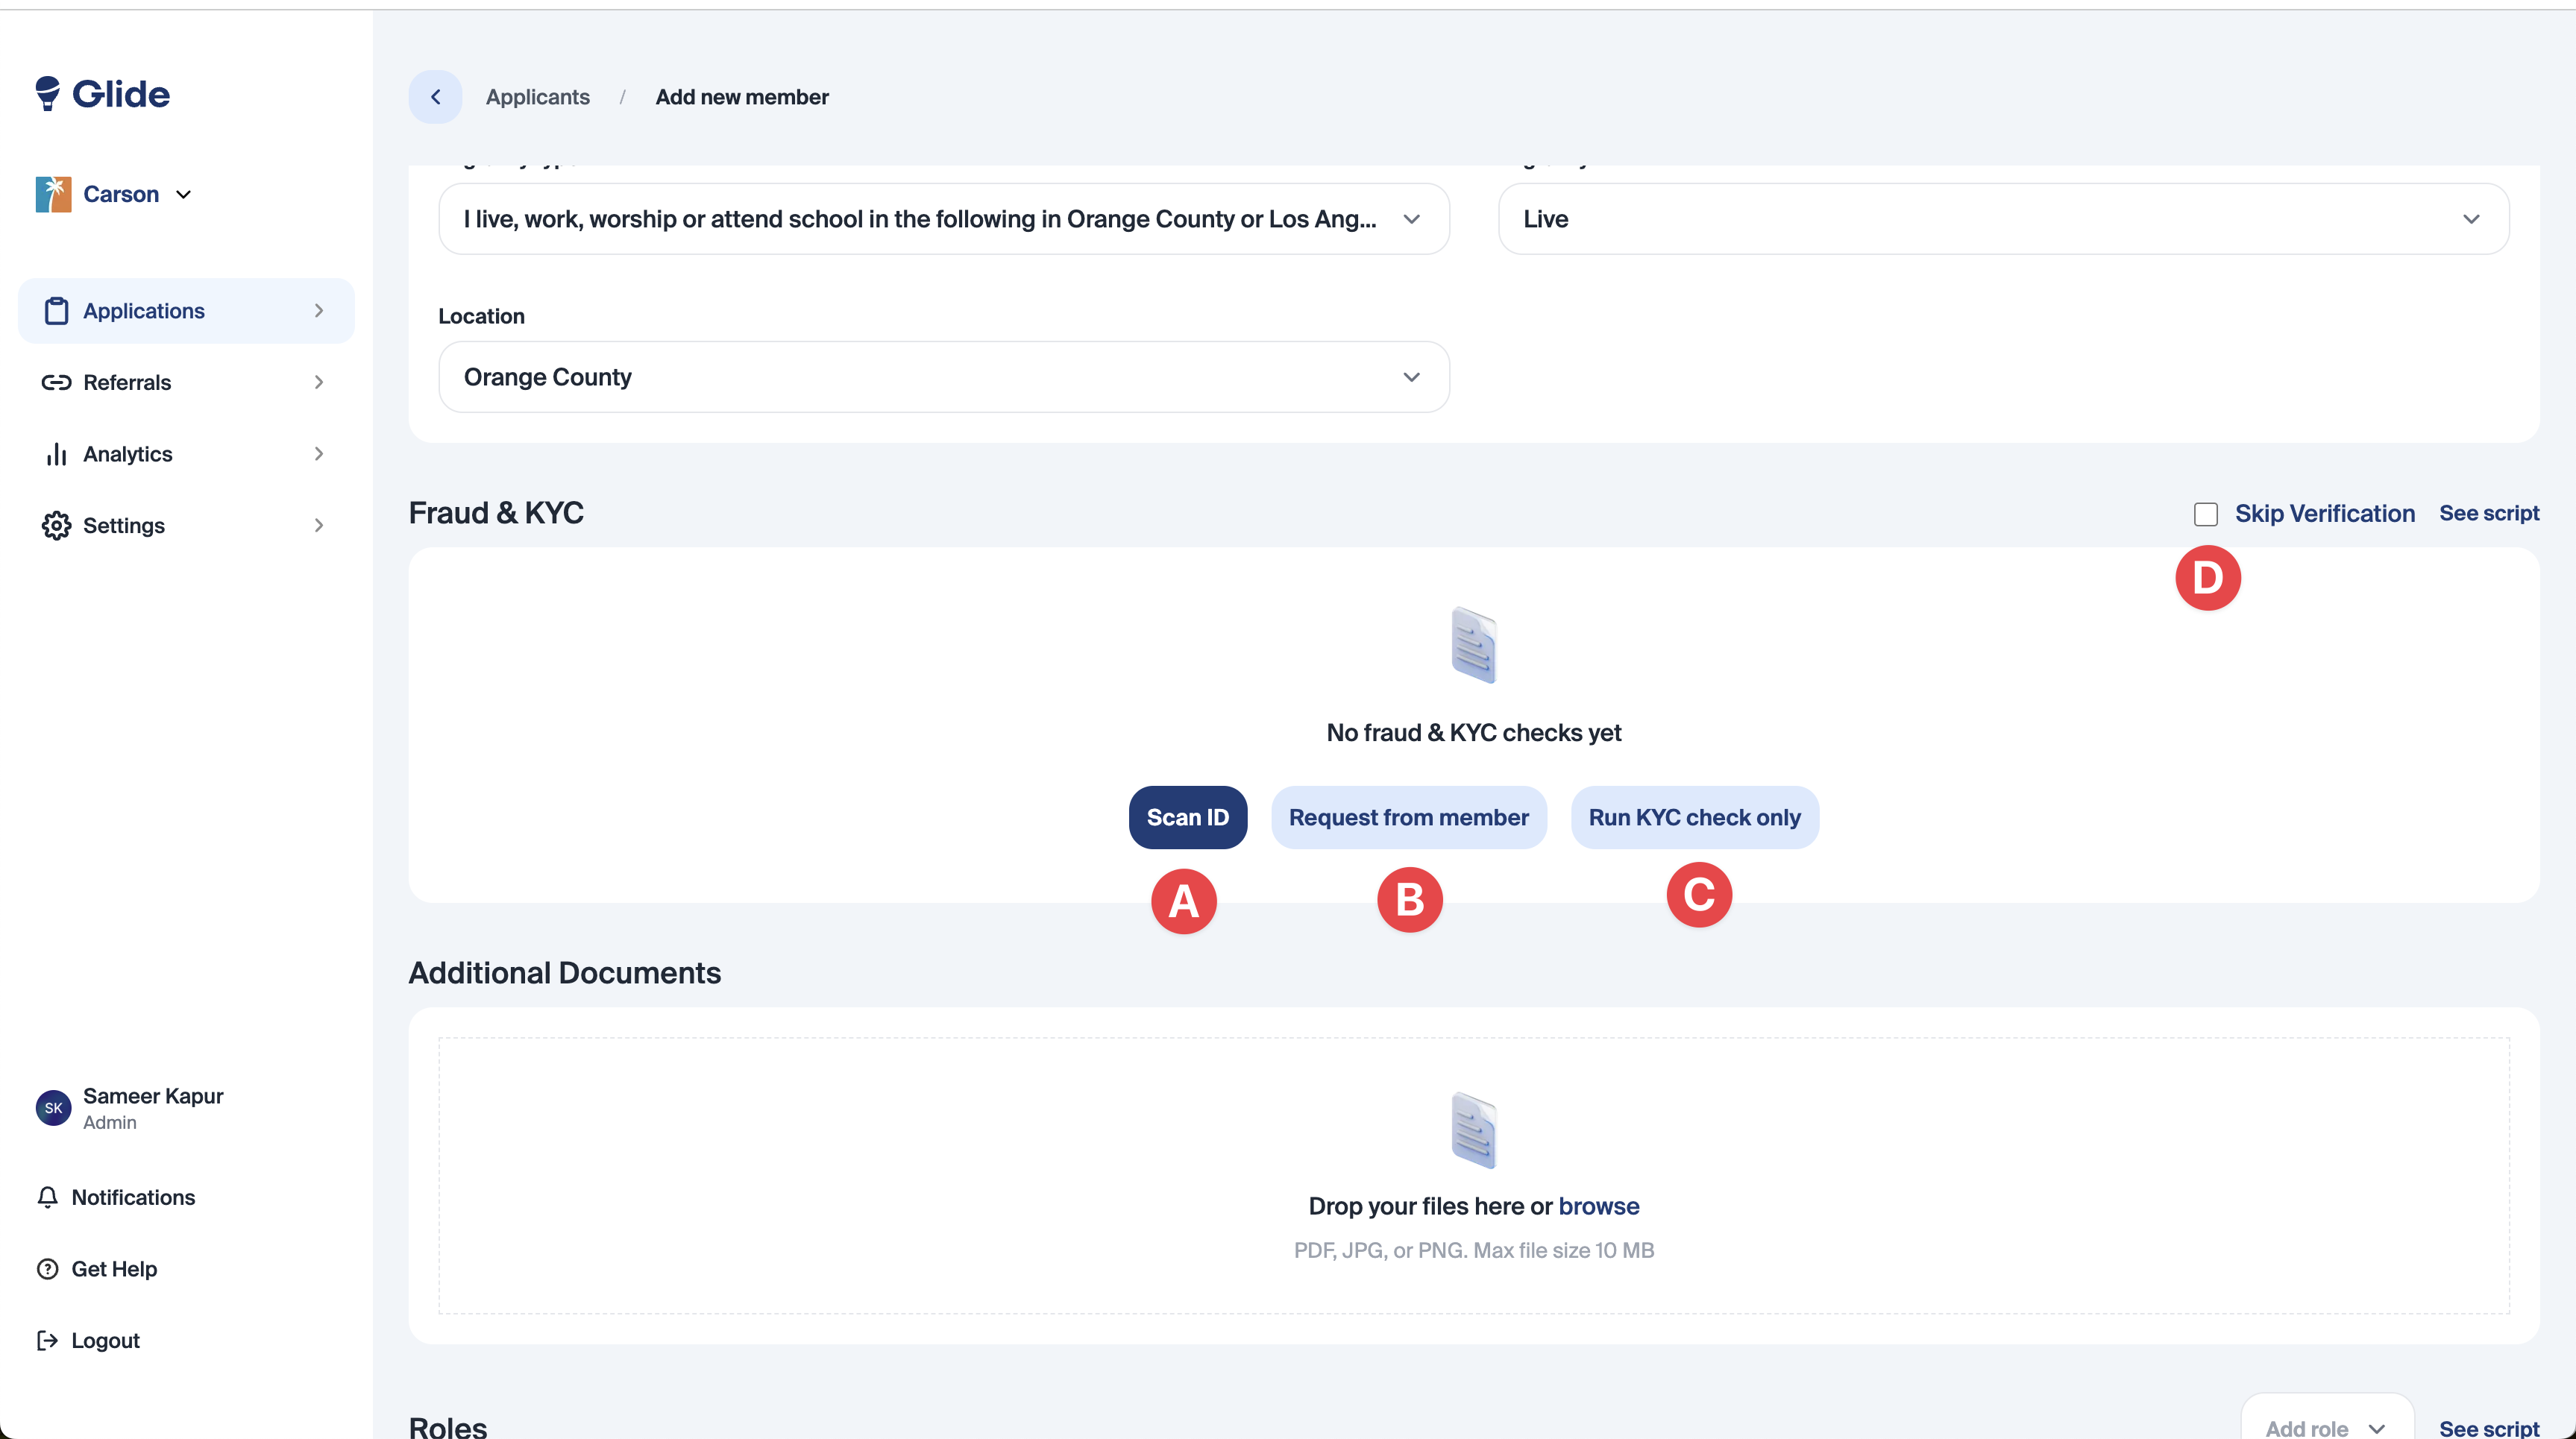
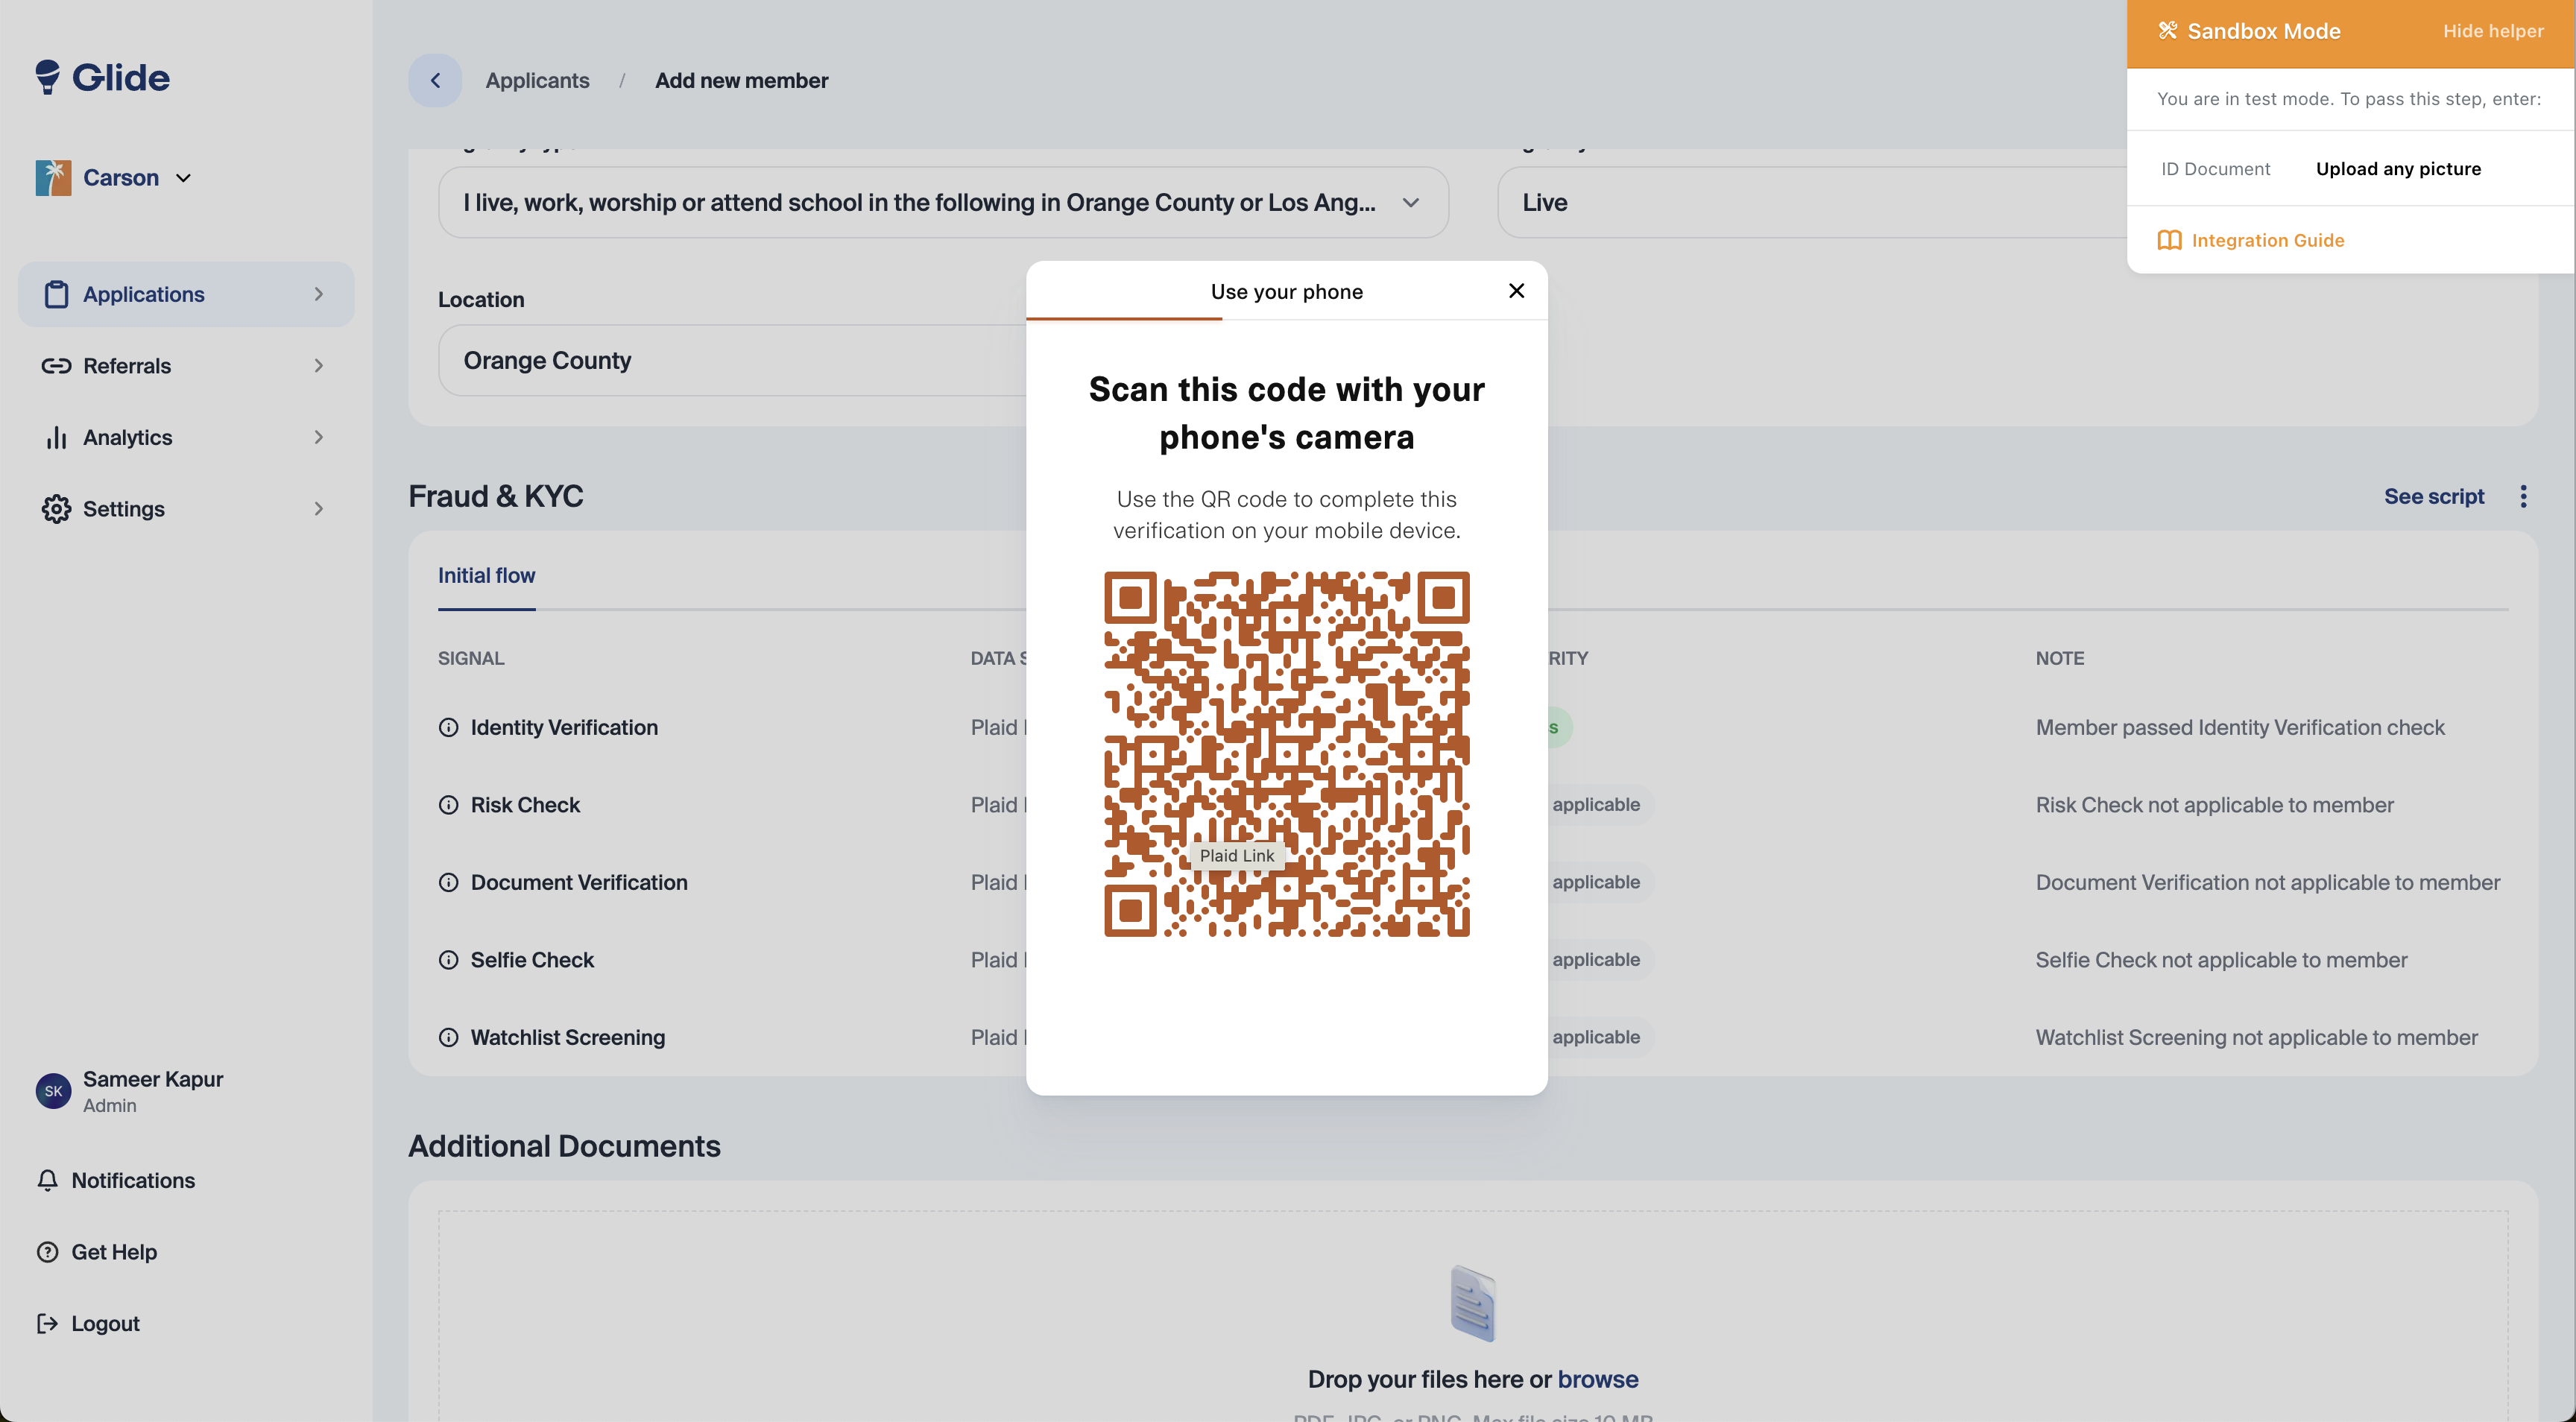
In the Fraud & KYC section, there are four options: Scan ID, Request from member, Run KYC check only, and Skip Verification.
Scan ID:
Most Common. Select this option when you are in person with the member and have their ID on hand. Clicking “Scan ID” will bring up a QR Code which will allow you or the member to scan and then capture a photo of their ID.
Request from member:
Useful for call centers where you are not in person with the member, but you would still like to capture a photo of their ID. This button will send an email to the member with a direct link to scan their ID.
Run KYC check only:
This this useful if you have already collected a photo of their ID (perhaps via a growth team event) and would just like to run the identity verification, risk, and OFAC watchlist checks without scanning a photo of their ID. If you already have a photo of their ID, upload it in the “Additional Documents” box below.
Skip Verification:
Not recommended to use. This option skips all fraud & checks, however ChexSystems (if enabled system wise) and OFAC watchlists will still run. This may used for minors.
If Scan ID is selected, a QR code, such as the one below, will appear on the screen. This can be scanned by a mobile phone with a camera or a tablet/iPad.
Government-Issued ID (Manual Input)
Manual input of ID information is useful when scanning a physical ID is not possible, or when you'd like to review and edit the ID data captured by Plaid IDV.

To use Manual ID Entry:
After completing the Fraud & KYC section, locate the Government-Issued ID section.
Toggle Manual Input on. The ID fields will appear. The default is off.
Select an ID Type from the dropdown:
Driver's License
State Issued ID
US Passport
Foreign Passport
Other
Fill in the required fields based on the ID type selected:
Driver's License / State Issued ID: ID Number, Issuing State, Issue Date, Expiration Date
US Passport: ID Number, Issue Date, Expiration Date
Foreign Passport / Other: Issuing Country, ID Number, Issue Date, Expiration Date
All fields are required when Manual Input is toggled on.
How it works with Plaid IDV:
If you scan an ID via Plaid first and then toggle Manual Input on, the fields will be pre-filled with the data captured from Plaid — you can then review or edit as needed.
If you enter data manually before scanning with Plaid, the manually entered data will not be overwritten by Plaid.
When Manual Input is active at submission, the manually entered data is what gets sent to the core system.
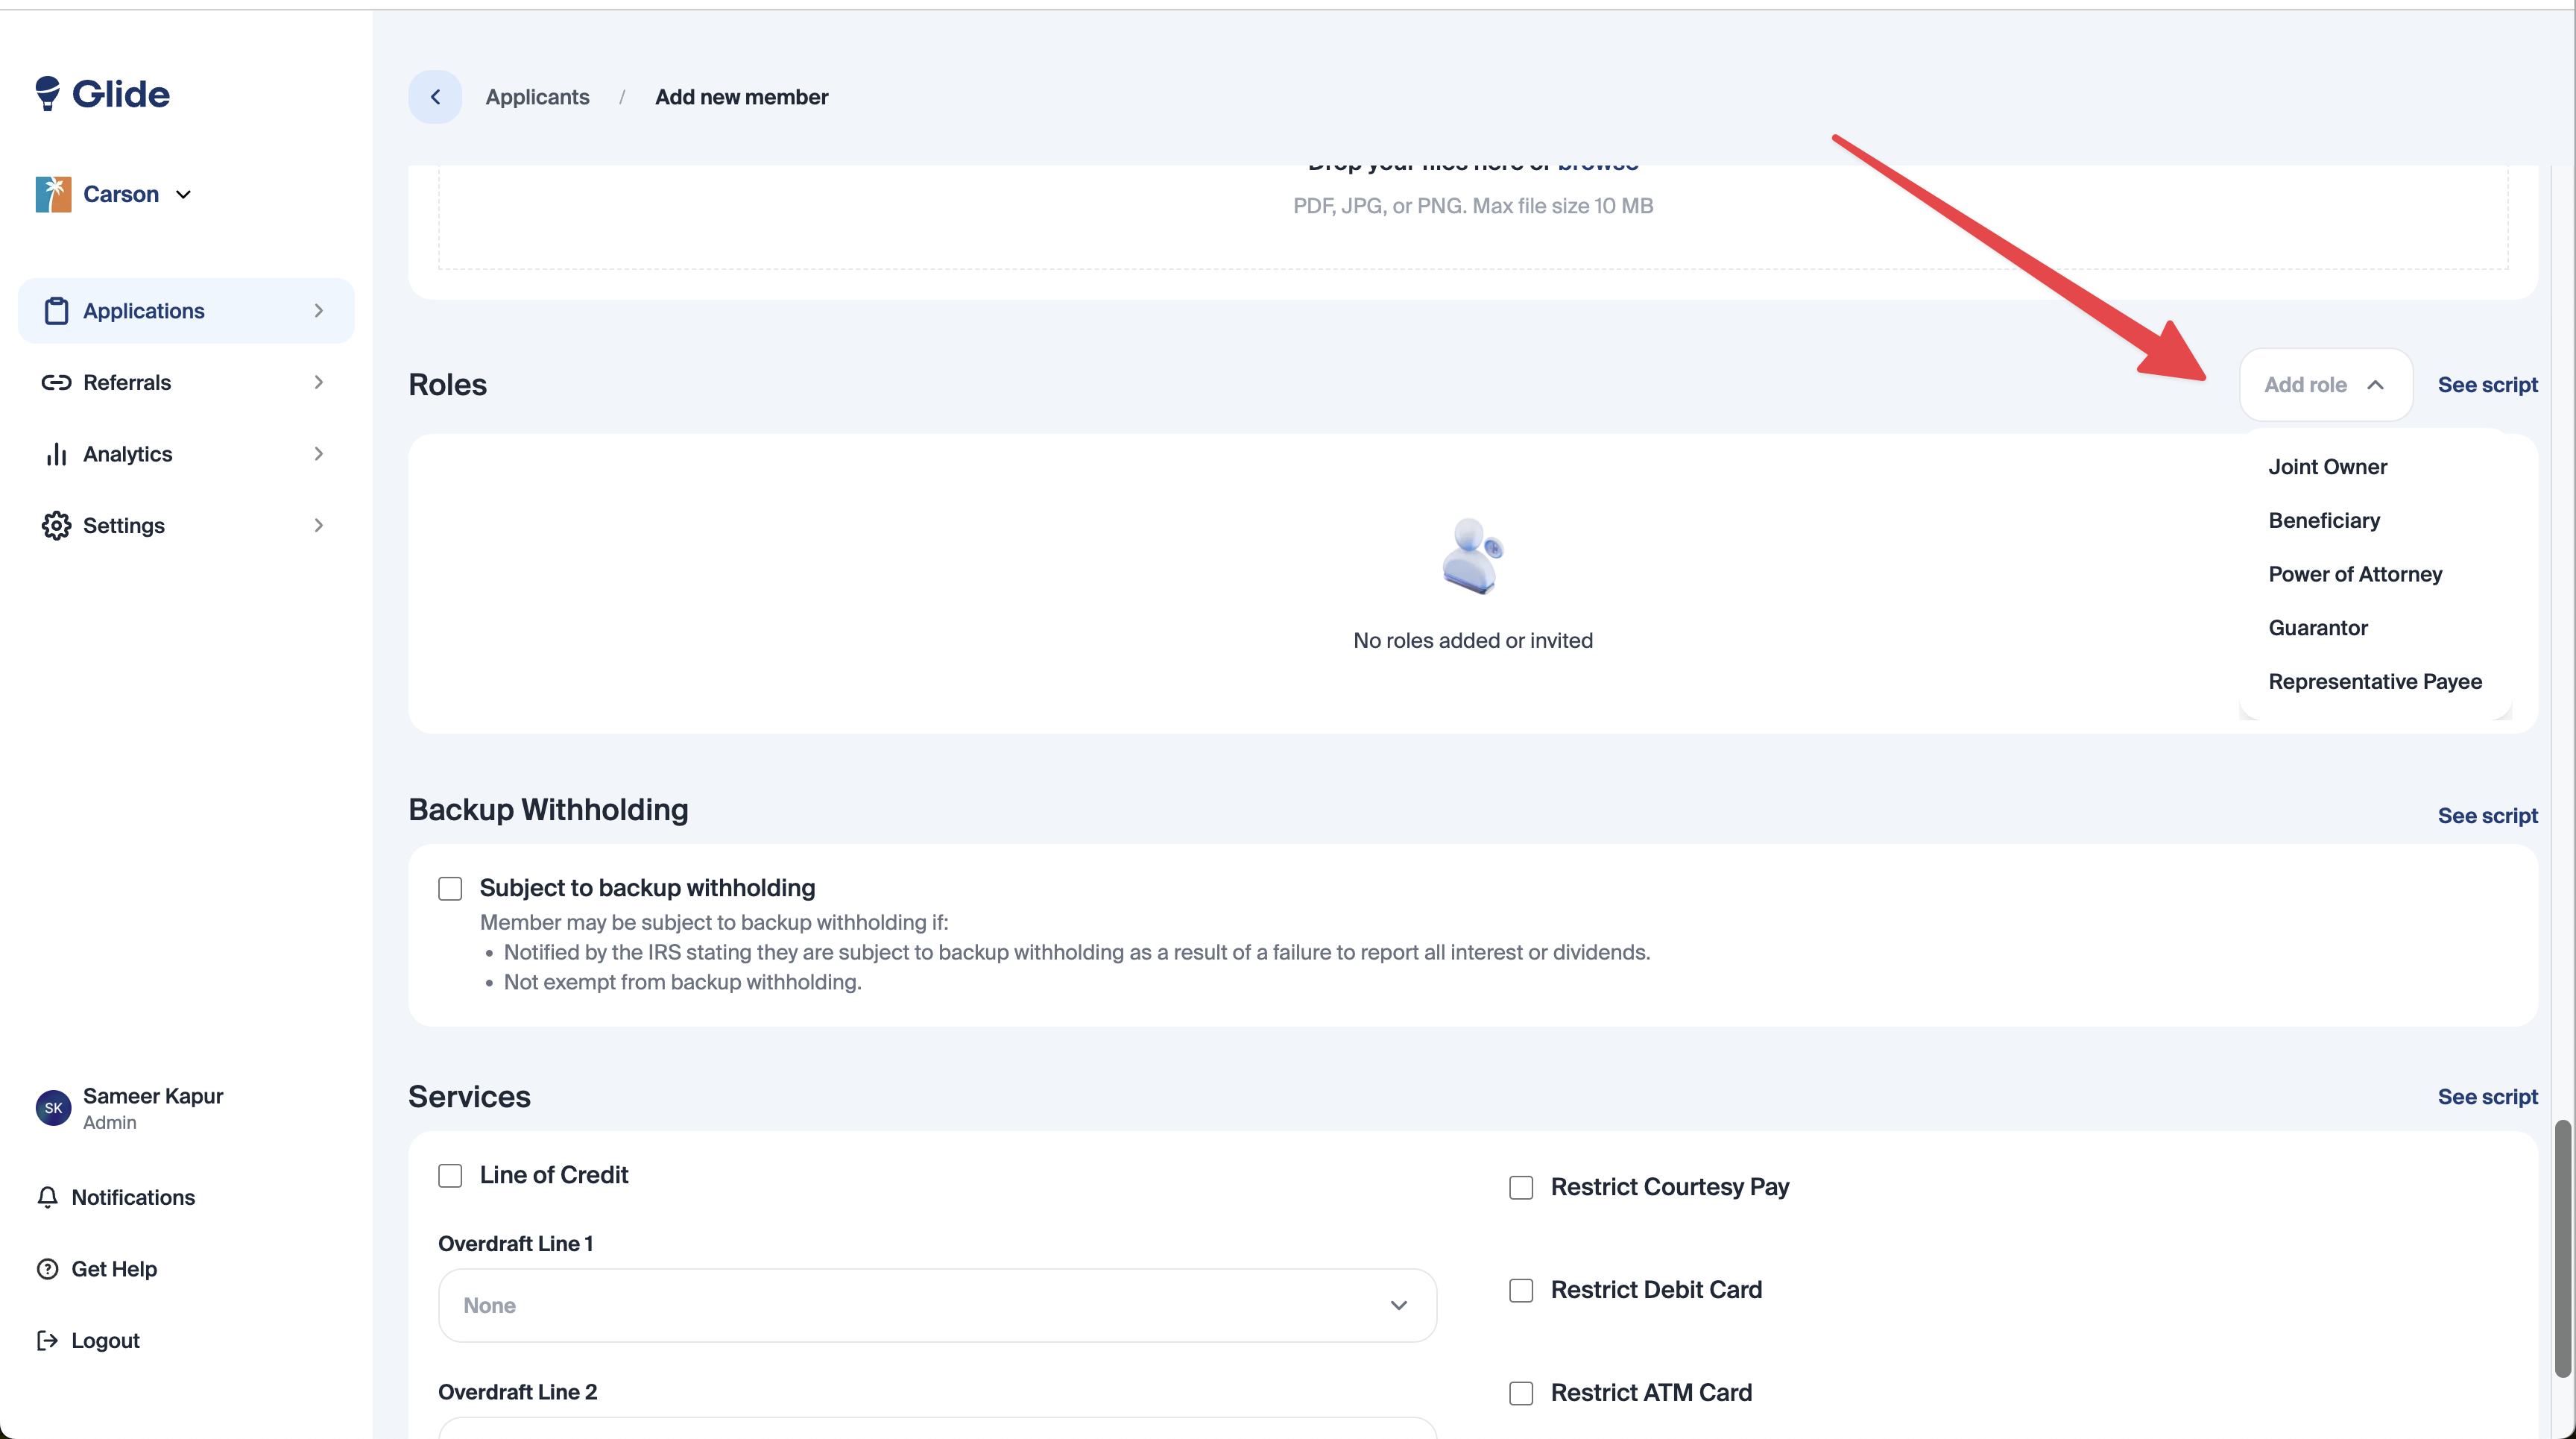
If additional roles (joints, beneficiaries, etc) would like to be added to the application use the “roles” table. The journey for adding these roles is similar to adding the primary applicant.
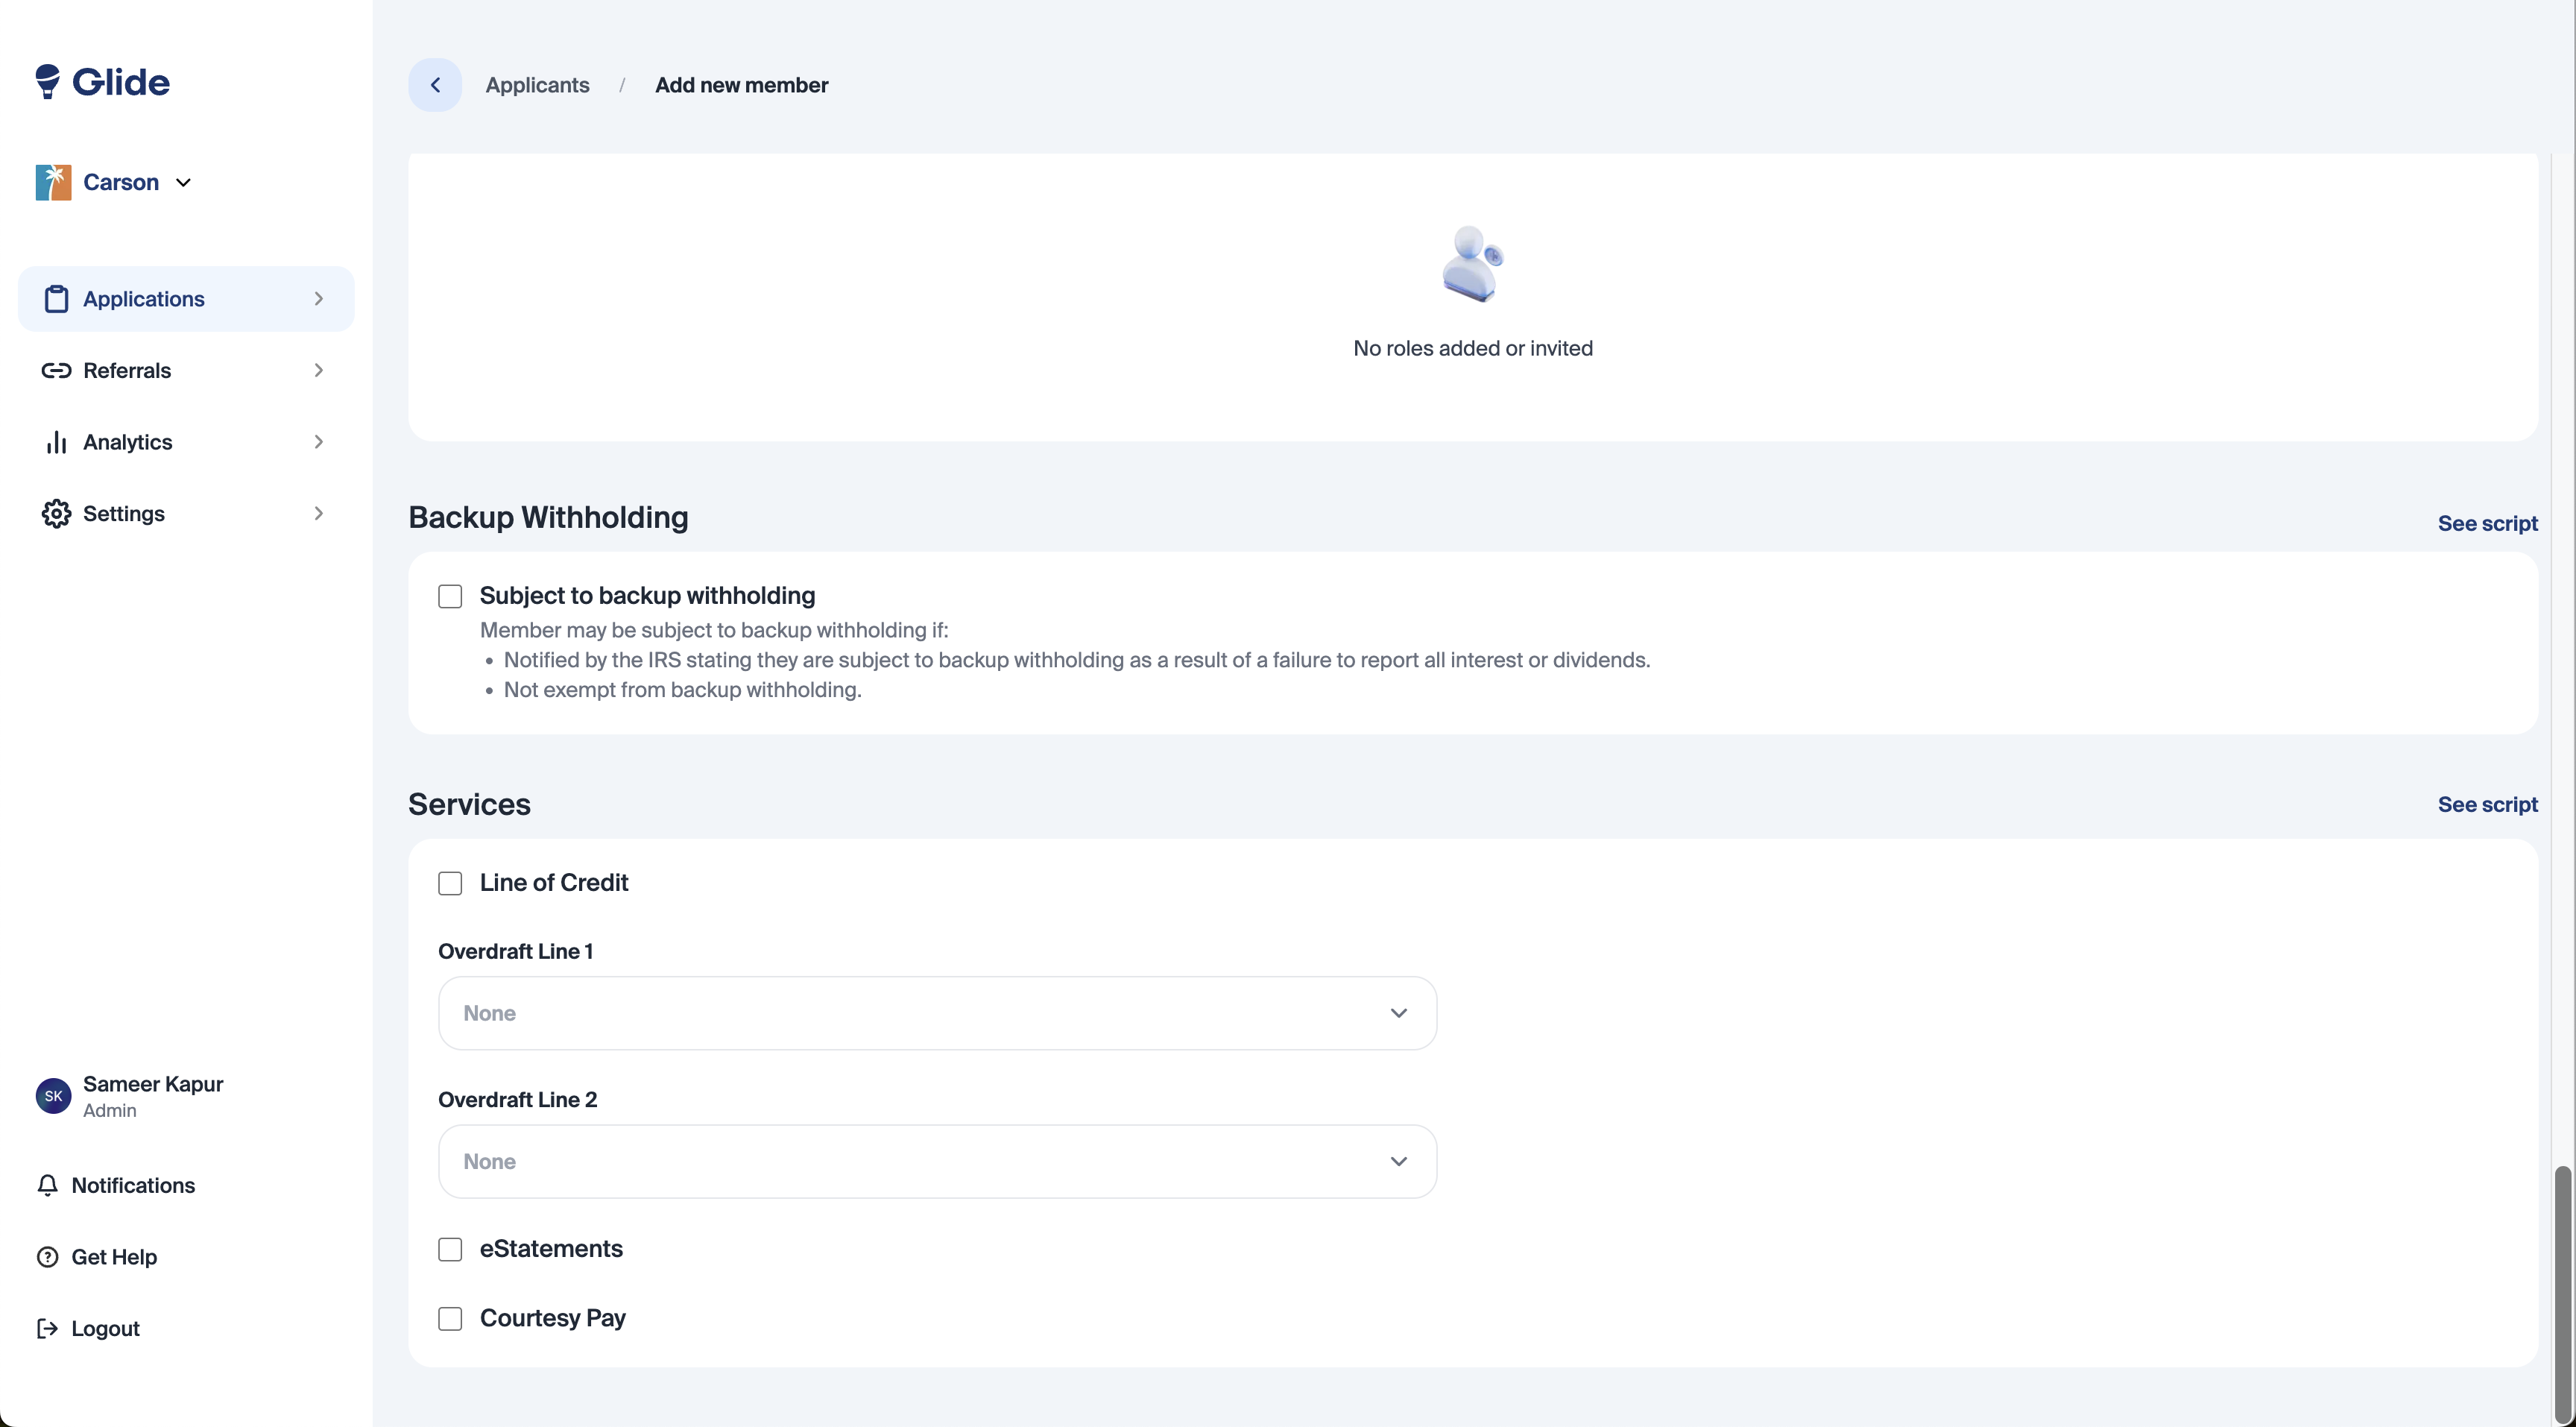
Select Backup Withholding if applicable.
Select any applicable services such as Line of Credit, Overdraft Line 1 and 2, eStatements, Courtesy Pay, and more.
Ensure that the “Submit” button is selected after finishing the application. Then, please wait a few seconds to be redirected to the application details page. If the submit button is not selected, the application will not be saved.
[If your credit union uses ChexSystems]
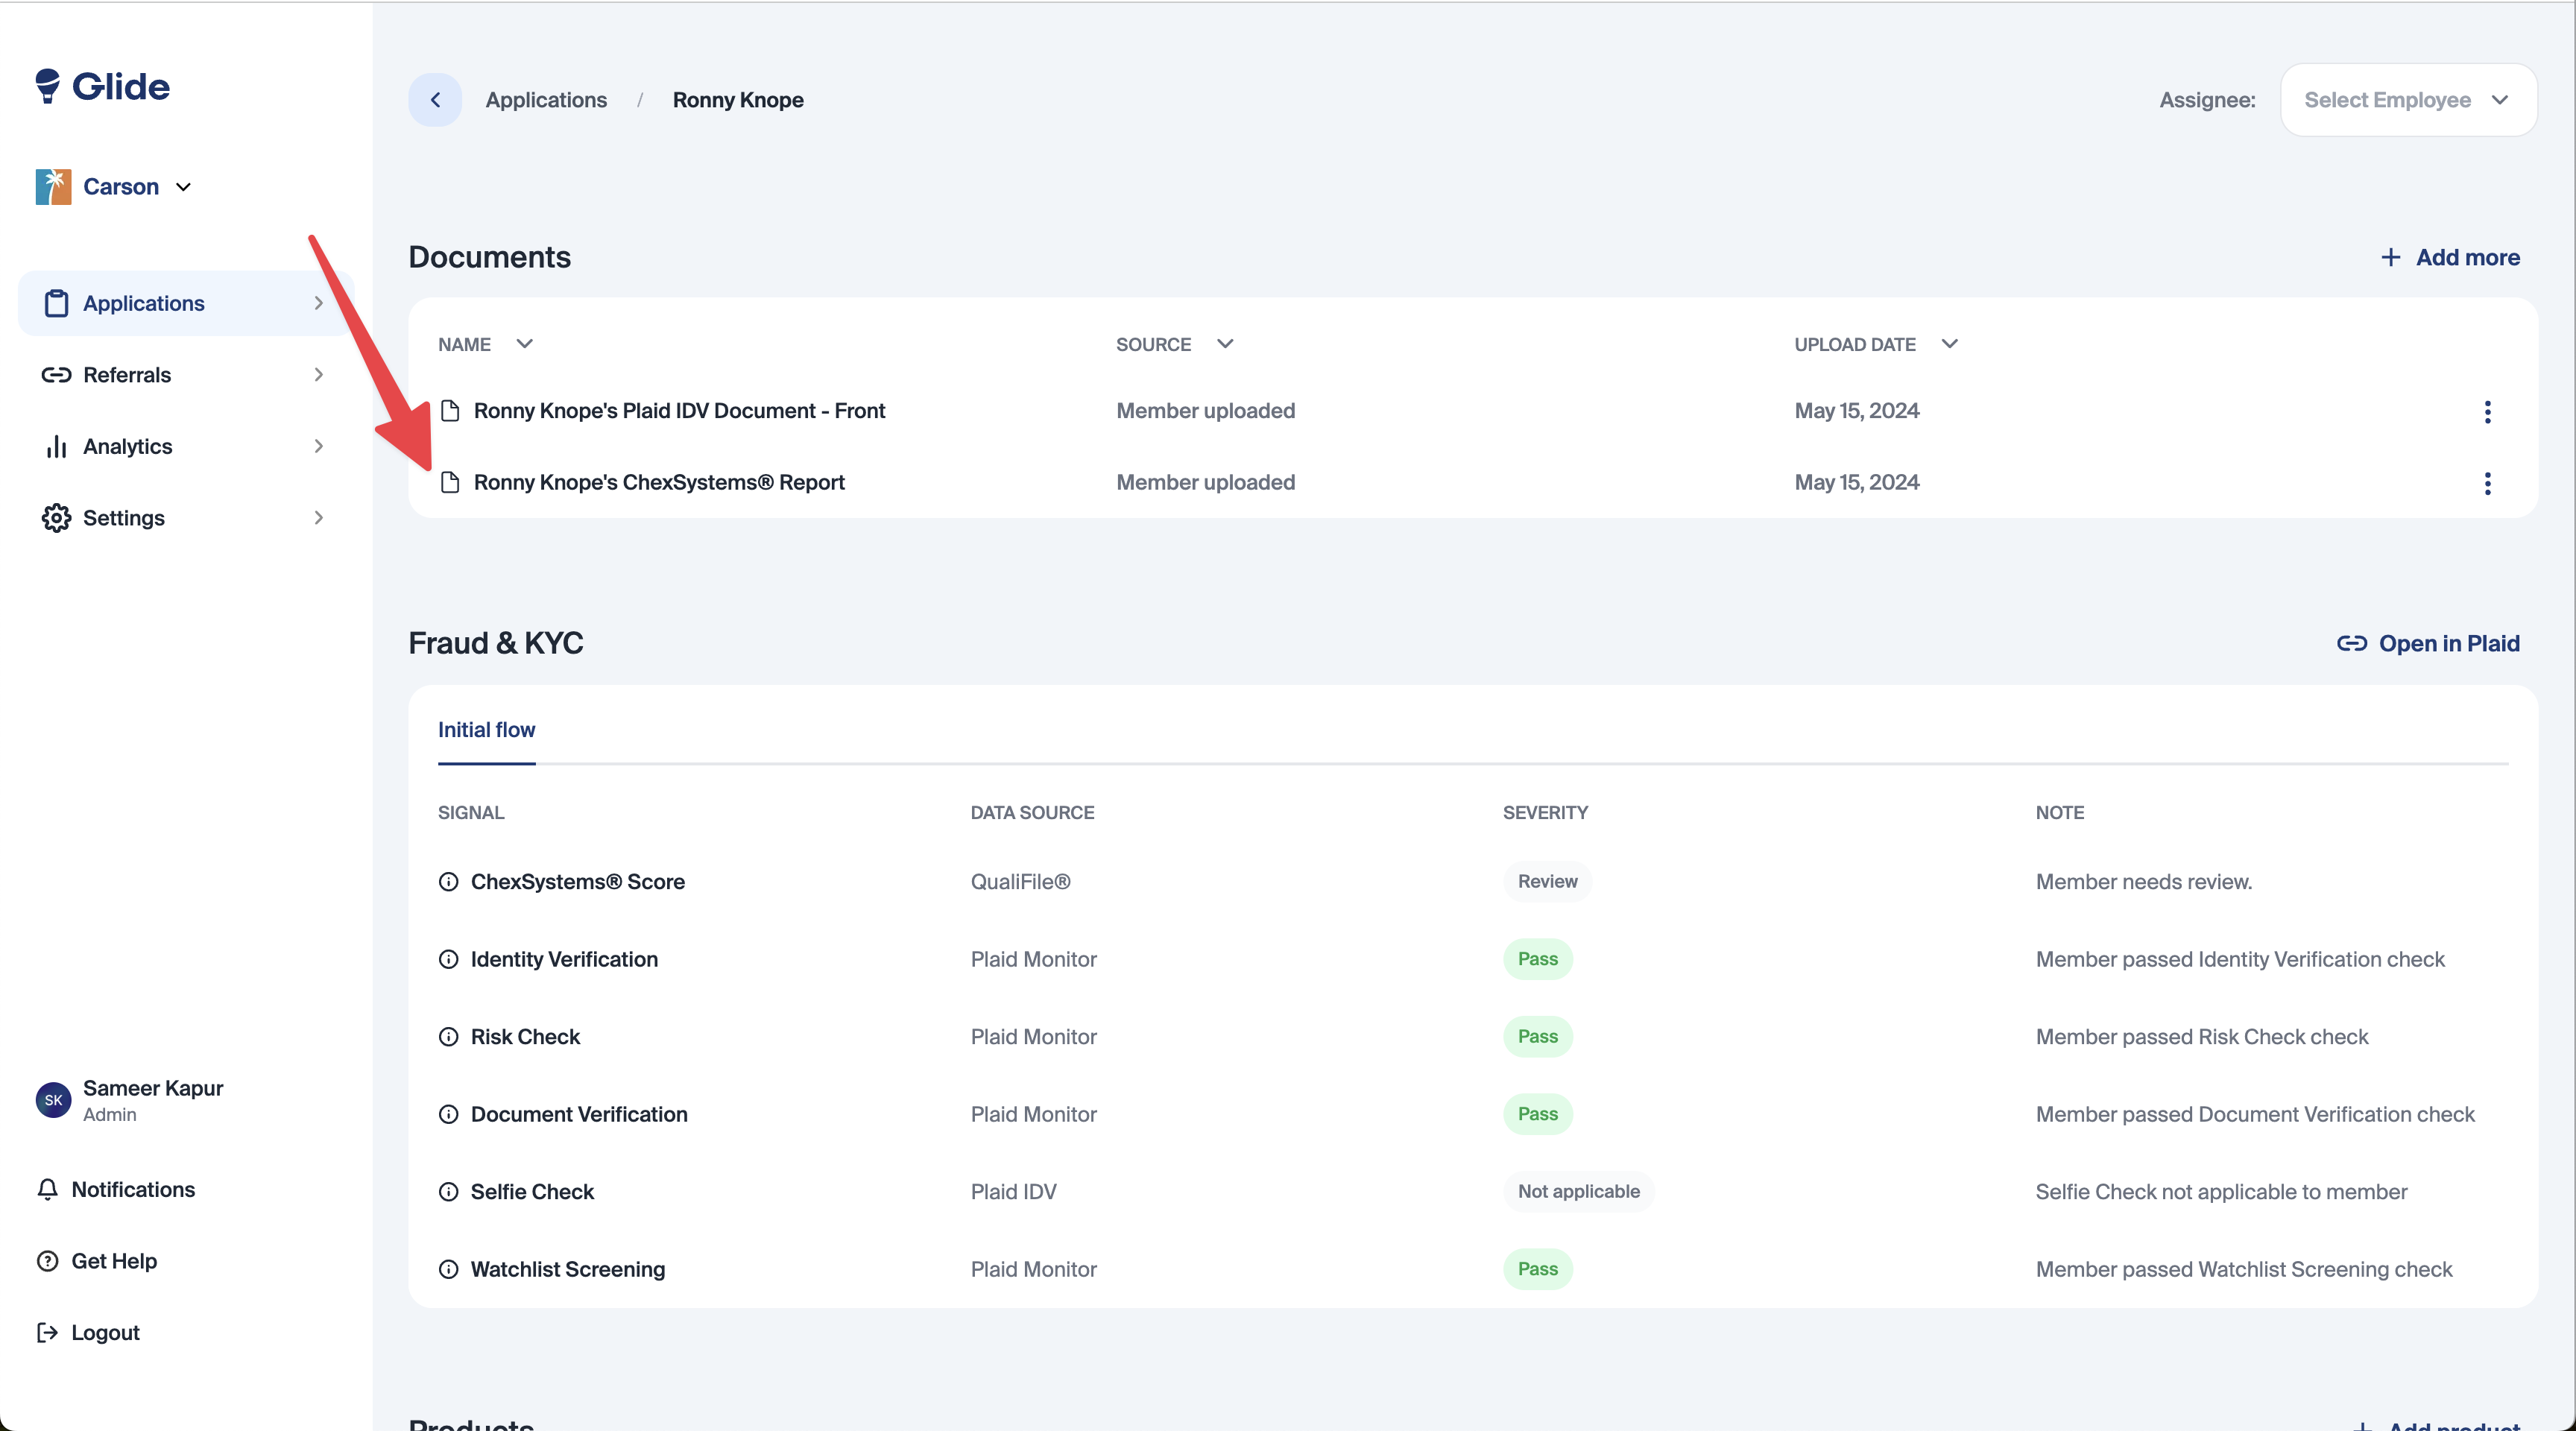
Once on the application is submitted, ChexSystems will automatically run. Click on the Document icon in the Documents table to view the ChexSystems report.
In the Fraud & KYC section, you’ll see a summary of all the fraud & KYC checks conducted. If you’d like a deeper analysis of the fraud & KYC report, use the “Open in Plaid” button.
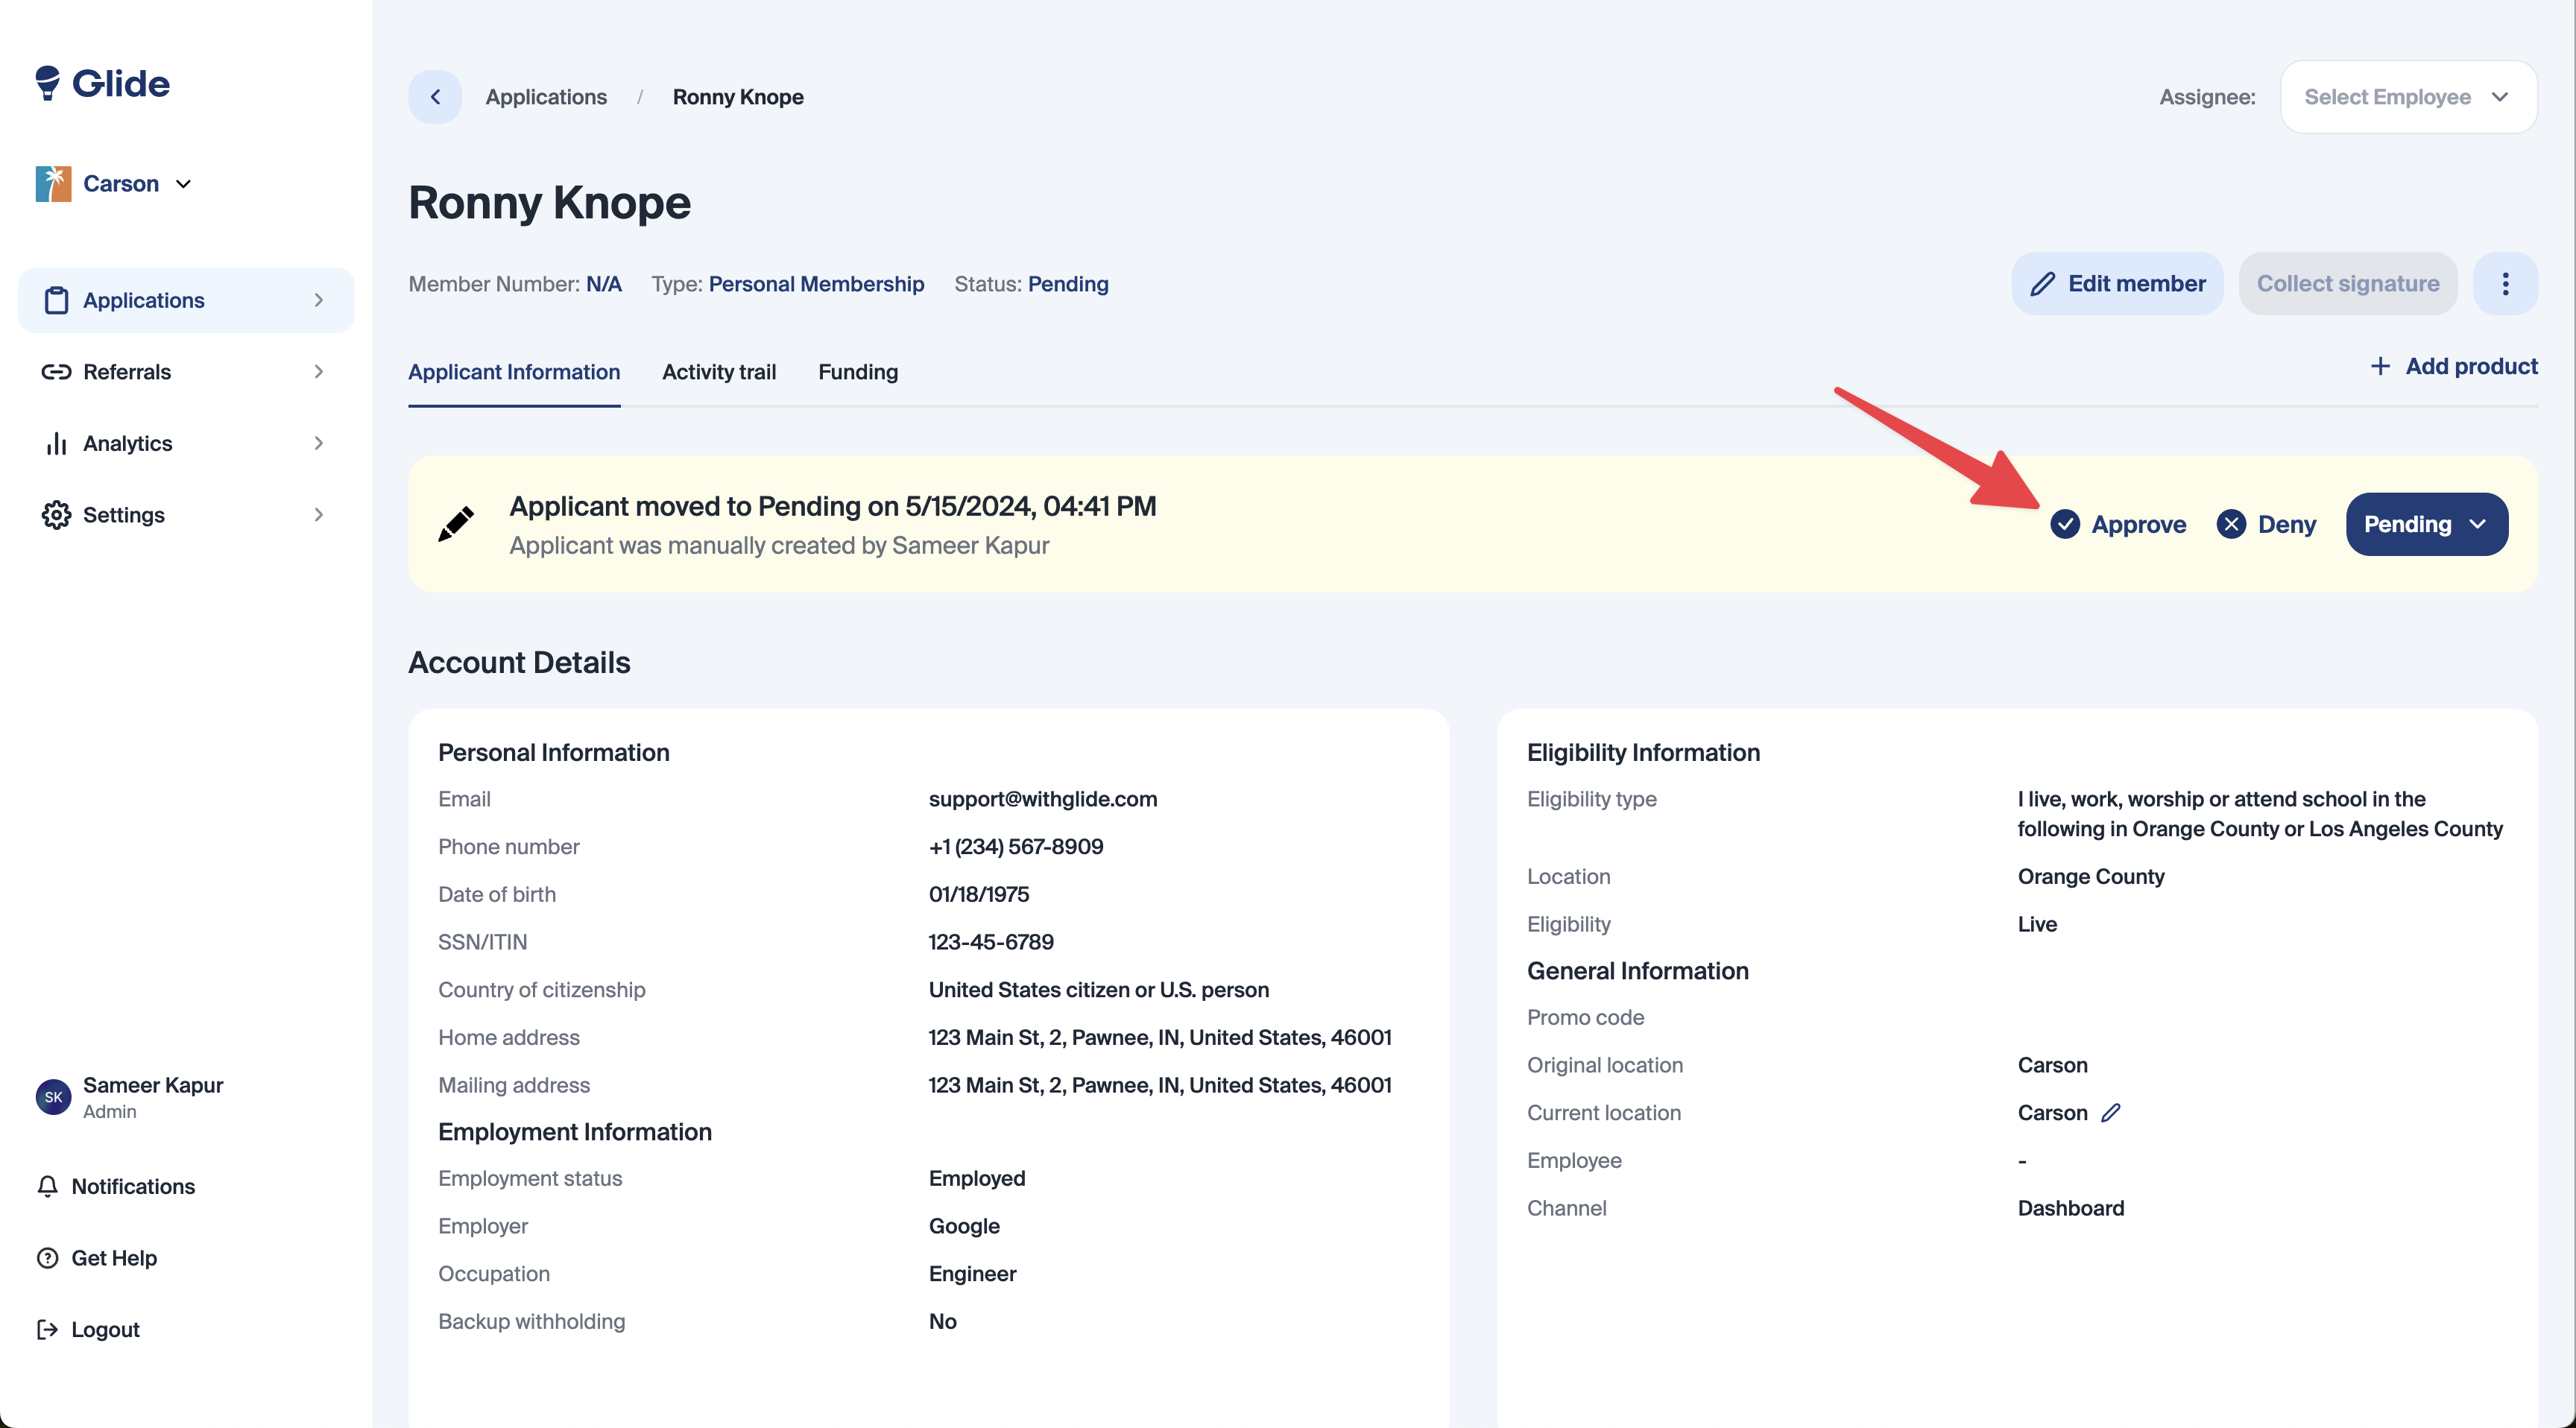
To decision on the application, use the Approve or Deny buttons. If the Deny button is selected, and ChexSystem is selected as a denial email, then the Adverse Action notice will be automatically sent out to the member.
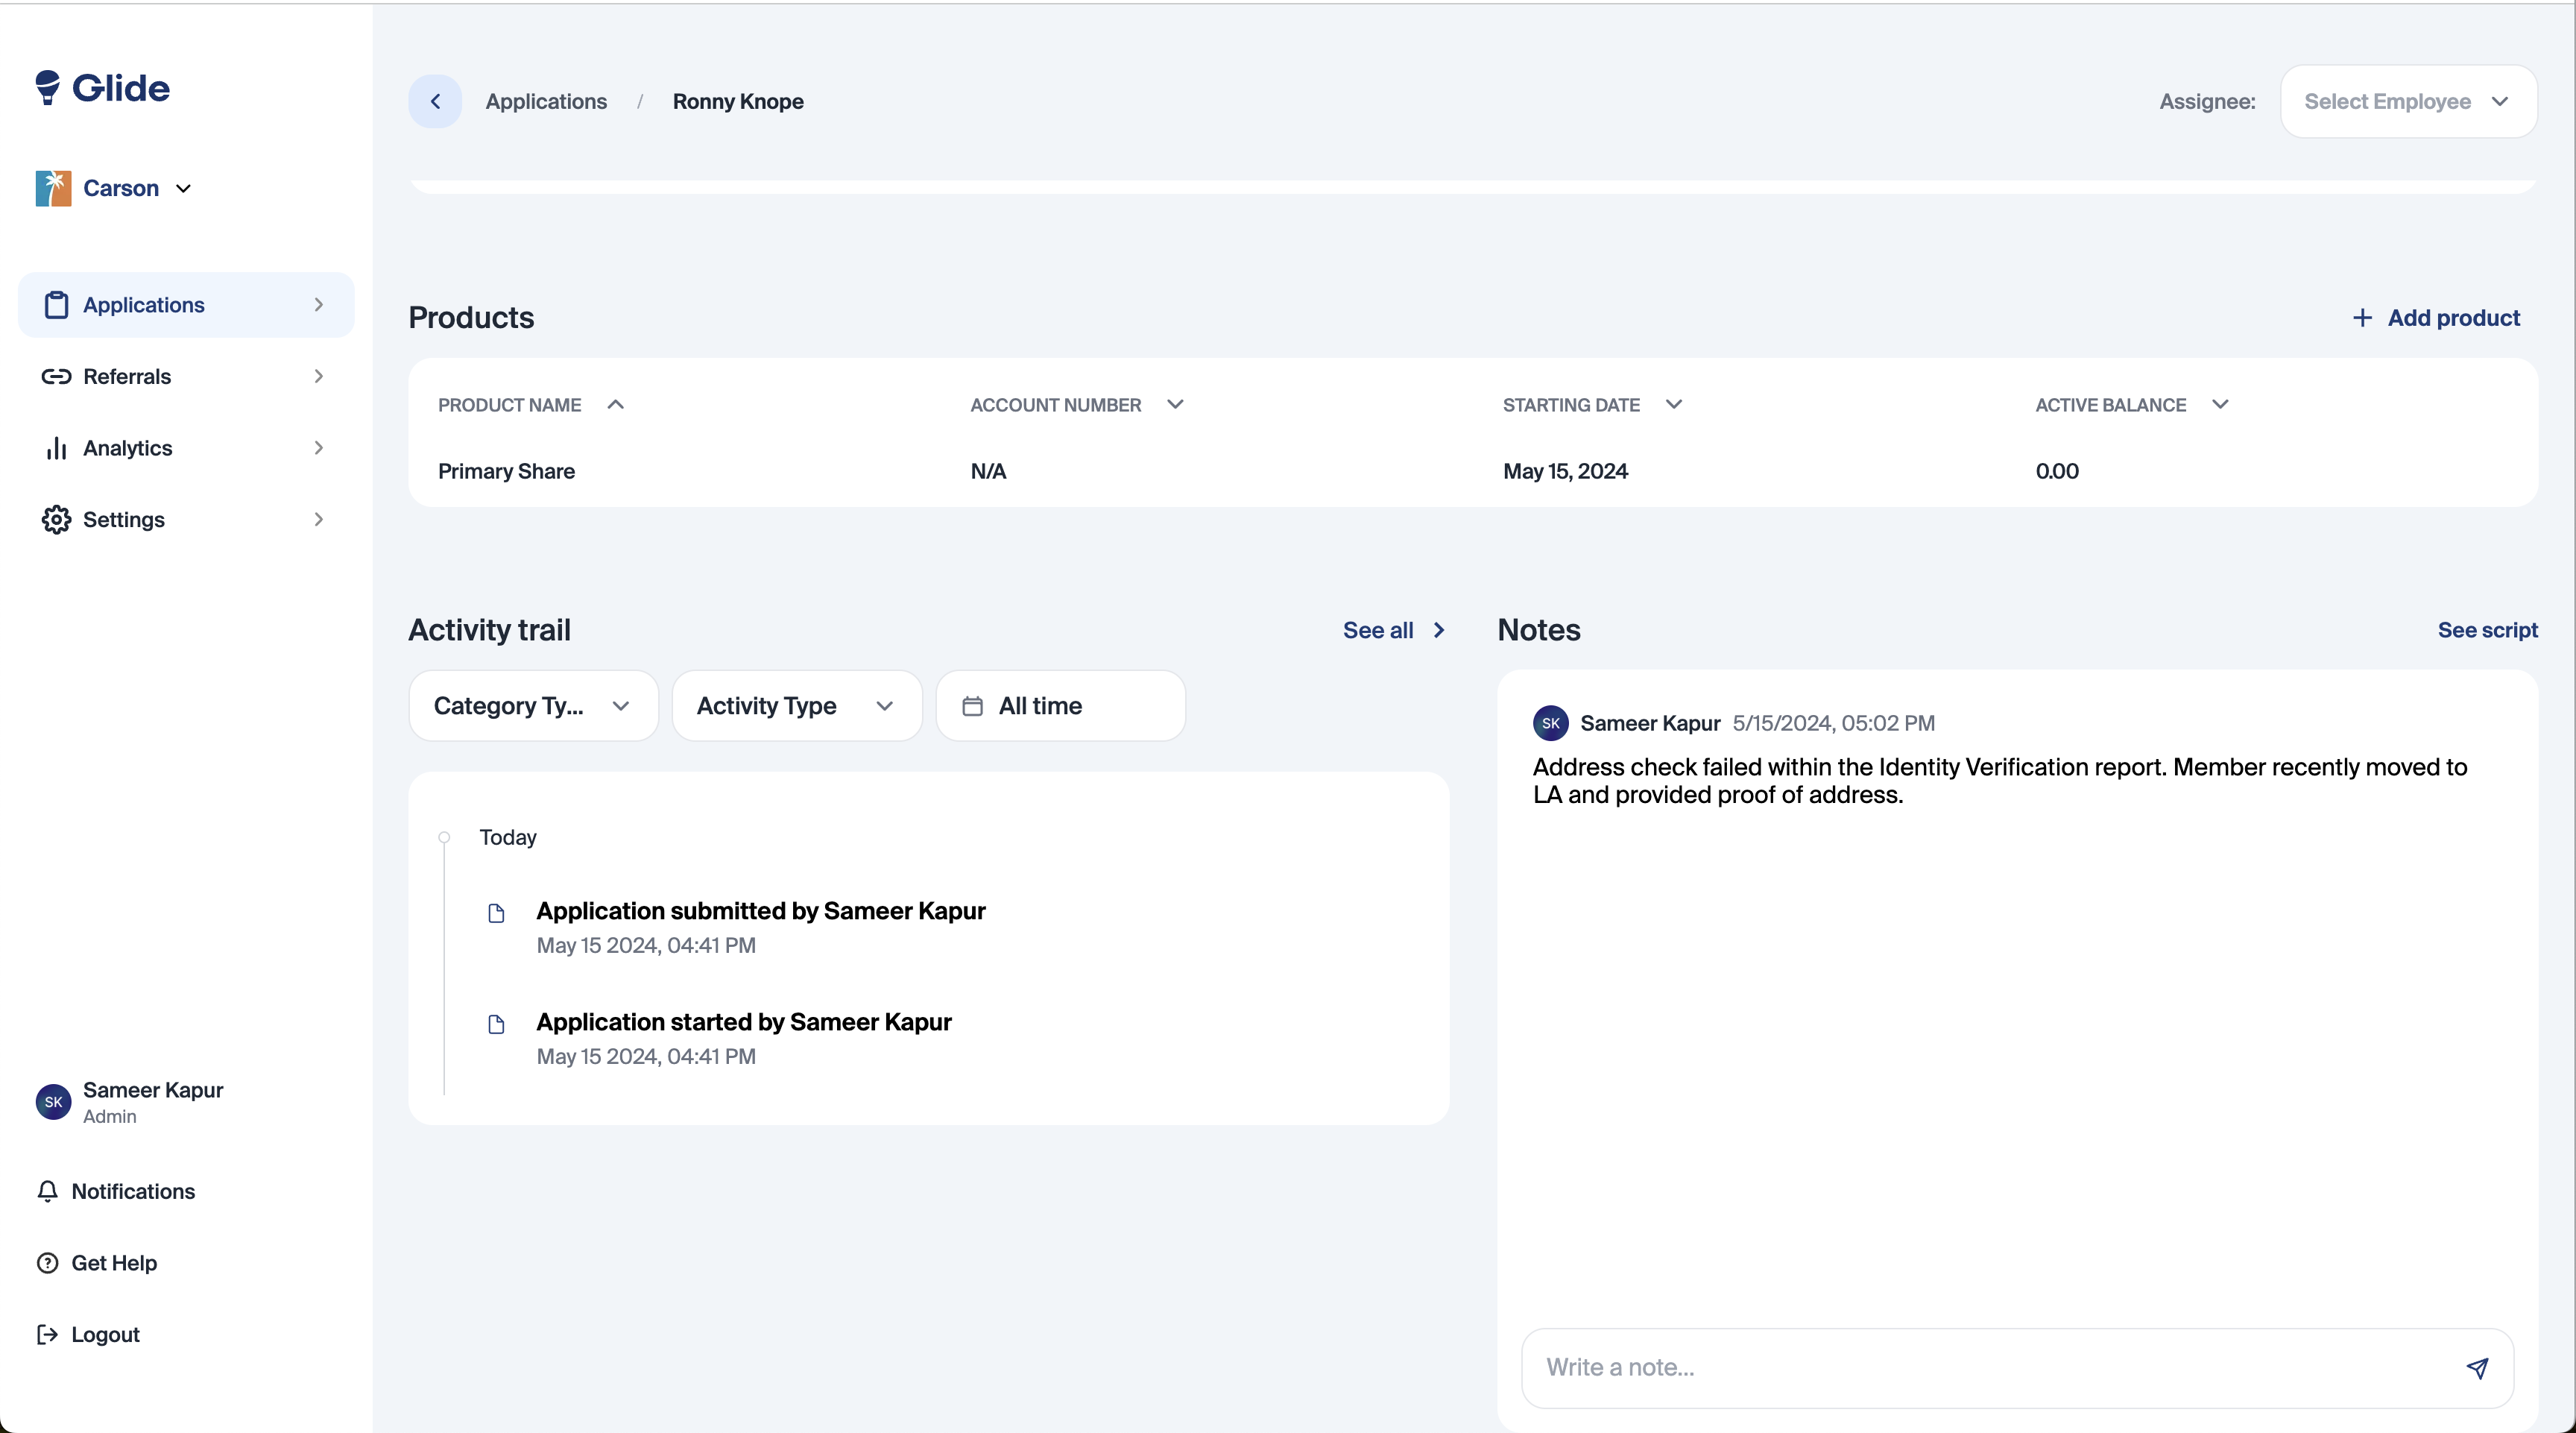
Leave any comments on the application in the “Notes” section on the bottom right.
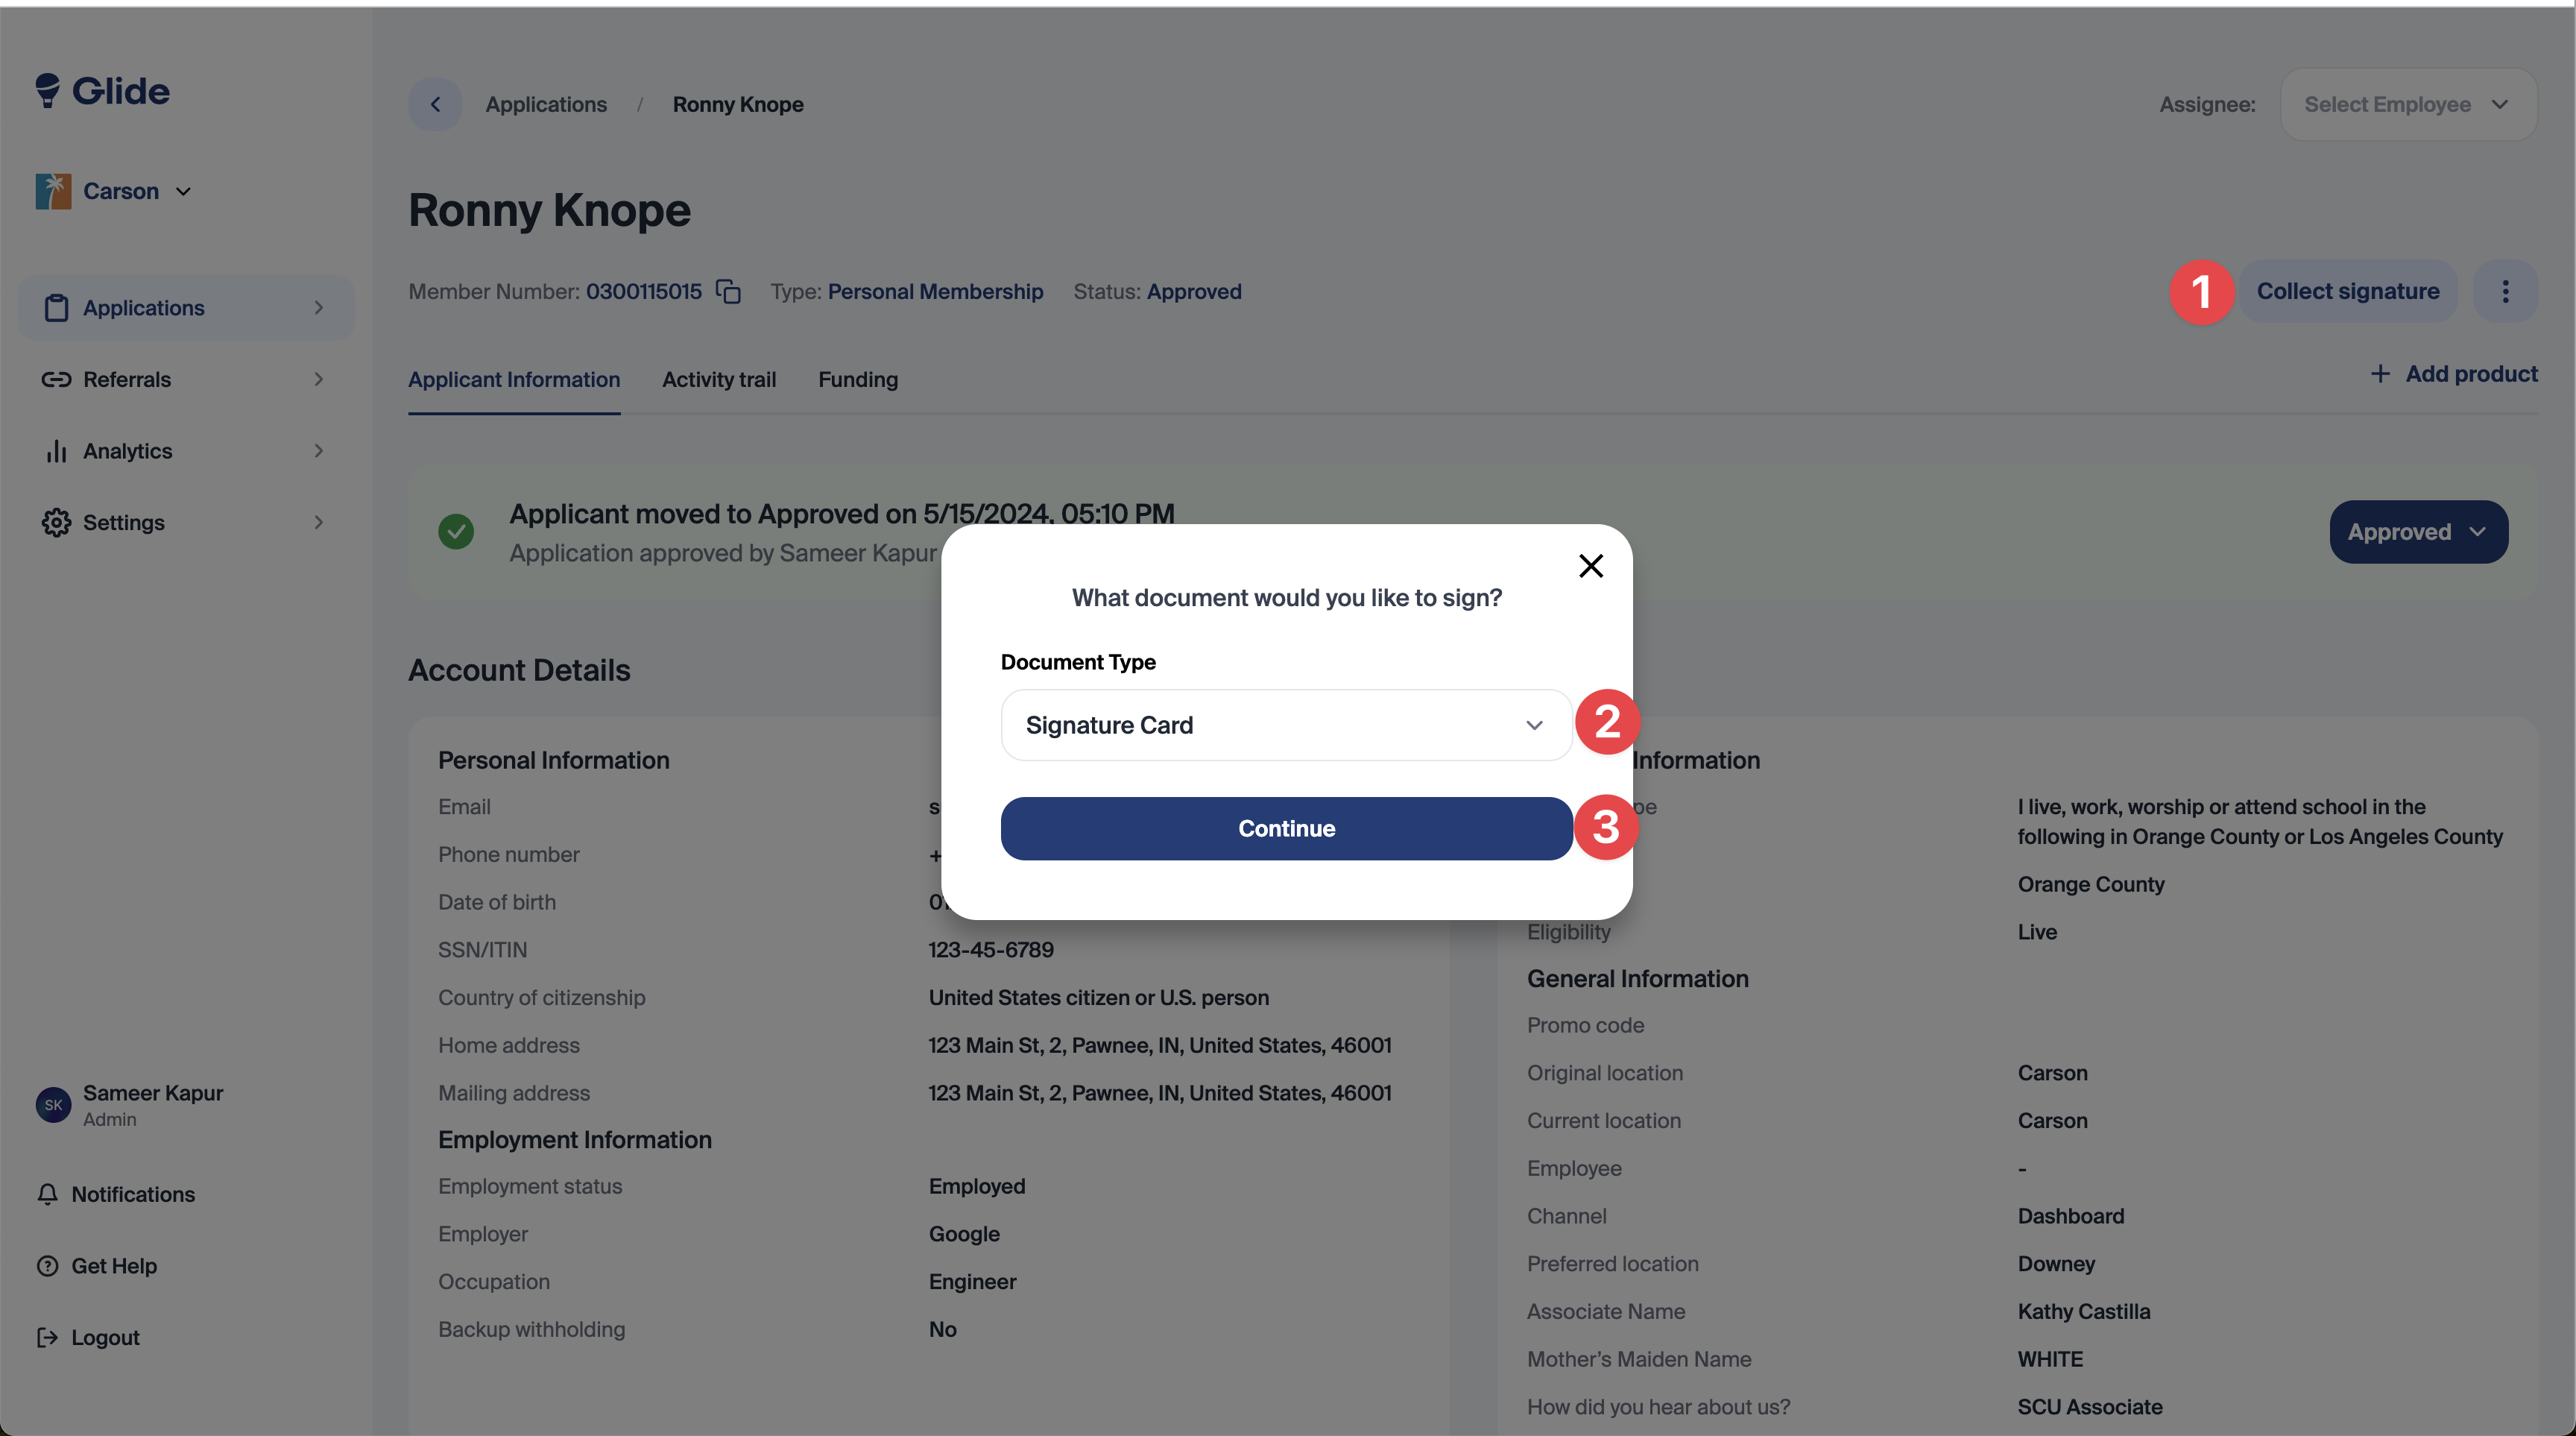
After an application has been approved, use the “Collect Signature” button to capture the members signature using a signature pad. Select the document type and click continue. After capturing the signature, the document will automatically appear in the documents section and be sent to your document storage system.